¶ 1. Camera Settings
Adjusting the cameras' parameters before starting a scan is crucial to getting a good 3D model.
Depth Camera Exposure
Note: When the scanning starts, the depth camera preview window will be automatically hidden. You can manually click the  button in the upper-right corner of the preview window to make it displayed.
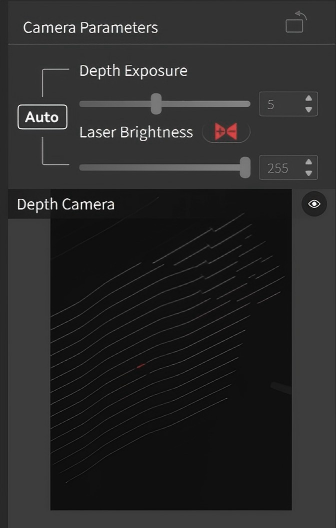
- Adjusting Exposure
The depth cameras' exposure can either be set to auto-exposure or manually adjusted. It is recommended that you use the default value. If you need to adjust it manually, please ensure the laser lines are clearly seen in the Depth Camera window.
- Laser Brightness
It's recommended that you use the default value to avoid affecting the scanning results.
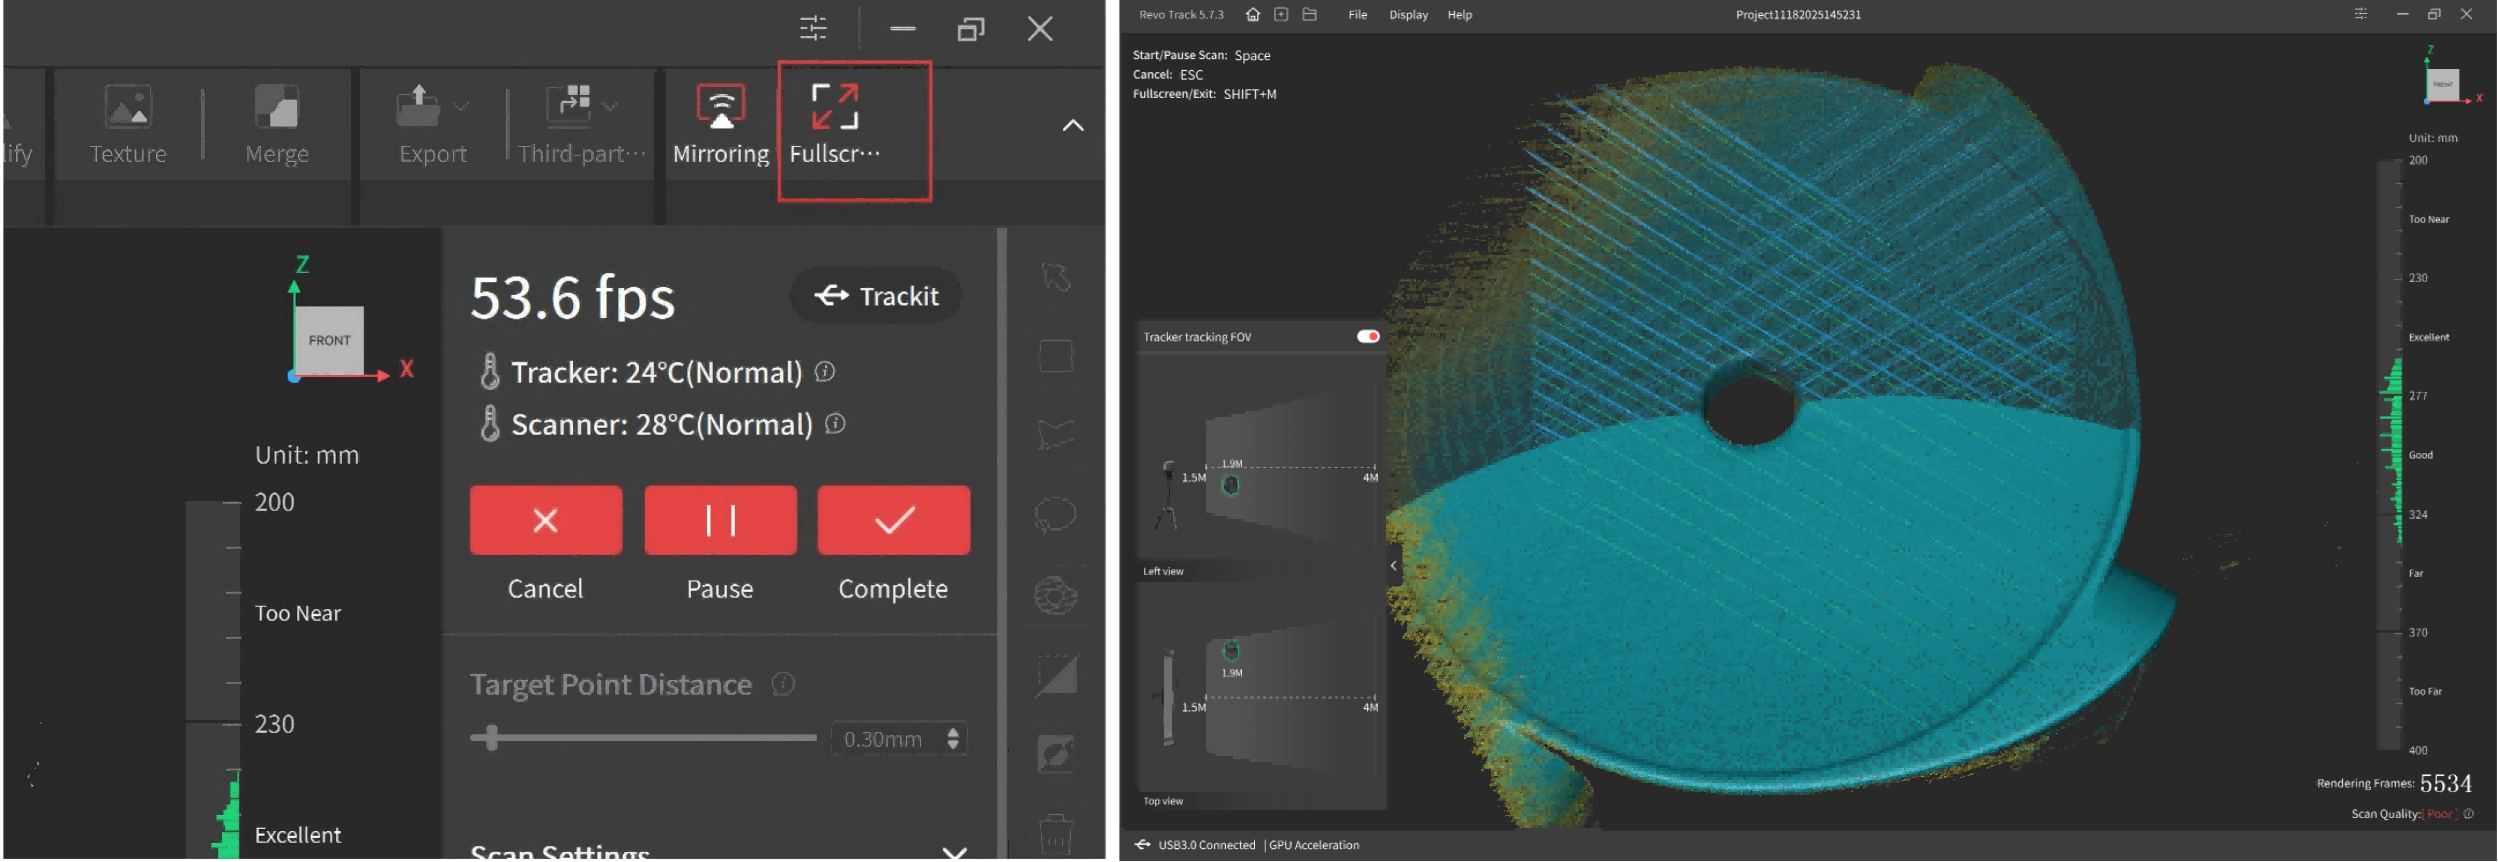
Tracker's FOV
.png)
When using Track Scan or Multi-position Scan mode, it displays the Tracker's tracking FOV from left and top views. To avoid losing track, keep the Scanner within Tracker's FOV during scanning.
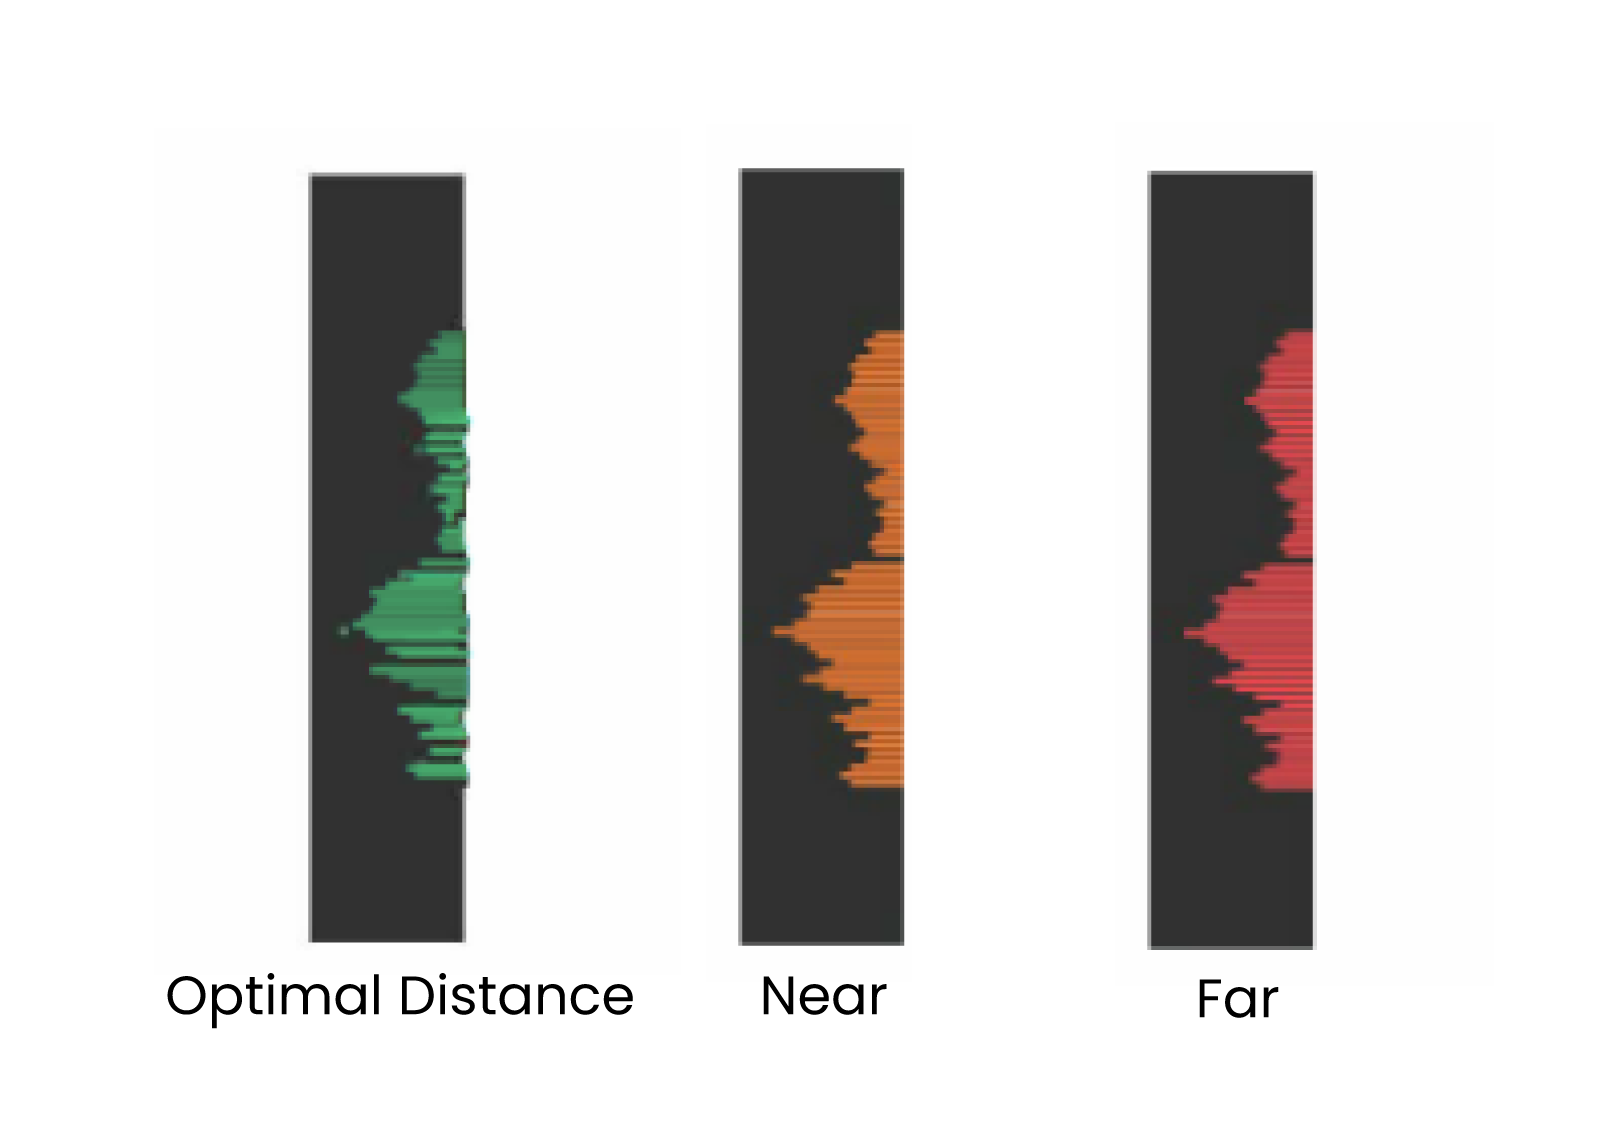
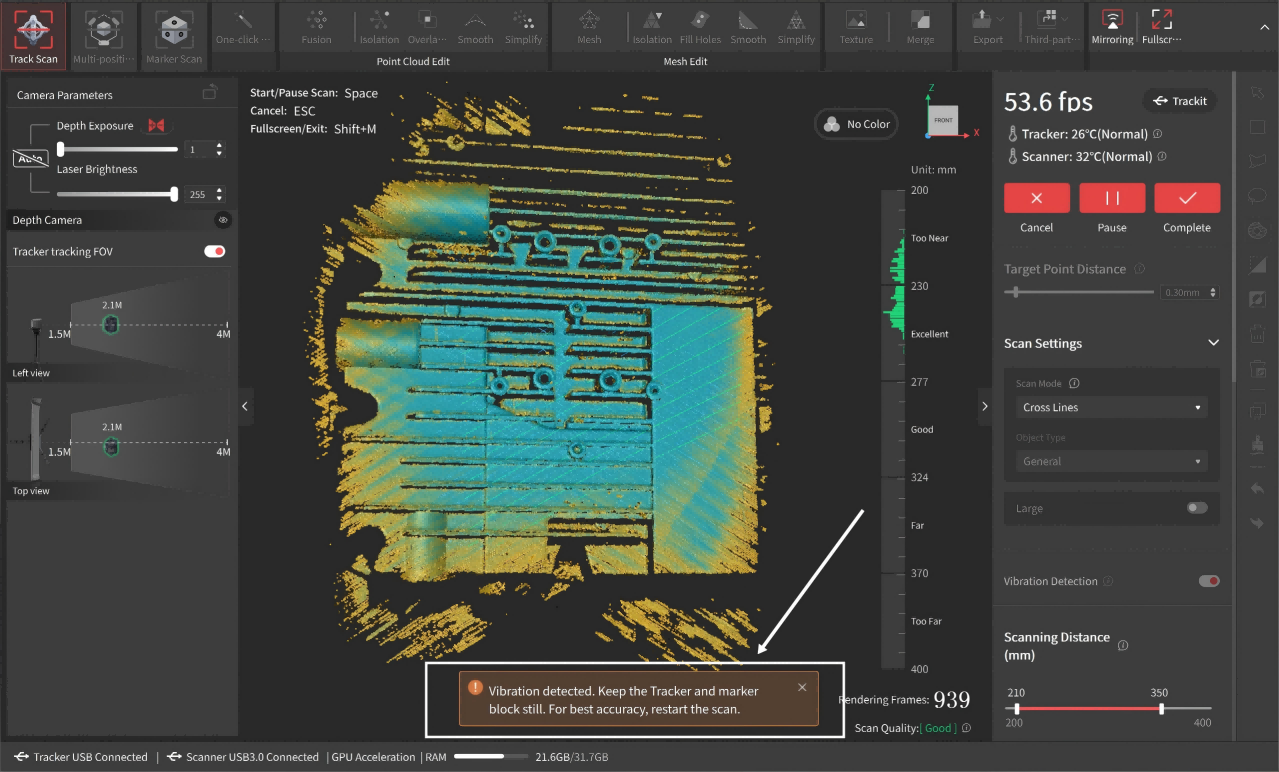
¶ 2. Scanning Distance Indicator Bar
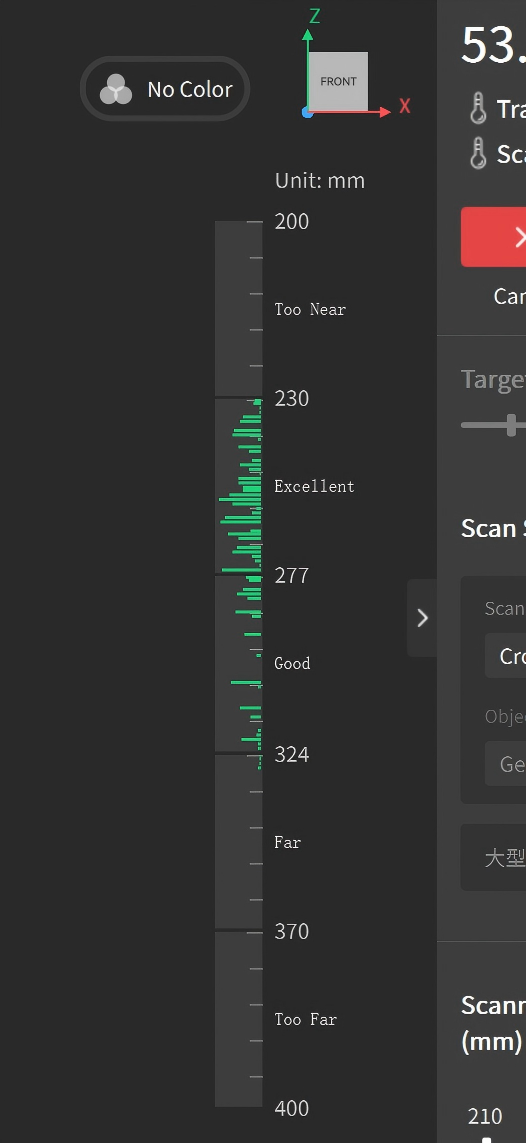
The distance indicator bar shows the distance between the object and the scanner. It is suggested to adjust the scanning distance until the bar remains green (optimal) when scanning.
¶ 3. Scanner Info
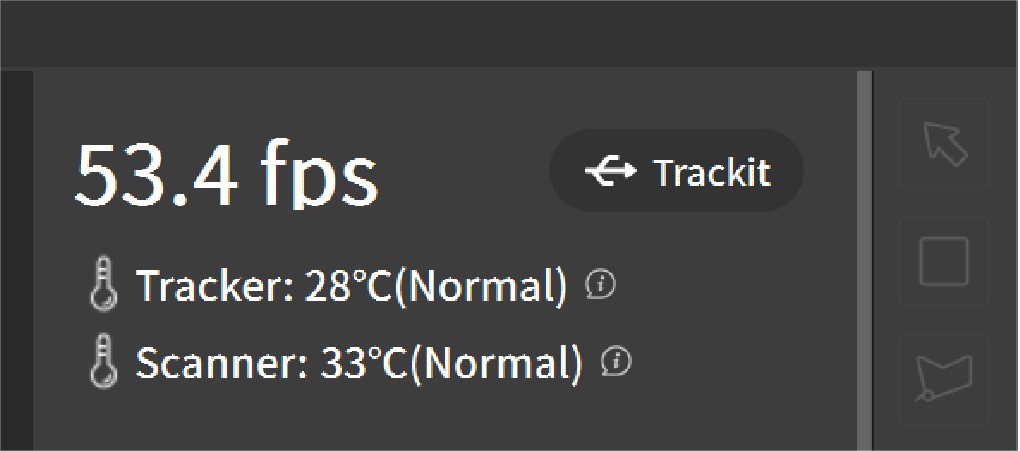
It shows the device name, the real-time frame rate and the device temperature.
If the software indicates that the temperature is too high or too low (±3°C above or below the last calibration temperature), keep the device running for about 30 minutes and then do a full recalibration before scanning to ensure optimal accuracy.
¶ 4. Scanning Controls
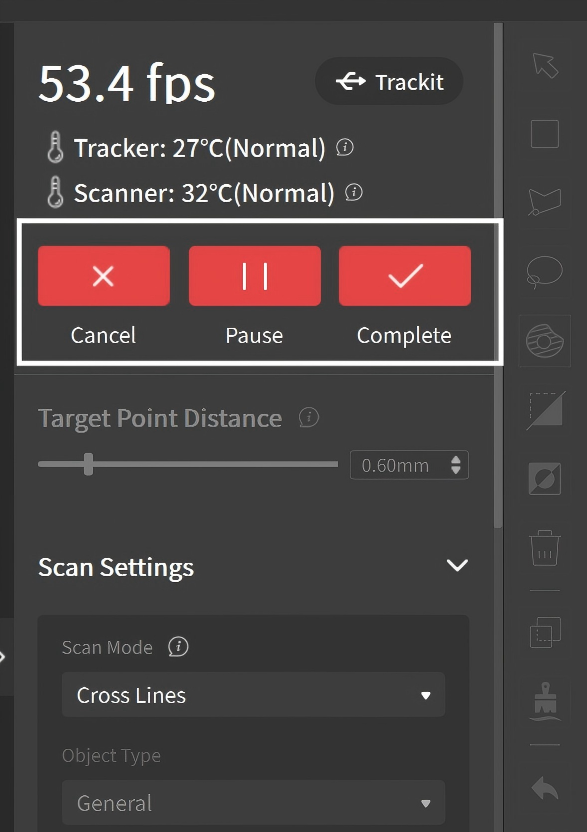
 : Click it to delete all captured data.
 /
/
 :
Click it to start or pause the scan.
:
Click it to start or pause the scan.
 : Click it when the scan is finished to move on to the editing process.
¶ 5. Target Point Distance
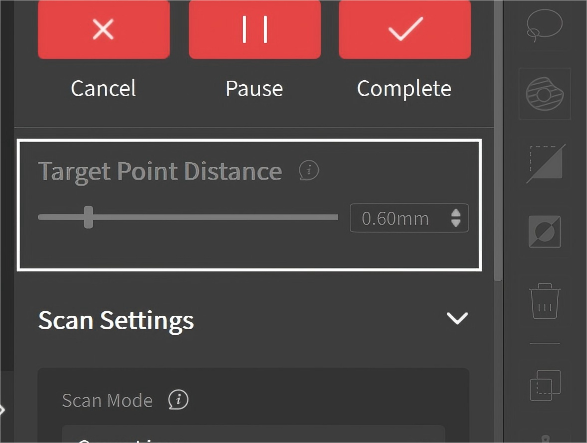
The Target Point Distance is the space between adjacent point clouds during scanning. You can set this value before the scan. Smaller values yield more details but increase scan time.
¶ 6. Scan Modes

Please select appropriate scan mode before scanning.
¶ 7. Tracking Modes
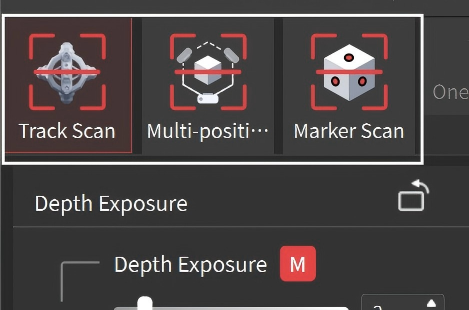
Before scanning, first select one of the three modes according to the object and your requirements.
- Track Scan: Scan without markers by tracking the Scanner’s position and angle in real time. The Tracker and object must stay still during the scan, making it suitable for quickly scanning small and medium-sized objects.
- Multi-position Scan: Ideal for scanning large objects like cars and industrial parts. Before scanning, divide surfaces into distinct areas. During each area scan, capture global markers after moving the Tracker, then capture the point cloud.
- Marker Scan: The Scanner functions as a standalone 3D scanner. It requires placing markers on the object irregularly, suitable for scanning small and medium-sized objects.
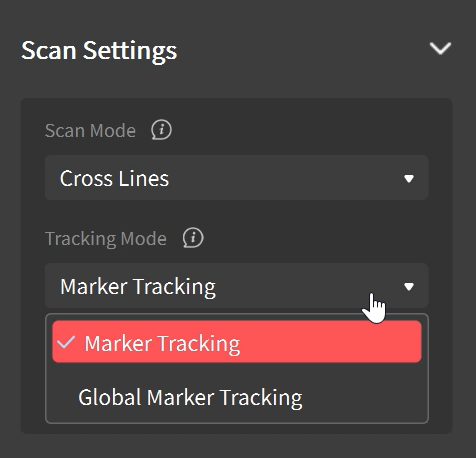
When using Marker Scan, the Tracking Mode can be set to either Marker Tracking or Global Marker Tracking.
* Global Marker Tracking offers more precise scanning and seamless frame stitching. There are two steps: firstly scan the markers to create global markers coordinates, and then scan the object based on these coordinates.
¶ 8. Object Type

- General: Suitable for the standard object type. Pick this type if the object doesn’t match the other options below.
- Black Object: Scan objects with dark surfaces, such as black or dark gray clothes.
- Metallic Shiny Object: Scan objects with metallic surfaces that reflect light, such as aluminum, steel, copper, and other types of metal.
Note: Select Black Object when scanning shiny objects with dark surfaces.
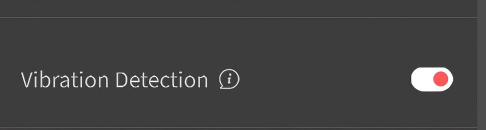
¶ 9. Vibration Detection
Vibration Detection is designed for applications that require higher scanning accuracy. It helps prevent accuracy degradation by using a fixed anchor block as a reference. A coded marker block must be placed near the object, within the Tracker’s field of view, and remain stationary throughout the scan. If the Tracker or the object moves, or if vibrations occur in the scanning environment, a vibration warning will appear in the software interface. You can then decide whether to restart the scan based on the prompt.
¶ 10. Scanning Distance
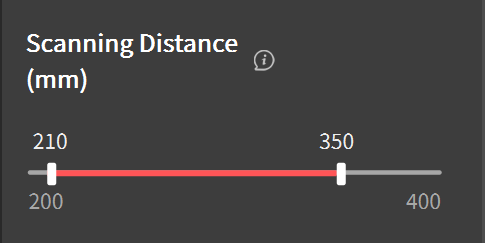
Use the slider to adjust the Depth Cameras' working distance to ignore unwanted background or foreground objects. Both a minimum and maximum distance can be set.
¶ 11. Tracking Quality
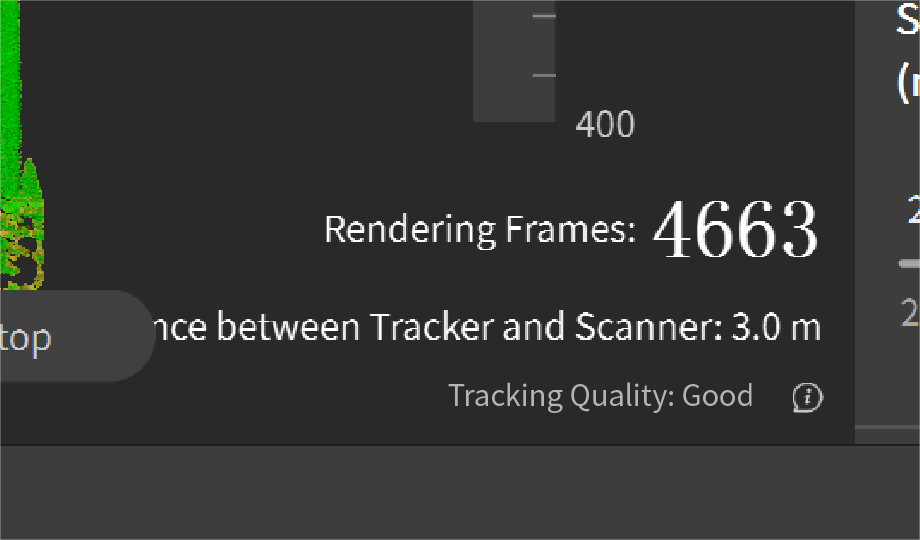
Rendering Frames: It displays the total frames captured in real time.
Distance between Tracker and Scanner: It displays the real-time distance between Tracker and Scanner. Ensure the distance is within 0-4 m.
Tracking quality: It indicates the expected scanning quality during “Track Scan” or "Multi-position Scan". To ensure accurate scan results, you can move the Scanner closer or further to adjust quality to good or excellent. If it indicates poor, calibrate your device before scanning.
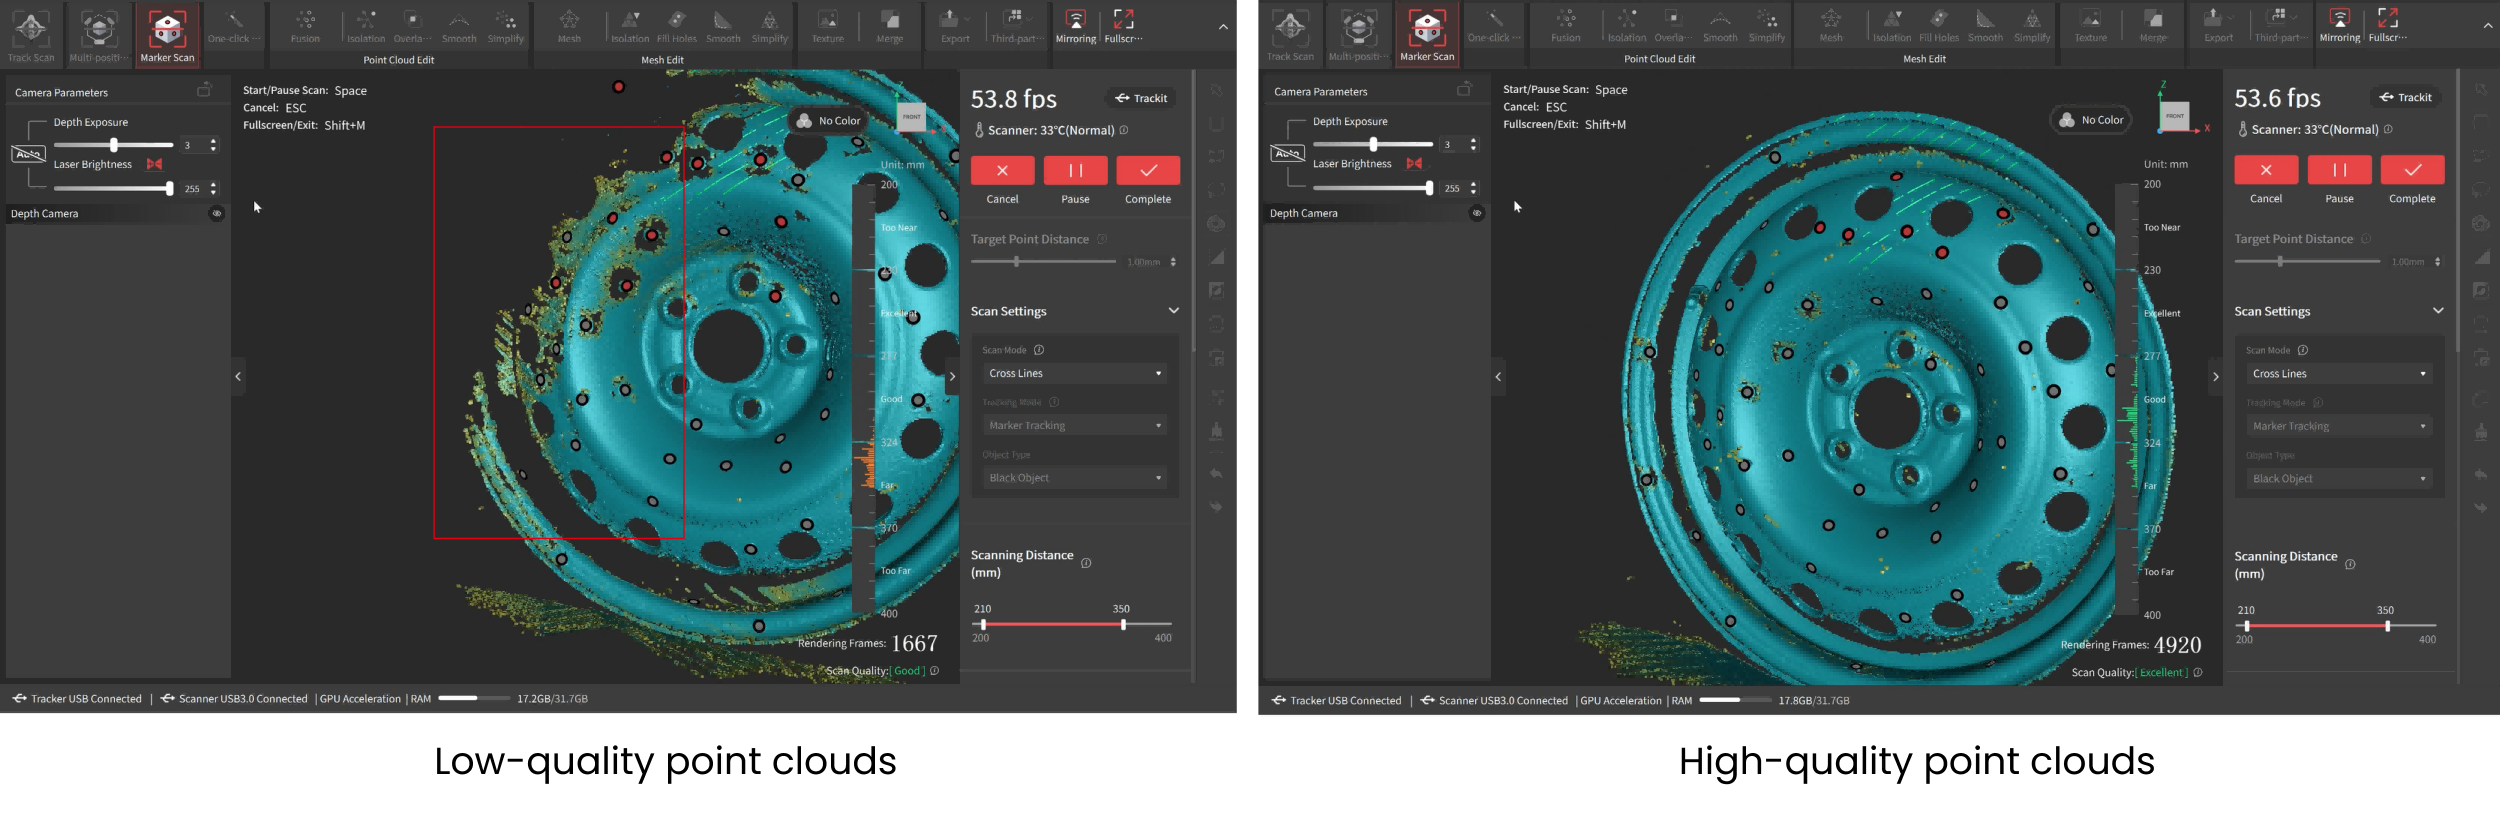
¶ 12. Scan Quality
During scanning, the point cloud changes from yellow to blue as more data is captured. Blue indicates higher quality, so it's best to scan the same areas from different angles and finish when the model is mostly blue.
¶ 13. Full Screen
Click the "Full Screen" button on the right side of the tab bar to enter a full screen.
Use a shortcut key "shift + M" to exit the full screen. Or you can access the full screen function via the M key on the Scanner.
¶ 14. Save/Import Scanning Settings
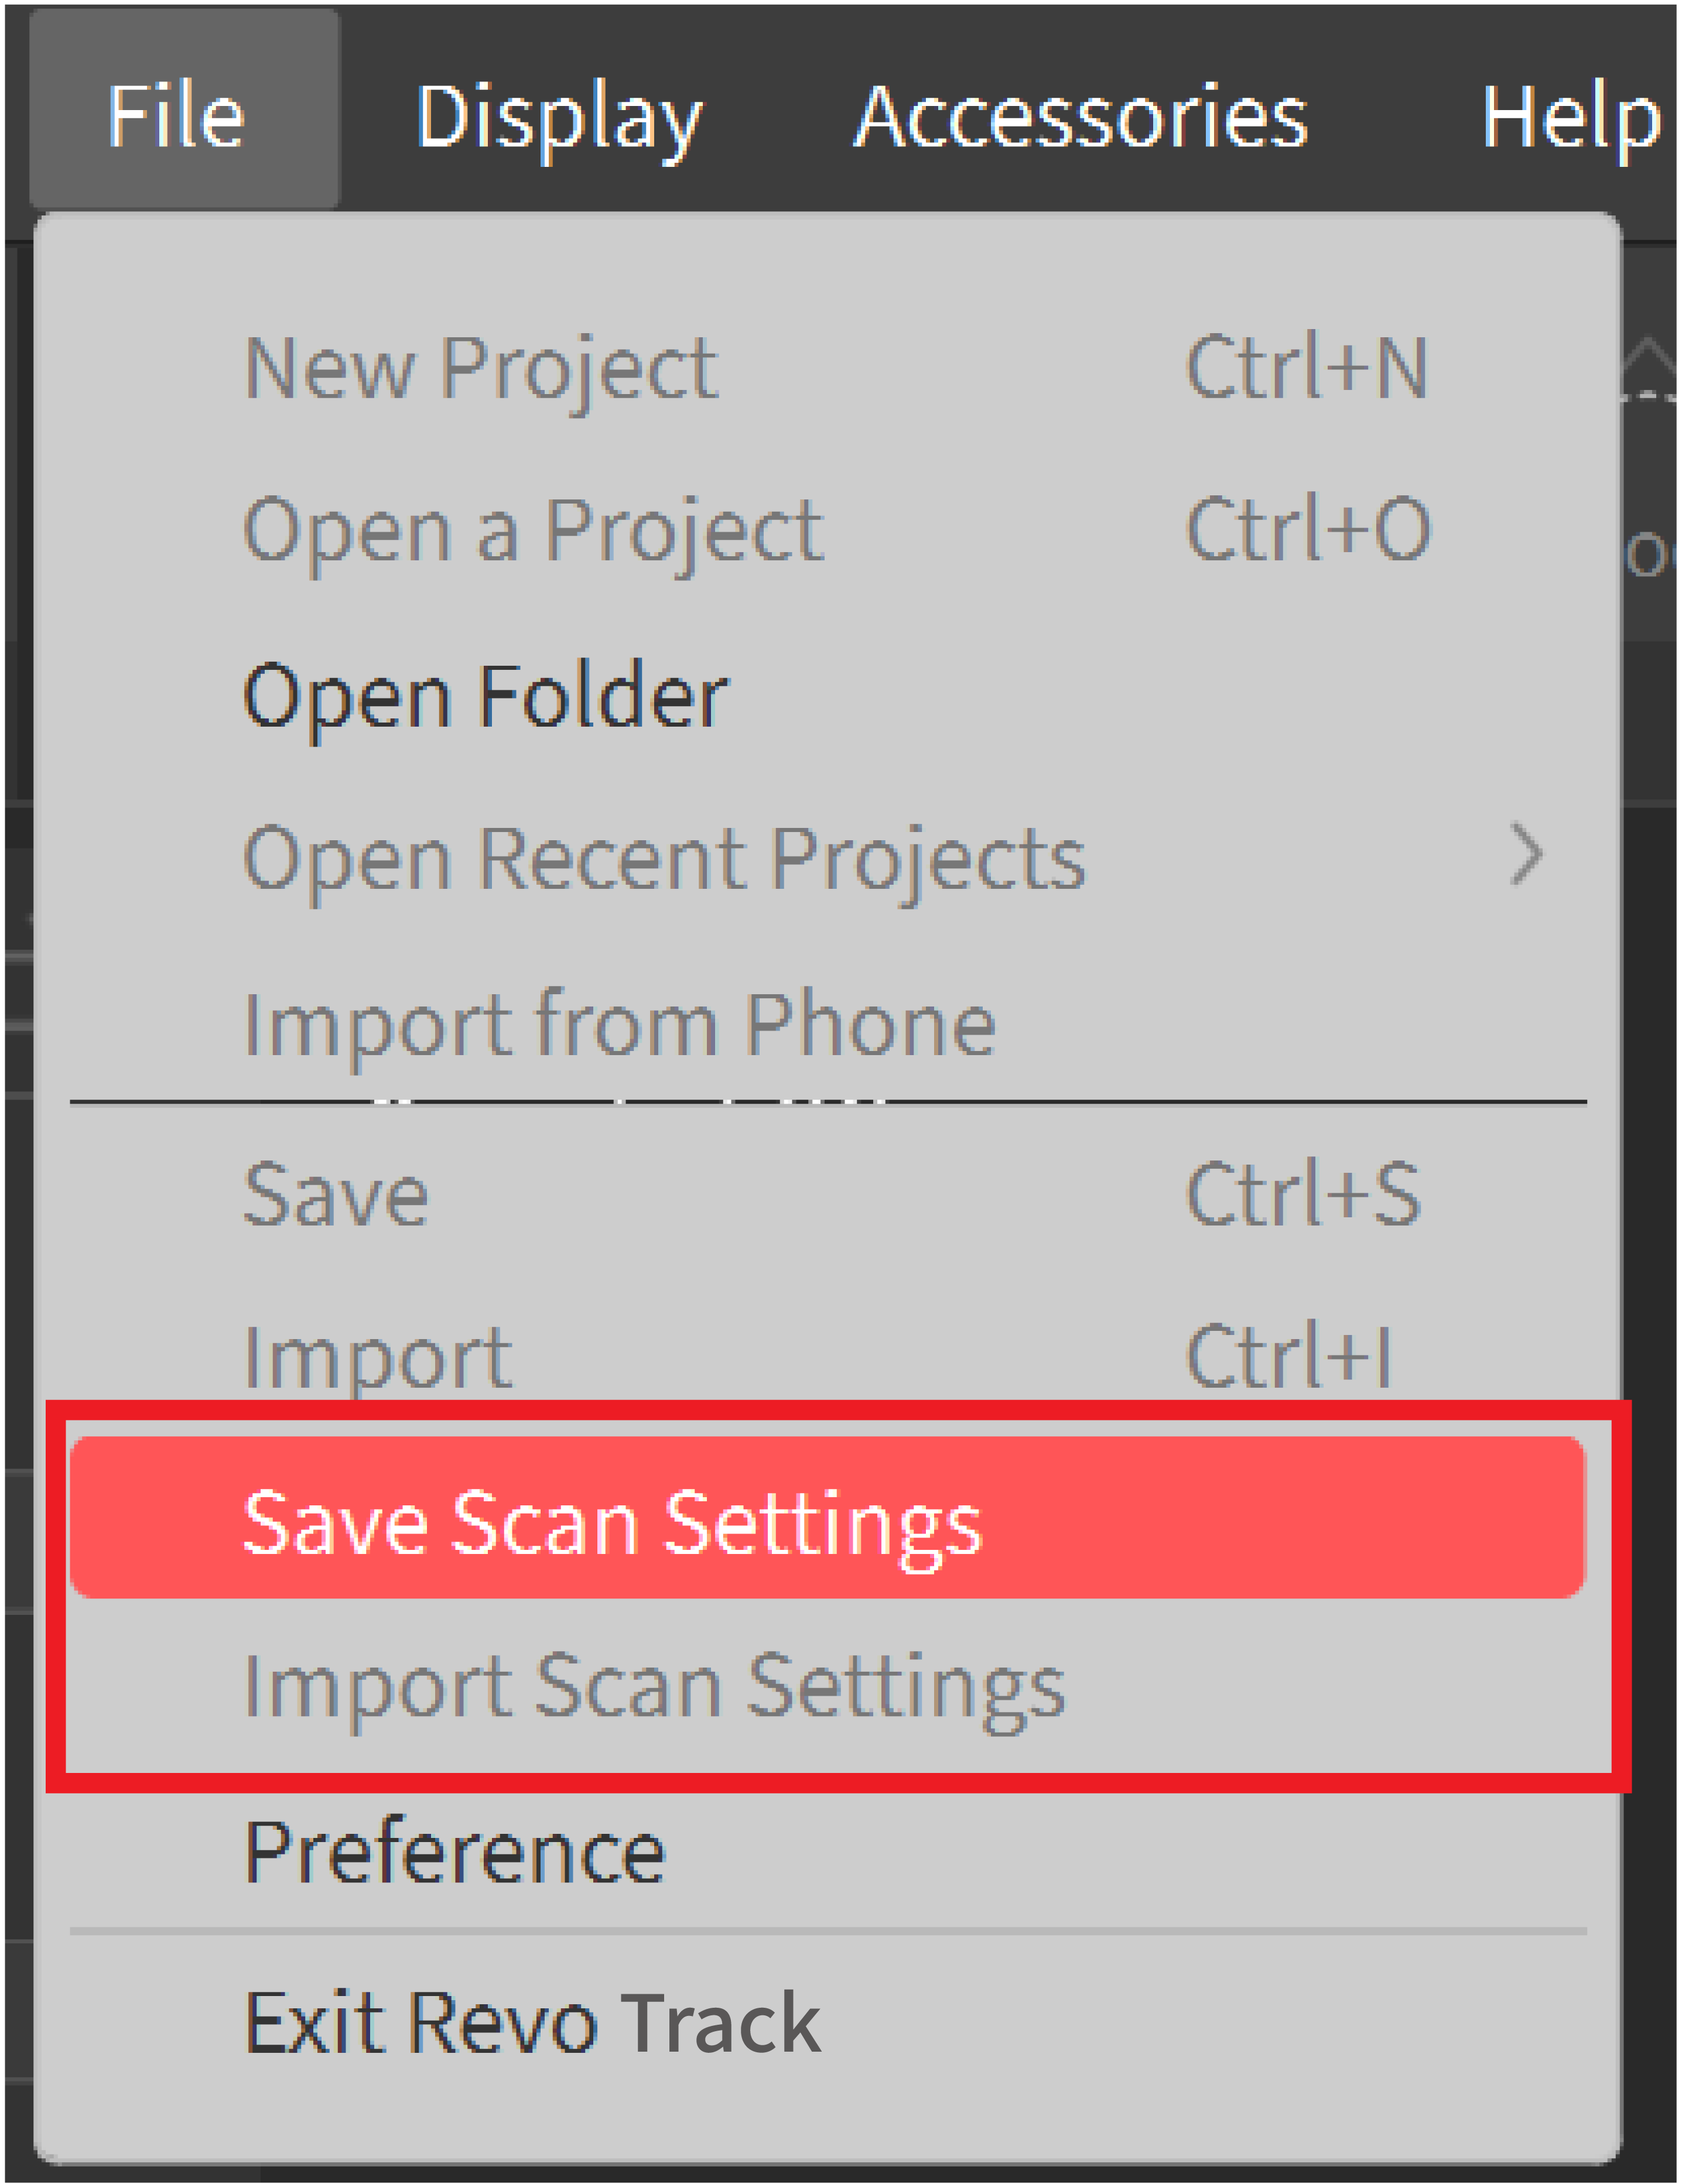
Save scan setting: In the Menu Bar, click File > Save Scan Settings, name the setting, and choose a location to save it.
Import scan setting: Click Import Scan Settings, select the file containing the wanted setting, and click Open to import.
Note: Only the scanning settings for the currently connected scanner can be imported.