¶ 1. Credit Card
Recommended scanner: MINI 2
① Fix the card on the turntable with the glue tack, and use the scanning spay to coat the black surface.
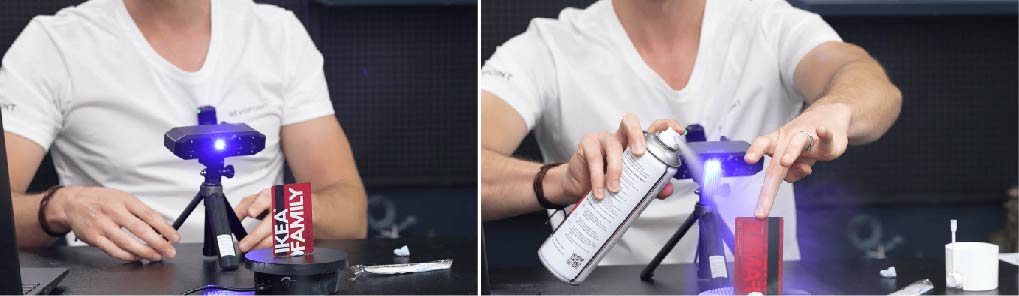
② Thin-wall object tracking loss often occurs when the scanner shifts between surfaces. A good solution is to place feature-rich reference objects nearby. Use reference objects that match the scanning object's color for easier exposure adjustment.
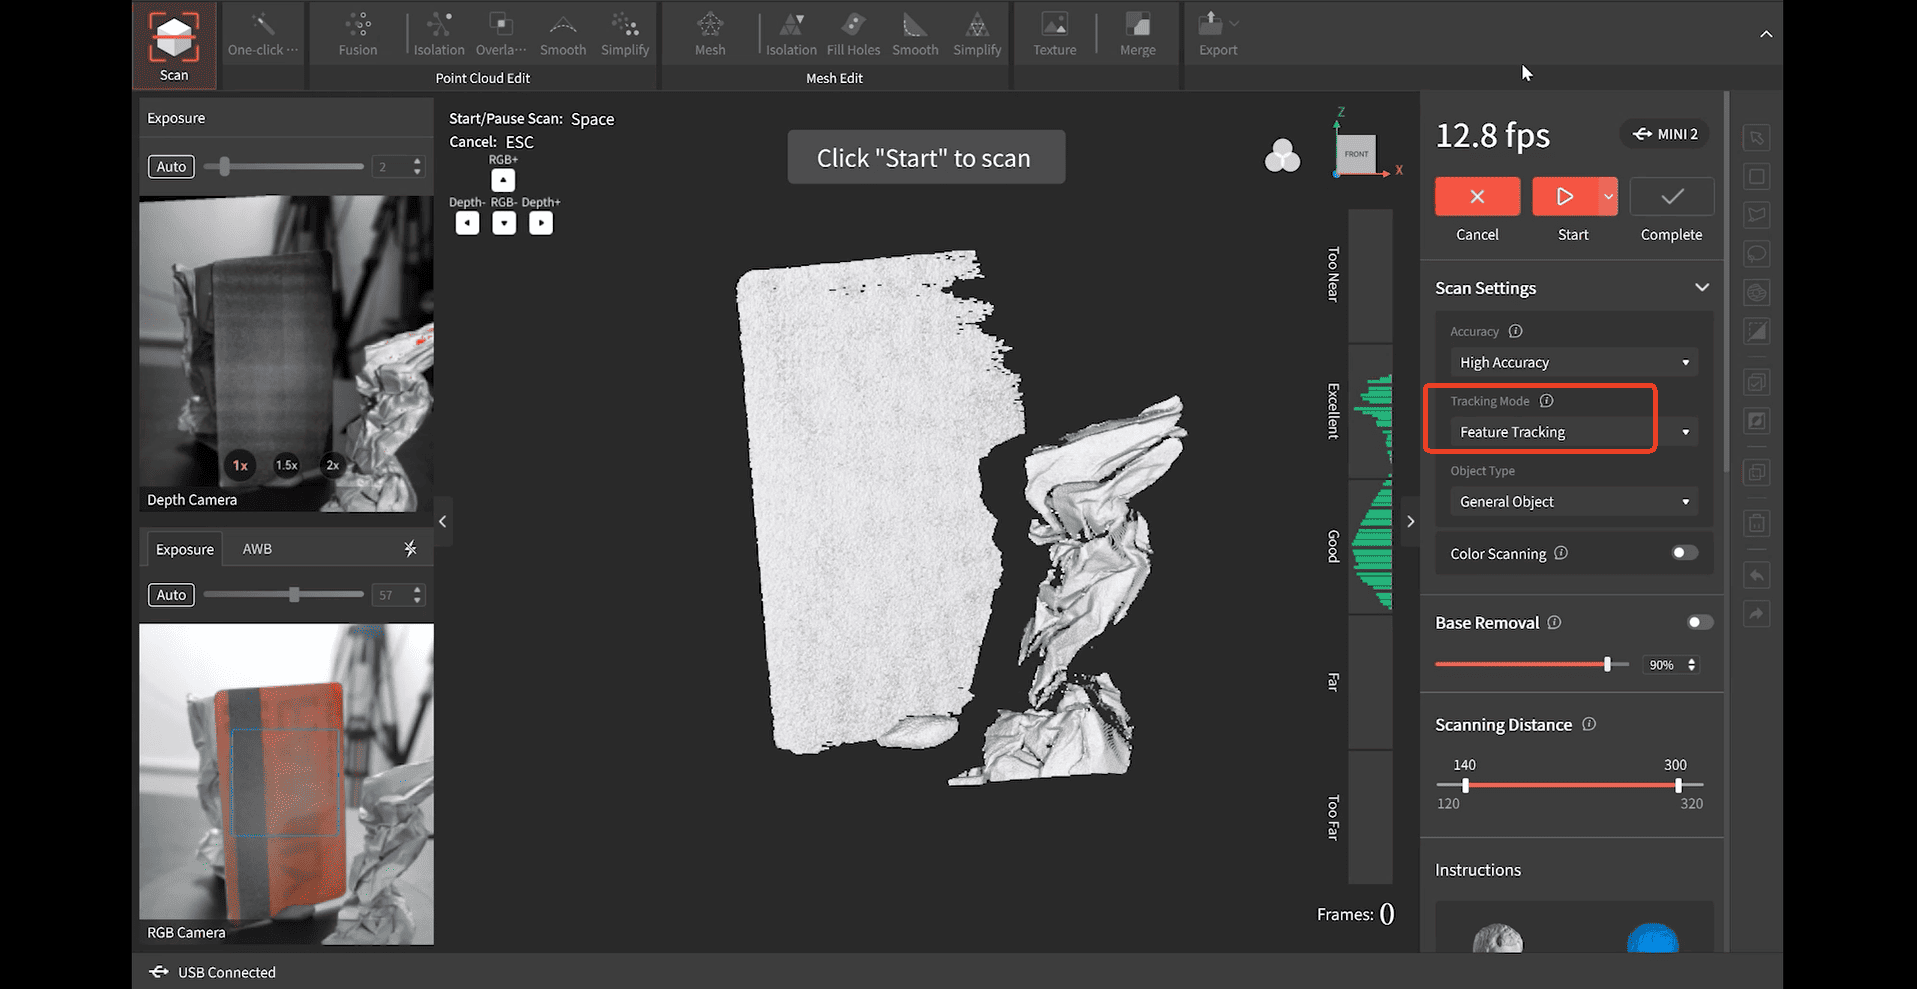
③ Adjust the scanner to a suitable angle and height. Open Revo Scan, Adjust the exposure and select High Accuracy, Feature Tracking, and General Object. Then, click the Start button to start the scan.
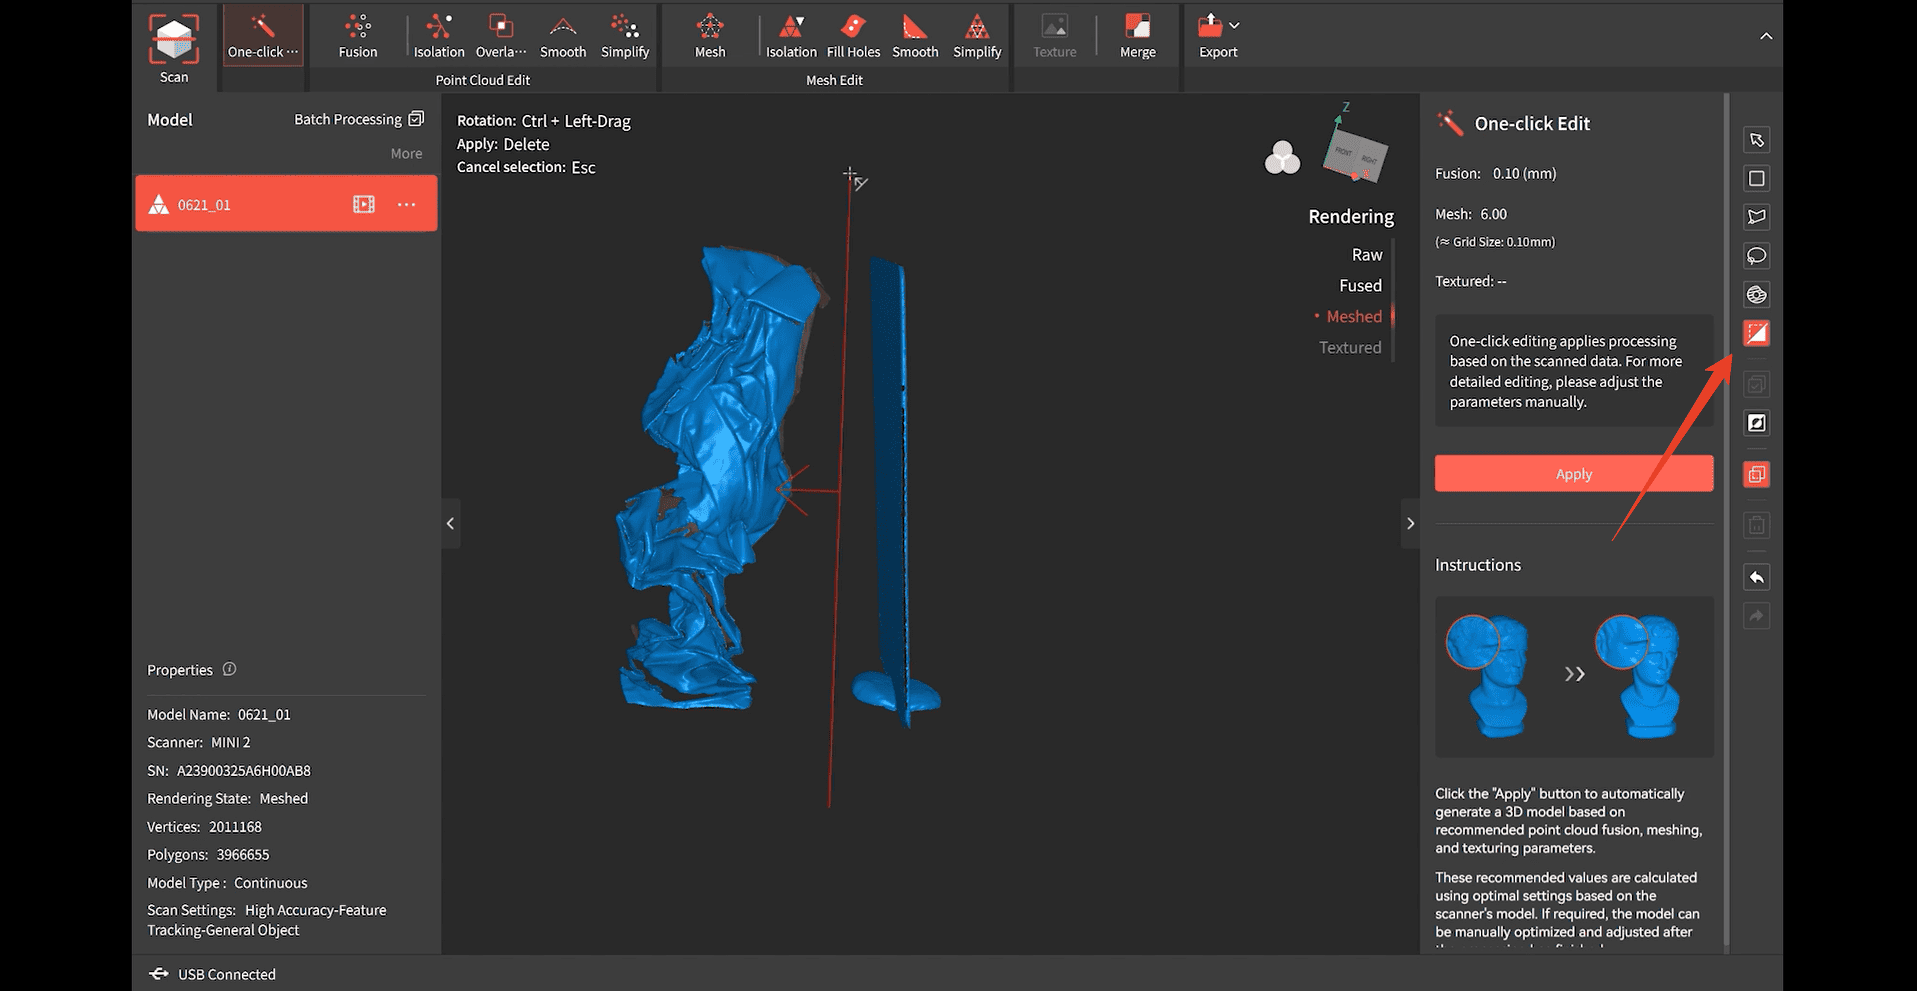
④ Process the model, then use the right-side Toolbar to remove unwanted data.
Credit Card Scan Tutorial Video
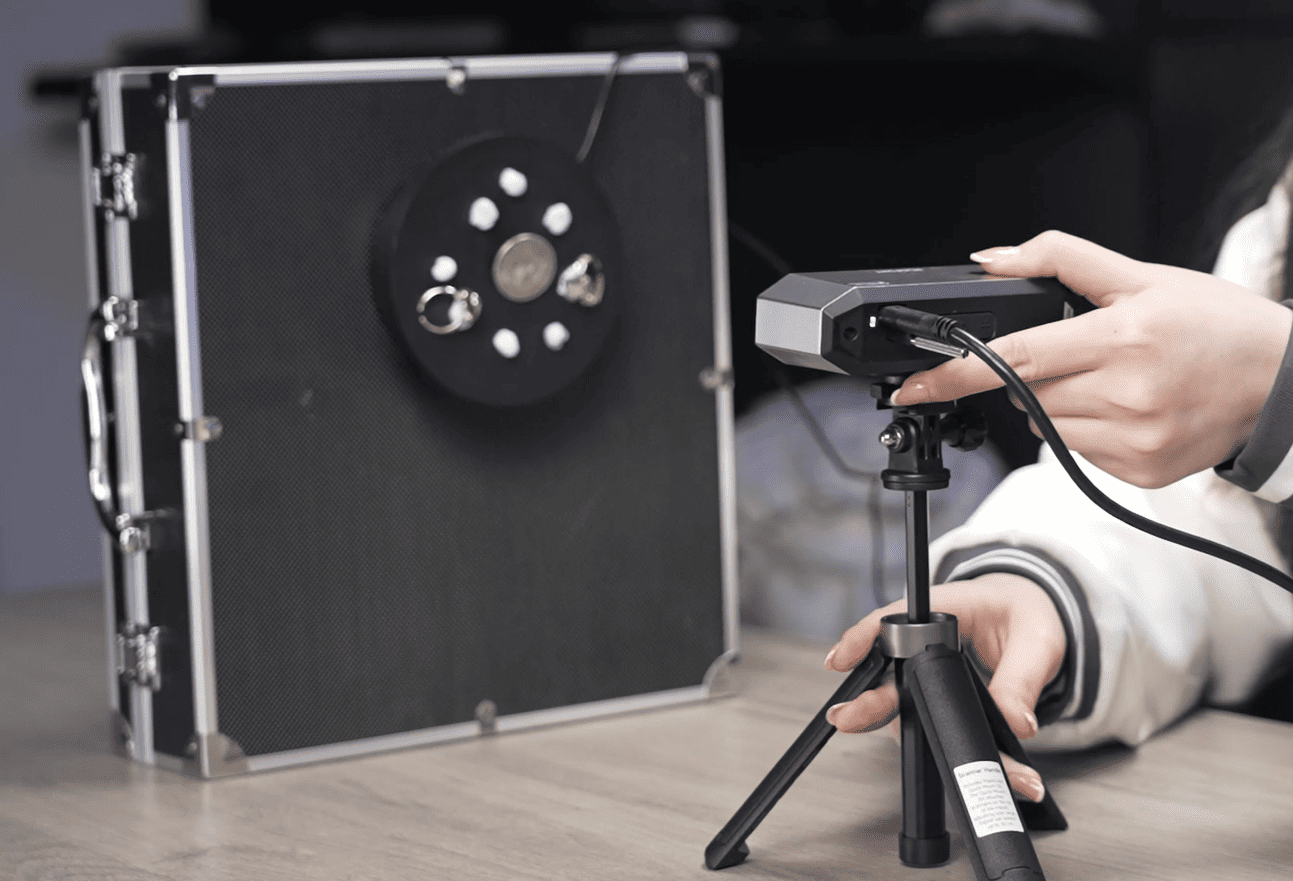
¶ 2. Coin
① Fix the coin on the turntable with the glue tack.
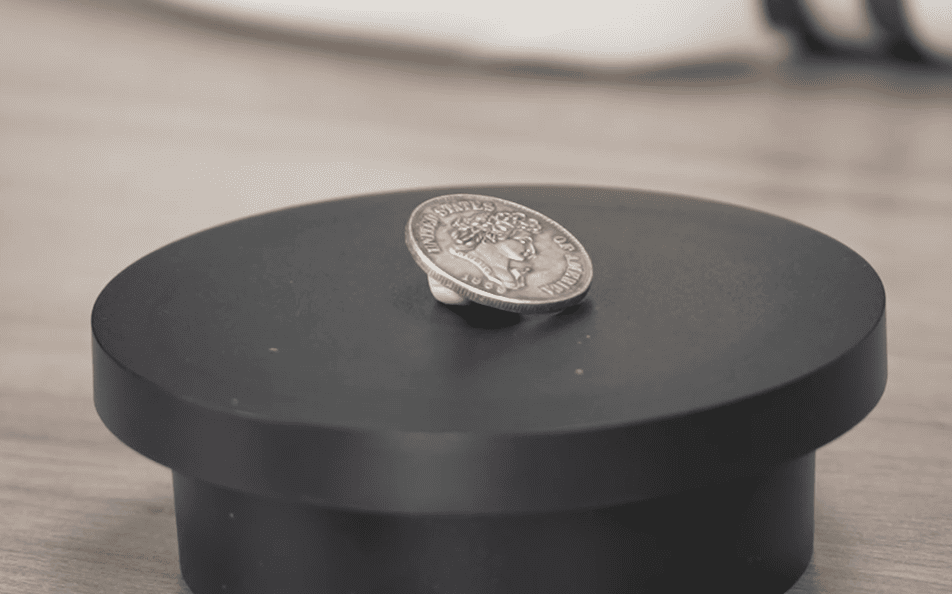
② To capture the featureless surface better, place feature-rich reference objects around for tracking.
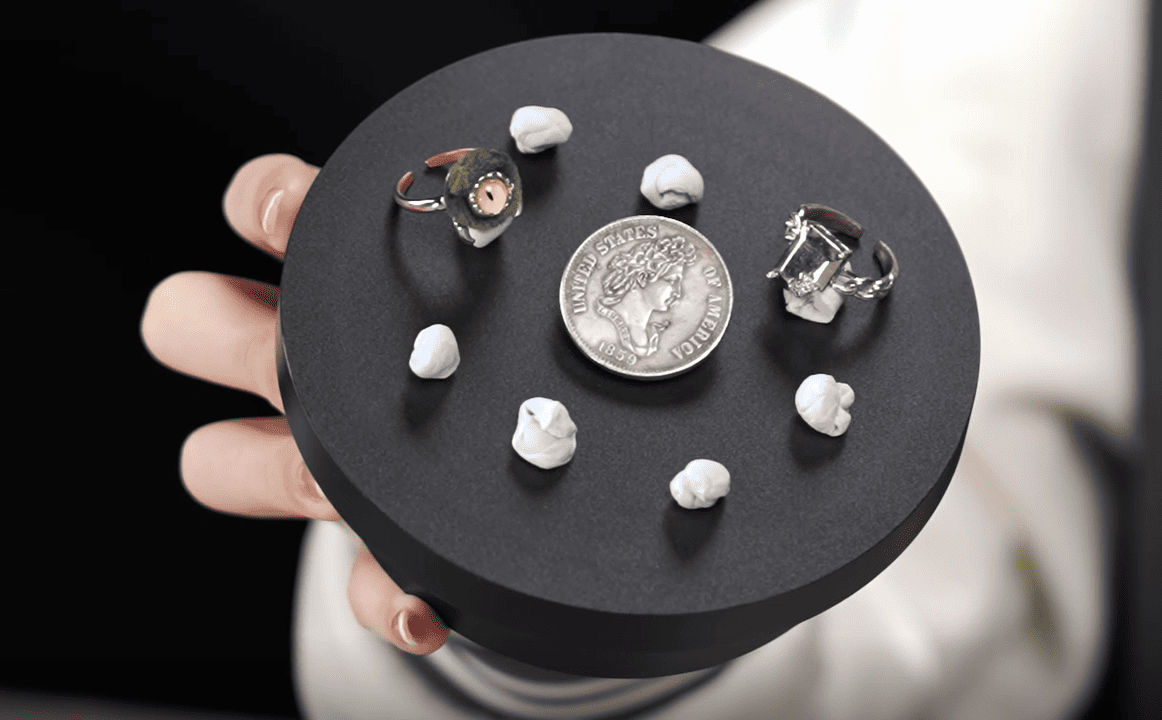
③ Keep the turntable vertical and adjust the scanner's angle to capture the coin from all sides.
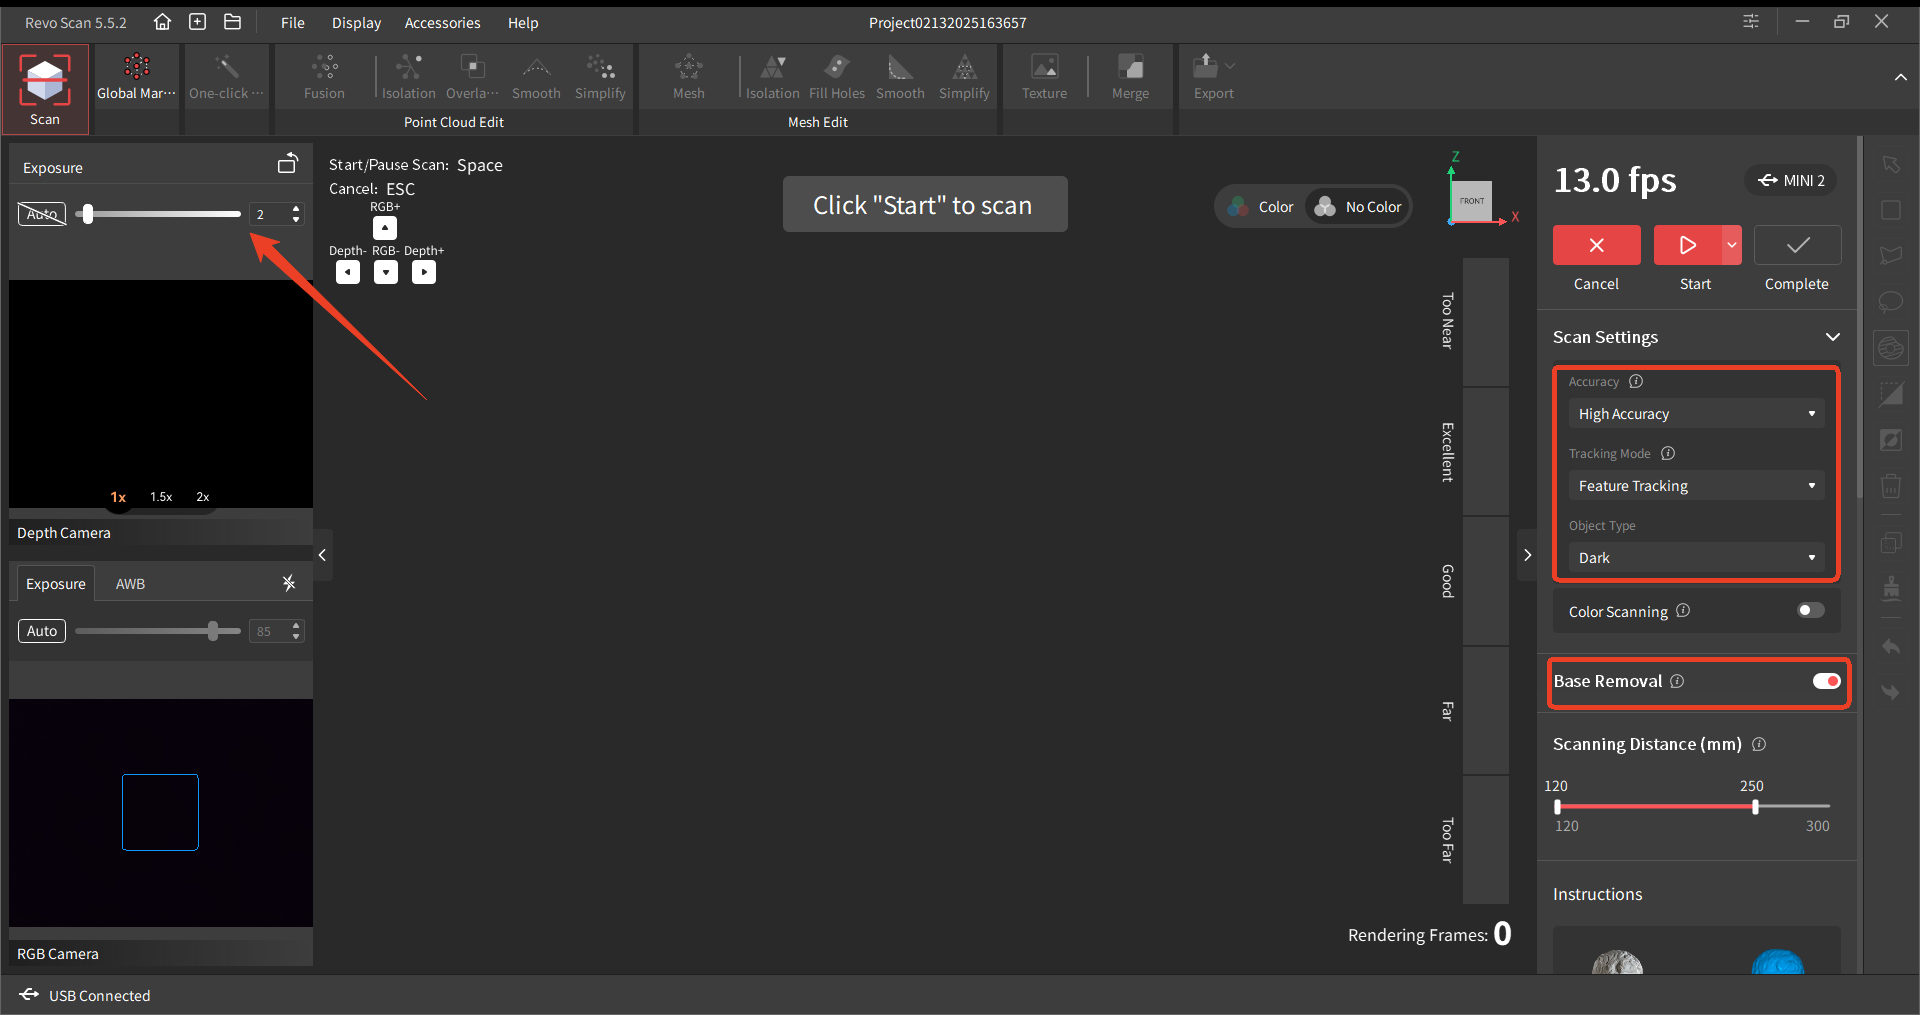
④ Select High Accuracy, Feature Tracking, and Black Object. Manually adjust the depth exposure to 2 and toggle on Base Removal. Click the Start button to start the scan.
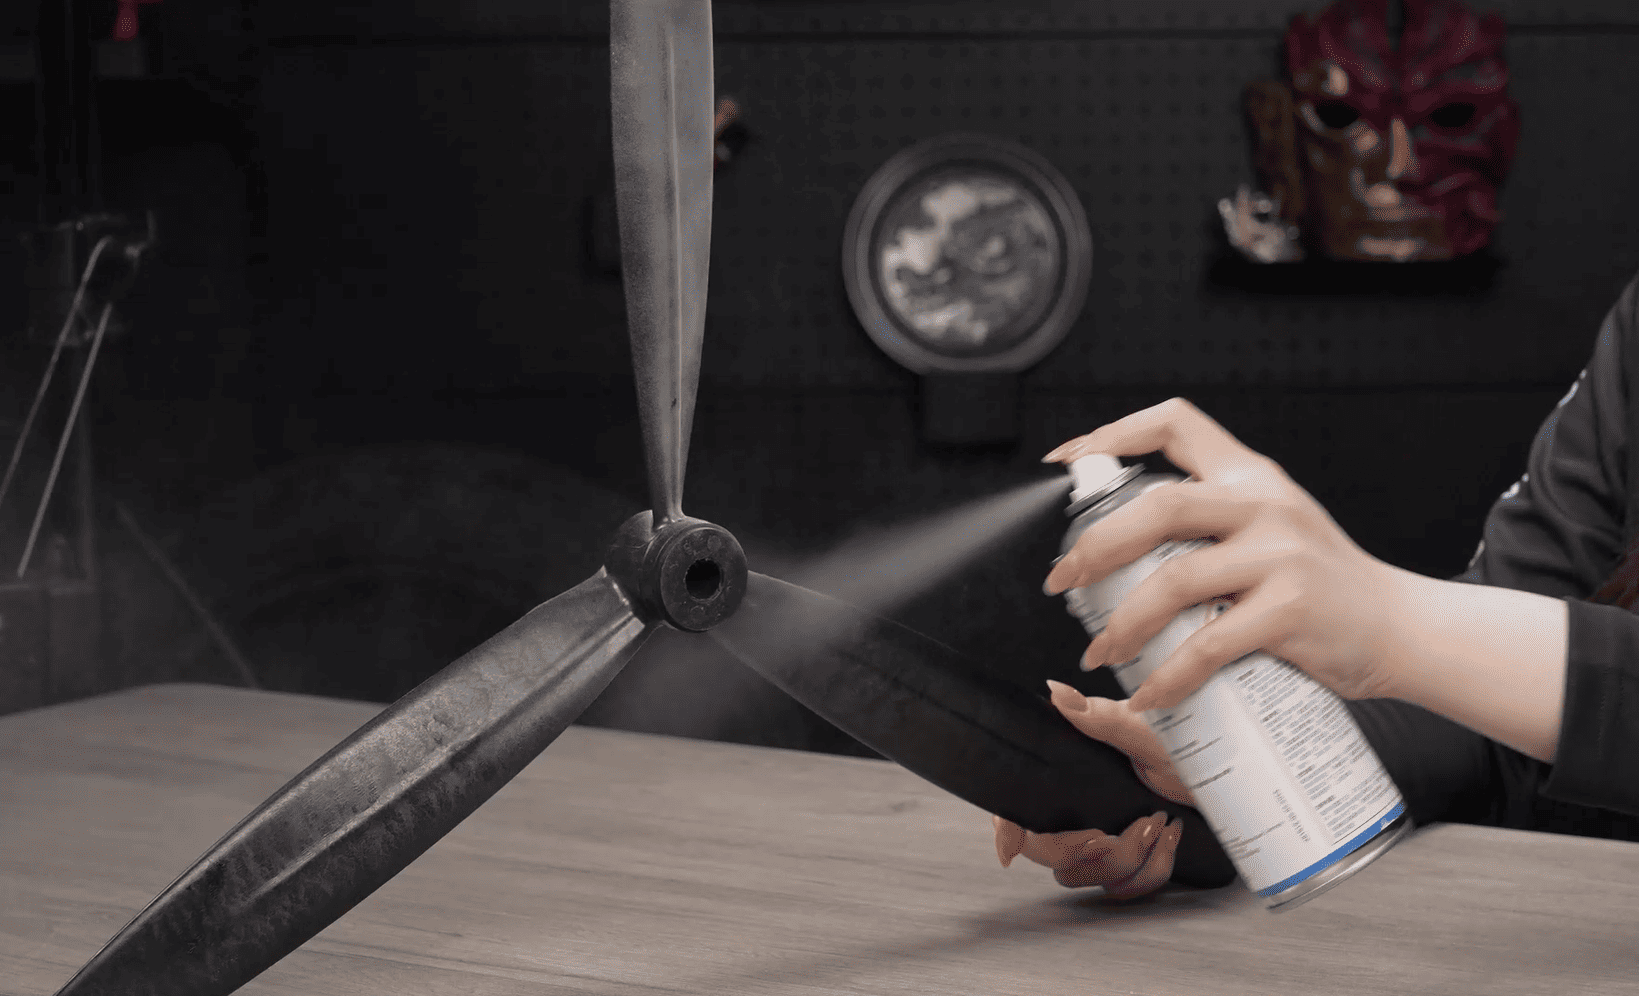
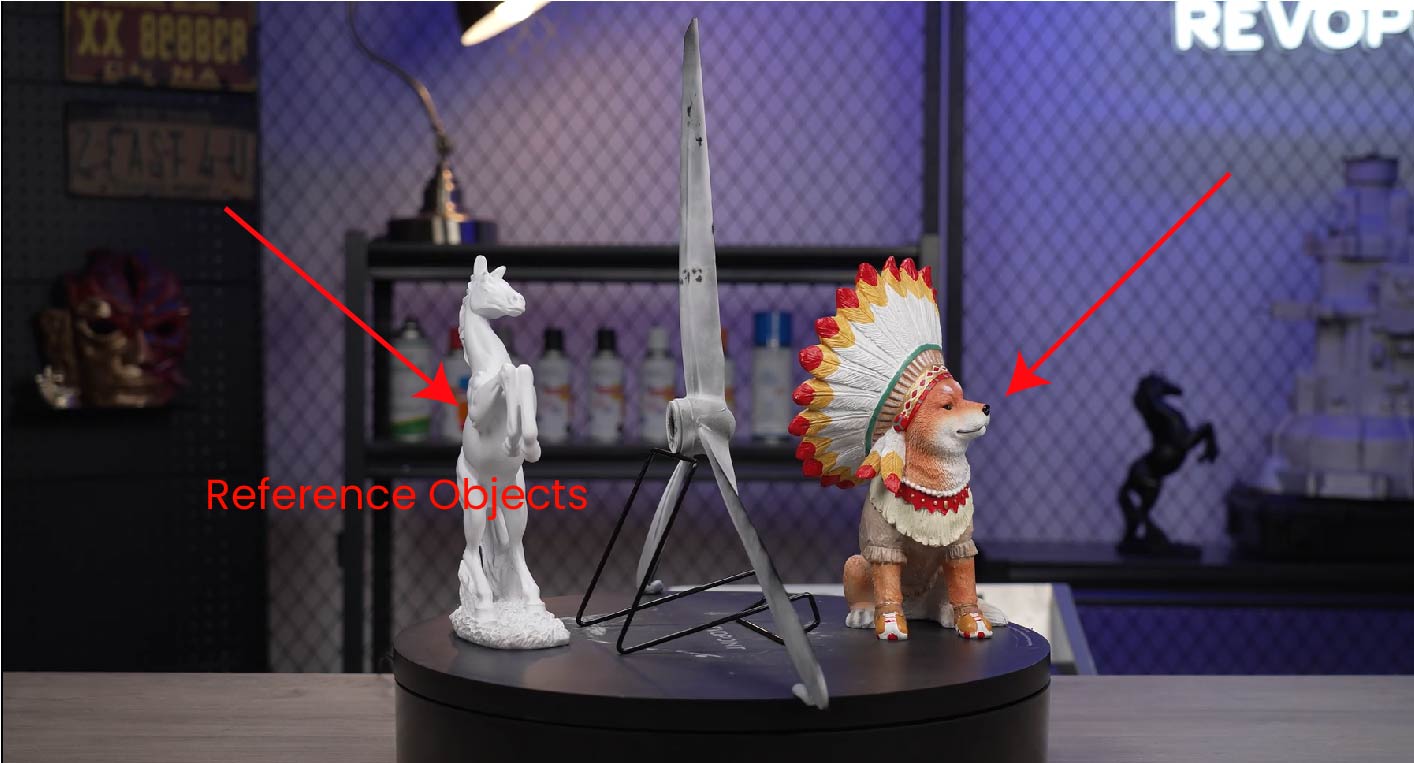
¶ 3. Fan Blades
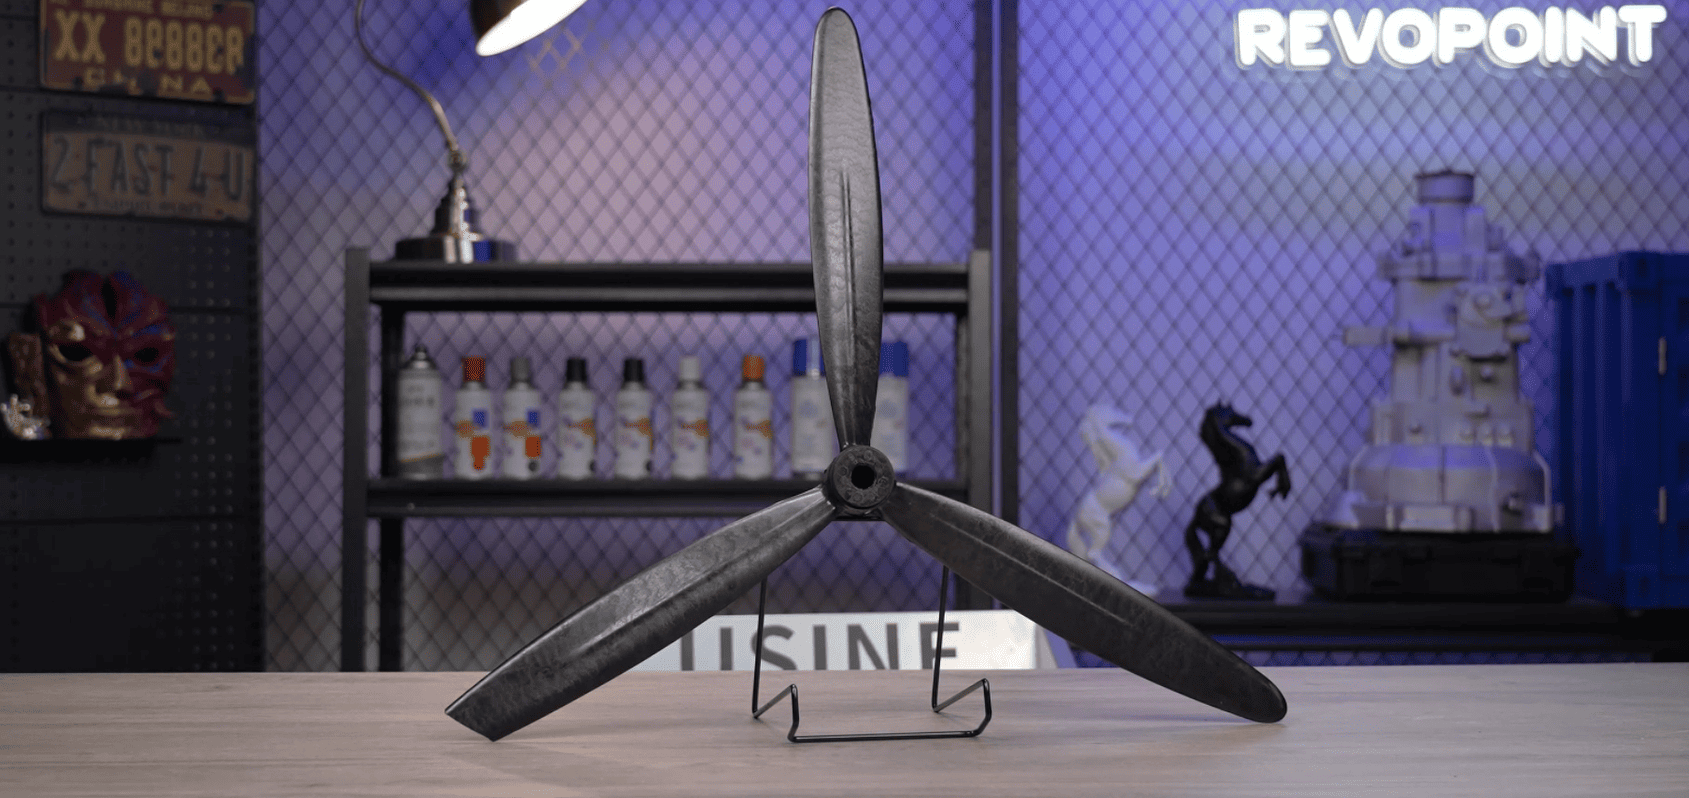
Recommended scanners: MIRACO's Far mode or RANGE 2
① Use a scanning spray to coat the surface.
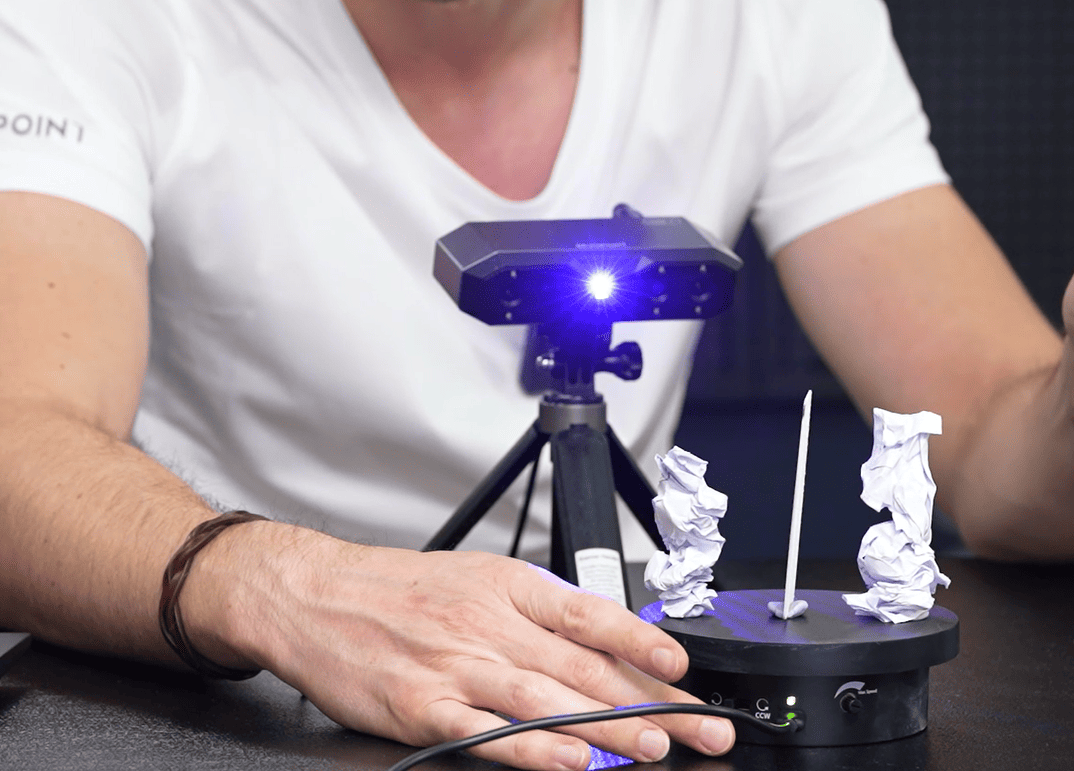
② Fix the fan blade with glue tack and support to make it stand upright.
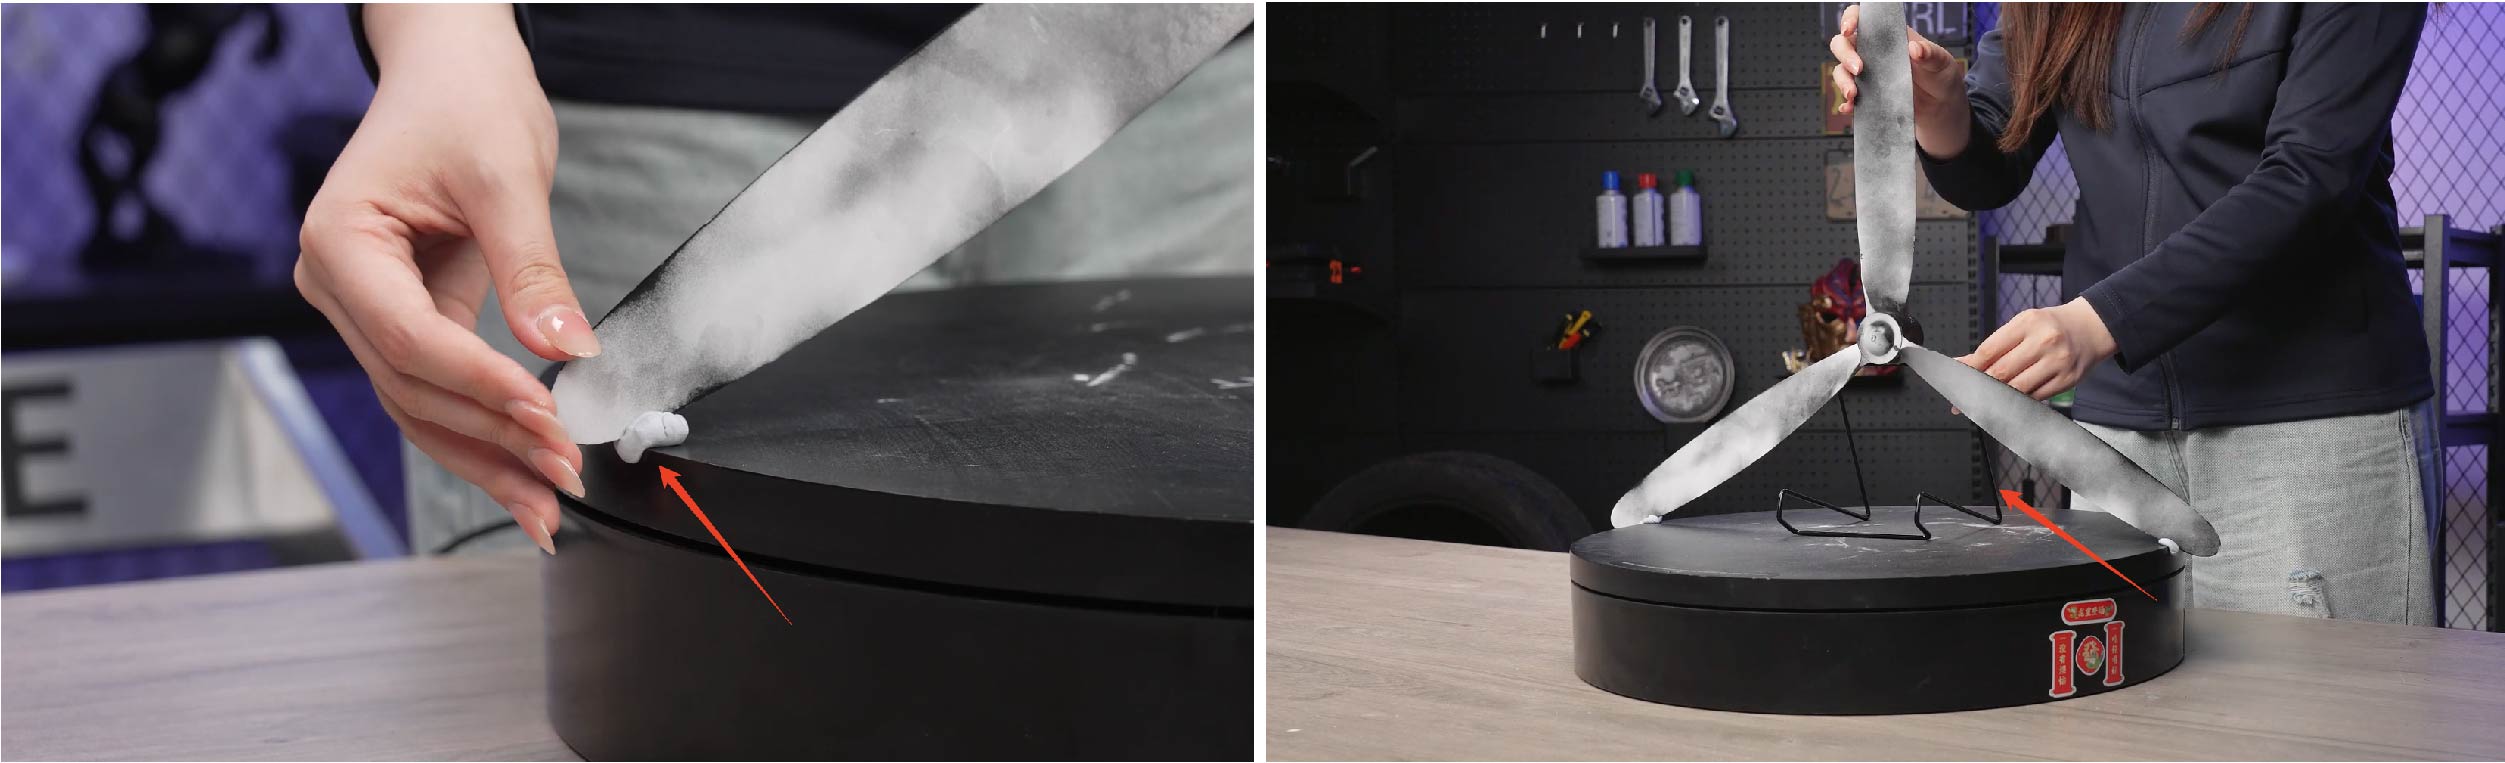
③ To address thin-edge tracking loss and capture featureless surfaces more effectively, position feature-rich reference objects nearby for tracking.
Note: the size of the reference objects should match that of the scanning object.
④ Select High Accuracy, Feature Tracking, and General Object, toggle on Base Removal, and switch to Far mode. Adjust the depth camera's exposure and start the scan.
⑤ Process the model after the scan and use the toolbar selection tools to select and remove the unwanted data.
¶ 4. Motorcycle Windshield & Ceramic Plate
For motorcycle windshield scan:
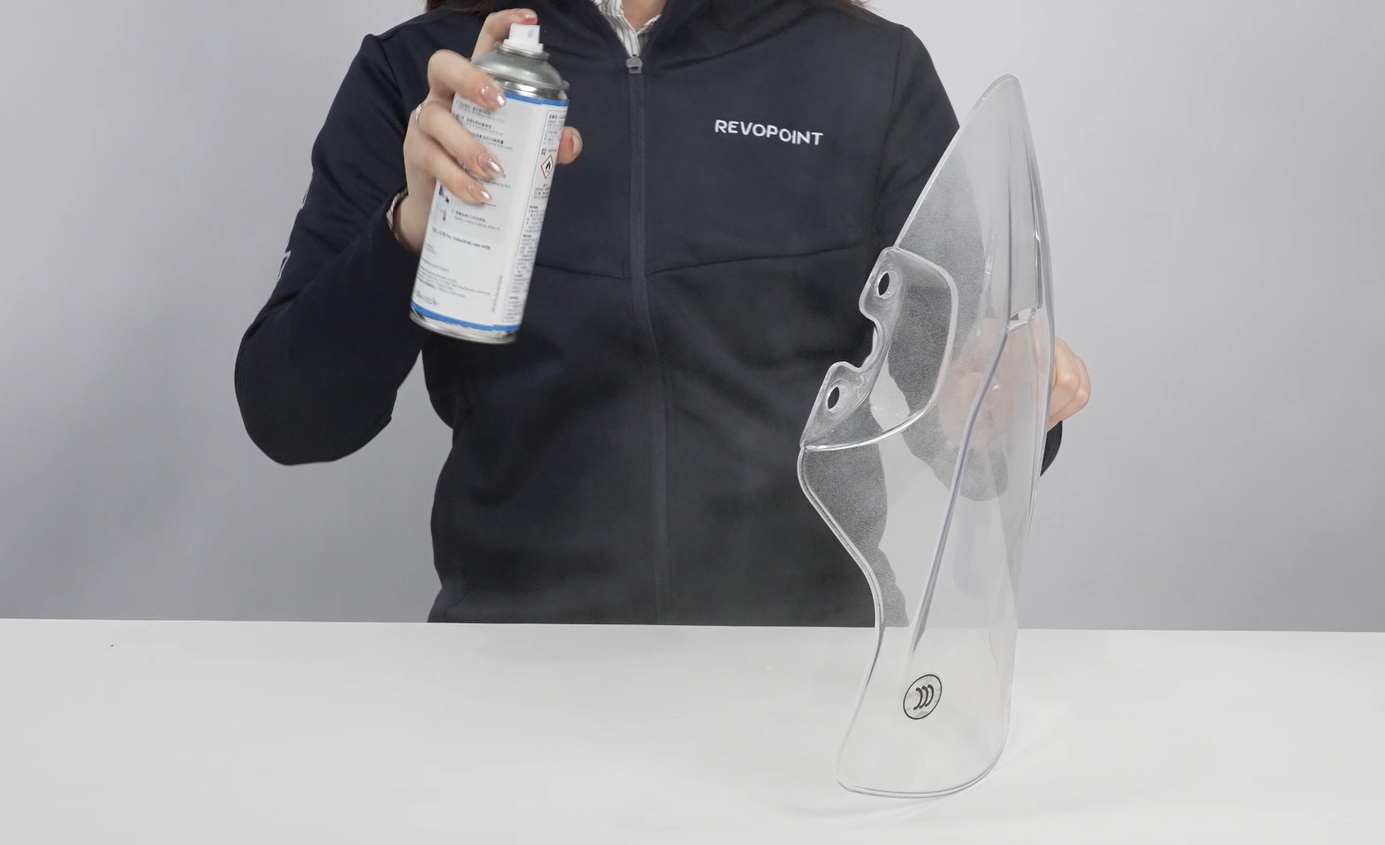
① Apply the scanning spray from a distance of 30 cm. Avoid apply thick coats as this may impact the model's outcome.
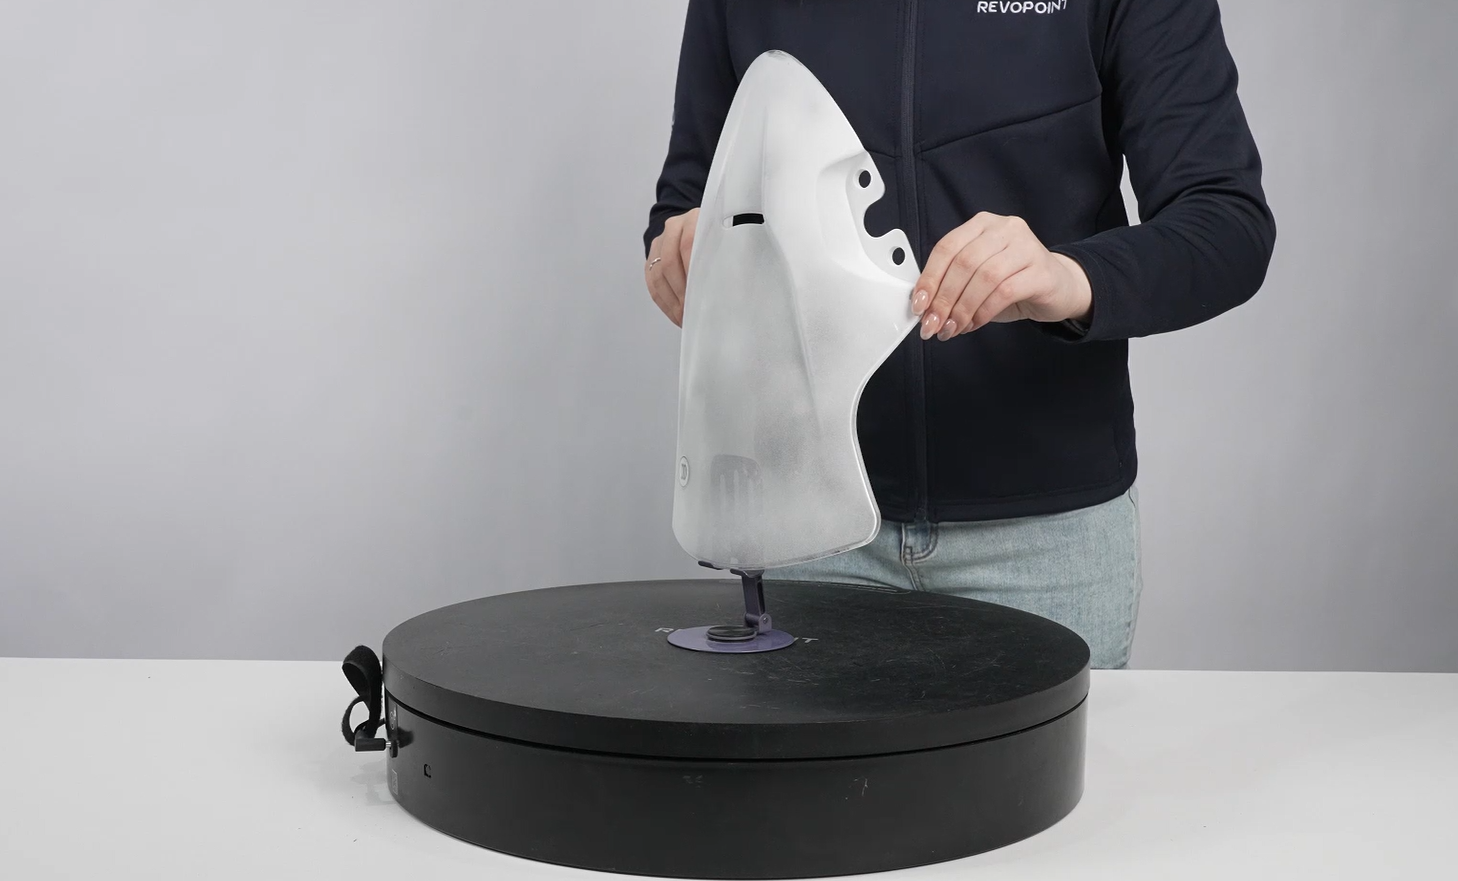
② Secure the windshield vertically on a large turntable using a stand.
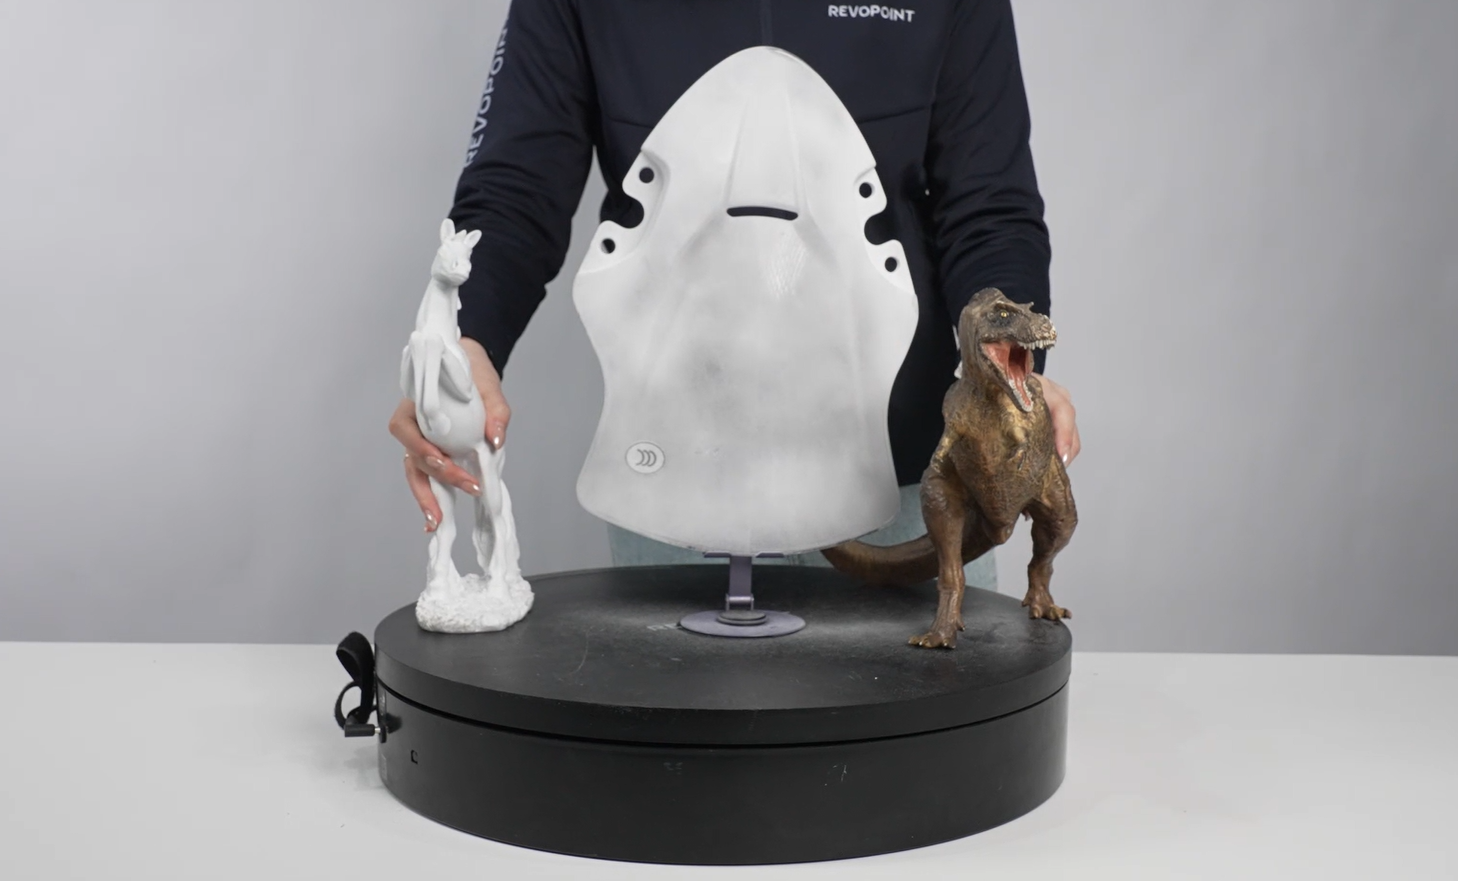
③ Place several feature-rich objects matching the windshield's size around its edges. This helps fix tracking loss caused by thin edges when the scanner shifts from one side to the other.
④ Select Feature Scan, Full Field scan mode, and General object type for scan settings. Also, turn on the depth cameras' auto exposure. Adjust scanning distance to excellent or good as shown on the distance indicator bar. Then, click "Start."
⑤ During scanning, ensure the turntable rotates at a moderate speed. If you need to move the scanner manually, keep it stable.
Tips: When scanning the edges, ensure that the reference objects are in the frame and being captured to prevent tracking loss or stitching errors.
⑥ Once the entire model is blue and the surface has no missing areas, click "Complete."
⑦ Perform fusion on the model, use the toolbar on the right to clip the unwanted data.
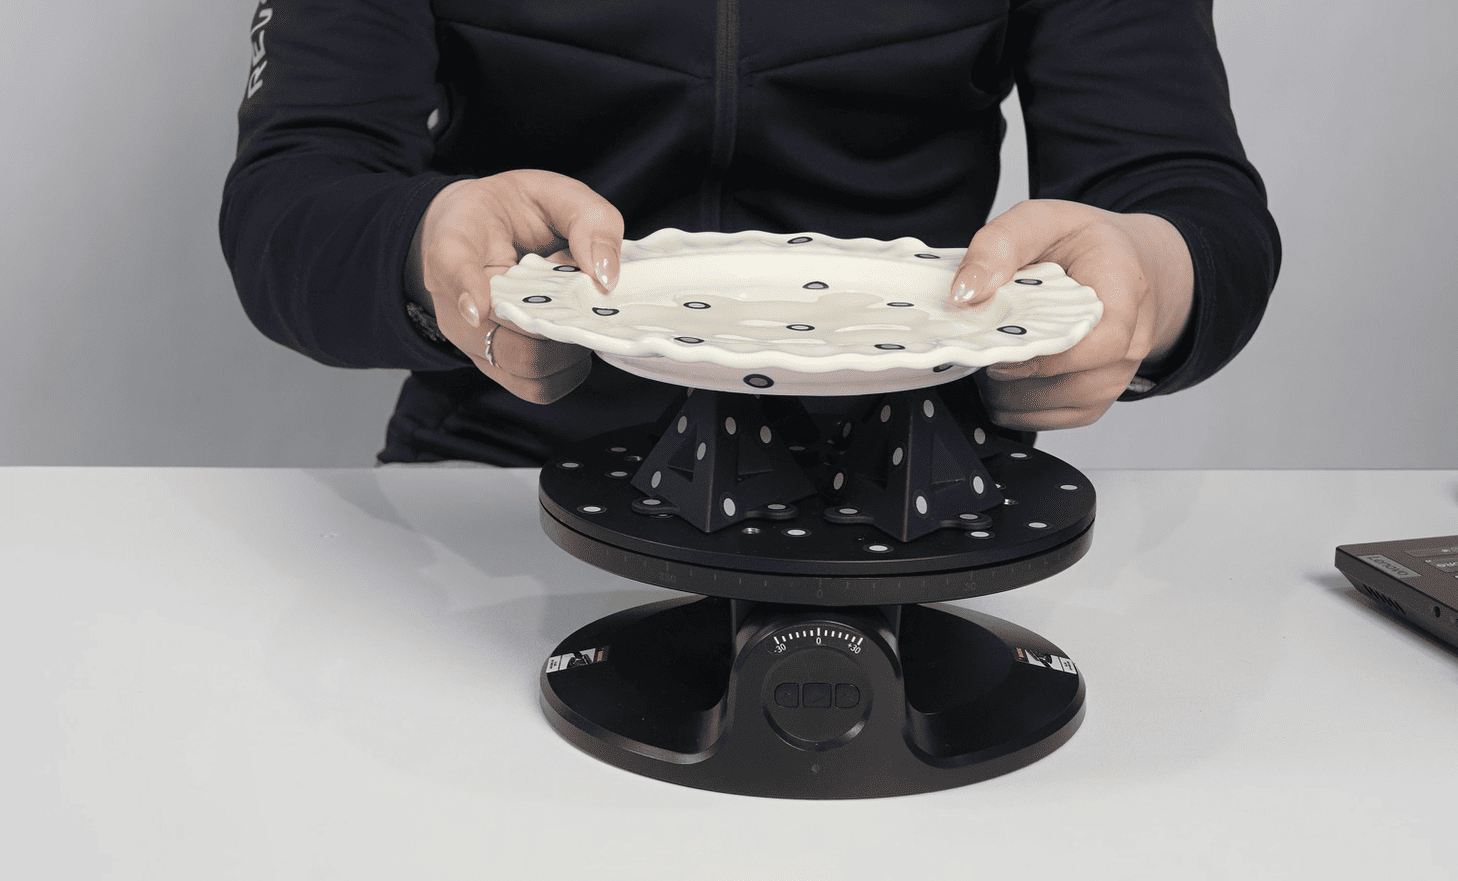
For ceramic plate scan:
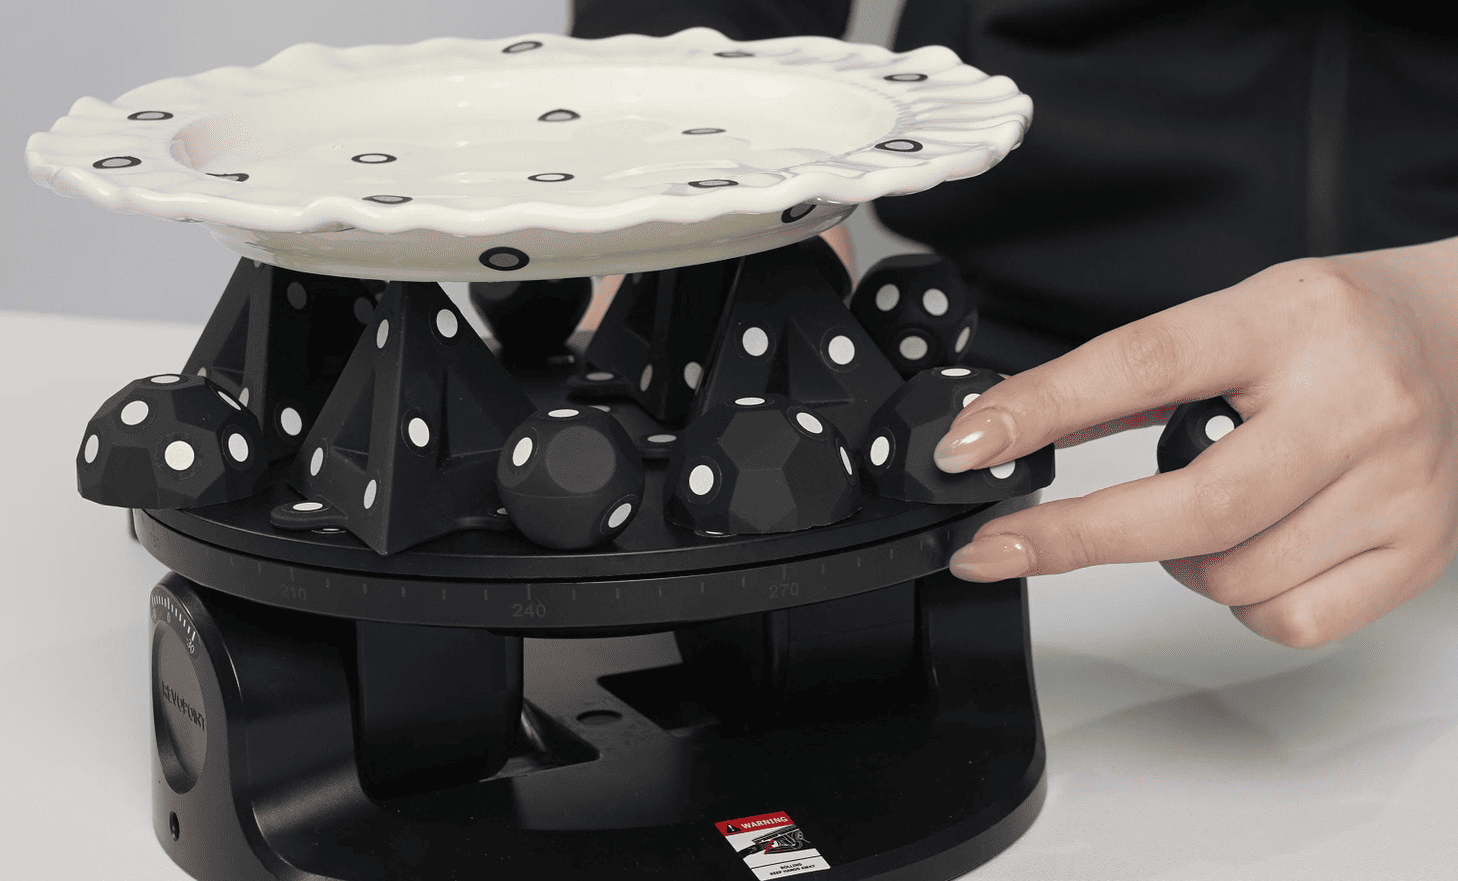
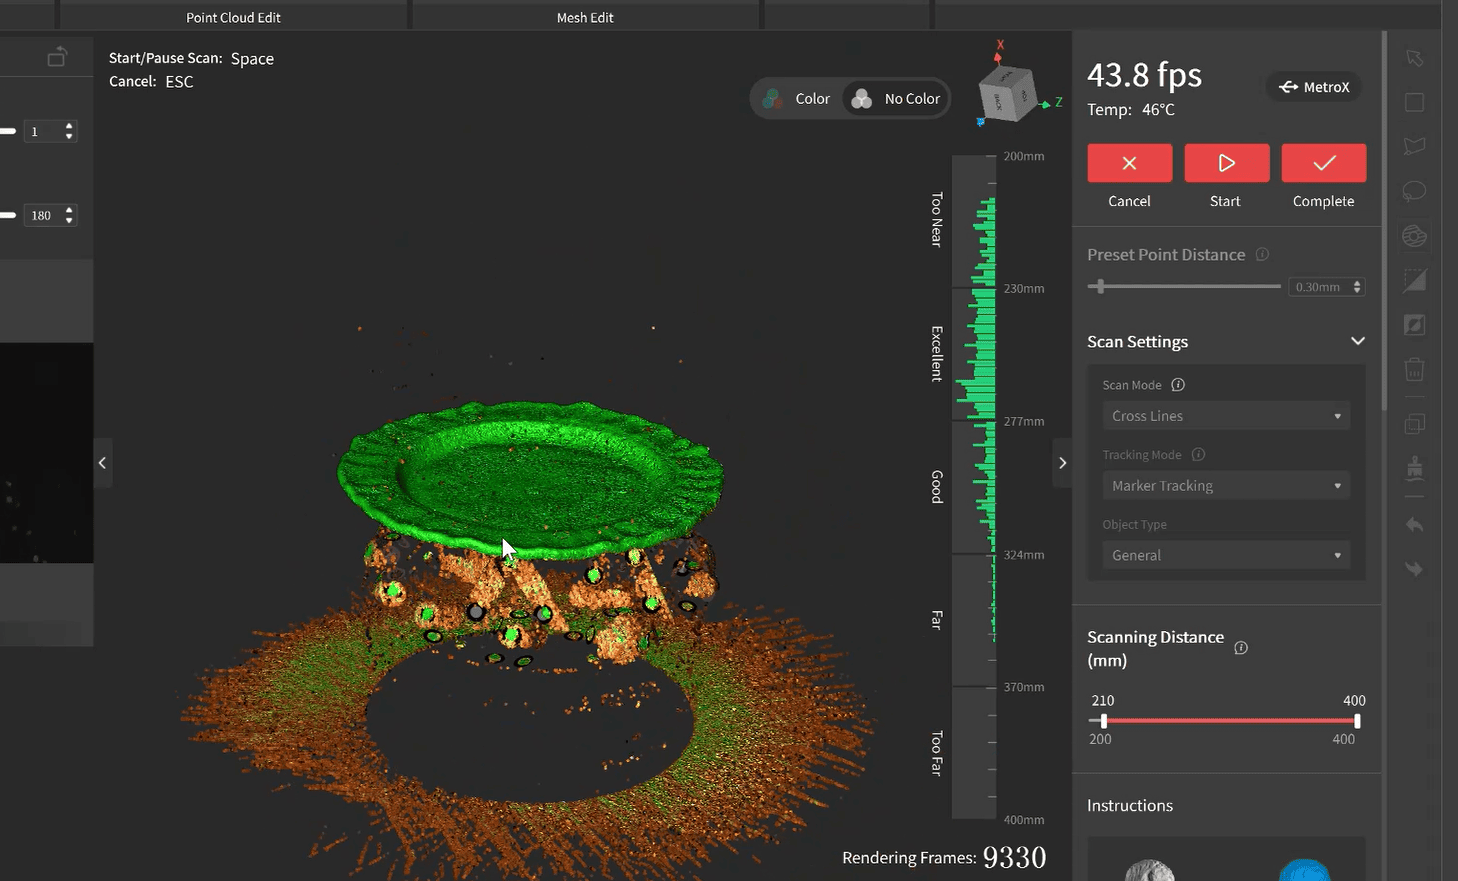
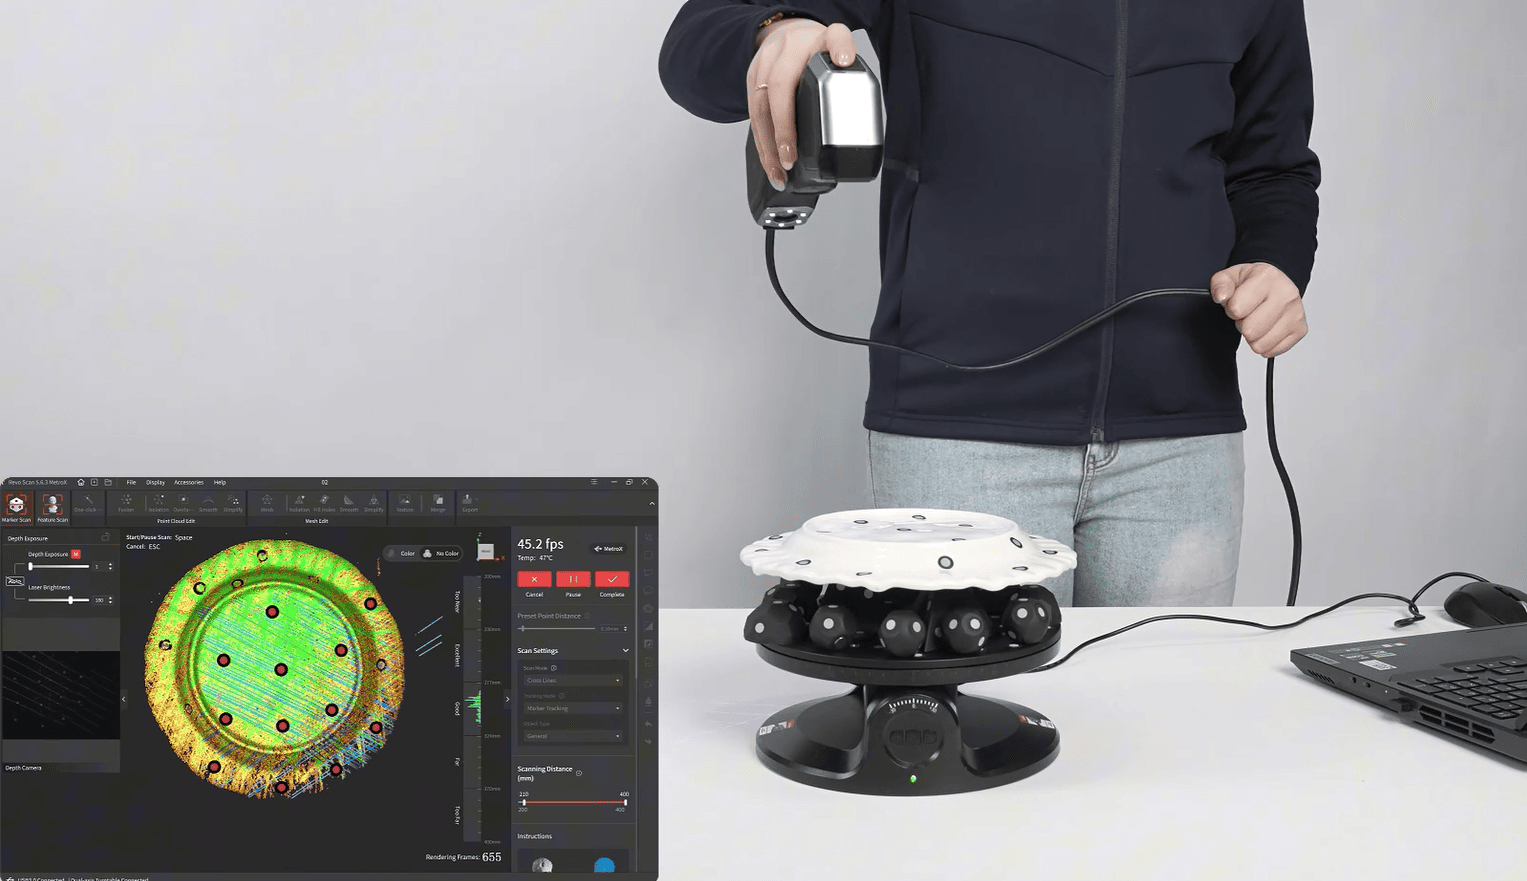
① Stick markers to the plate surface, and place Pyramid Markers underneath to raise it above the turntable's surface.
② Place marker blocks around the plate as the reference objects. Position them as far out as possible to easily scan the edges.
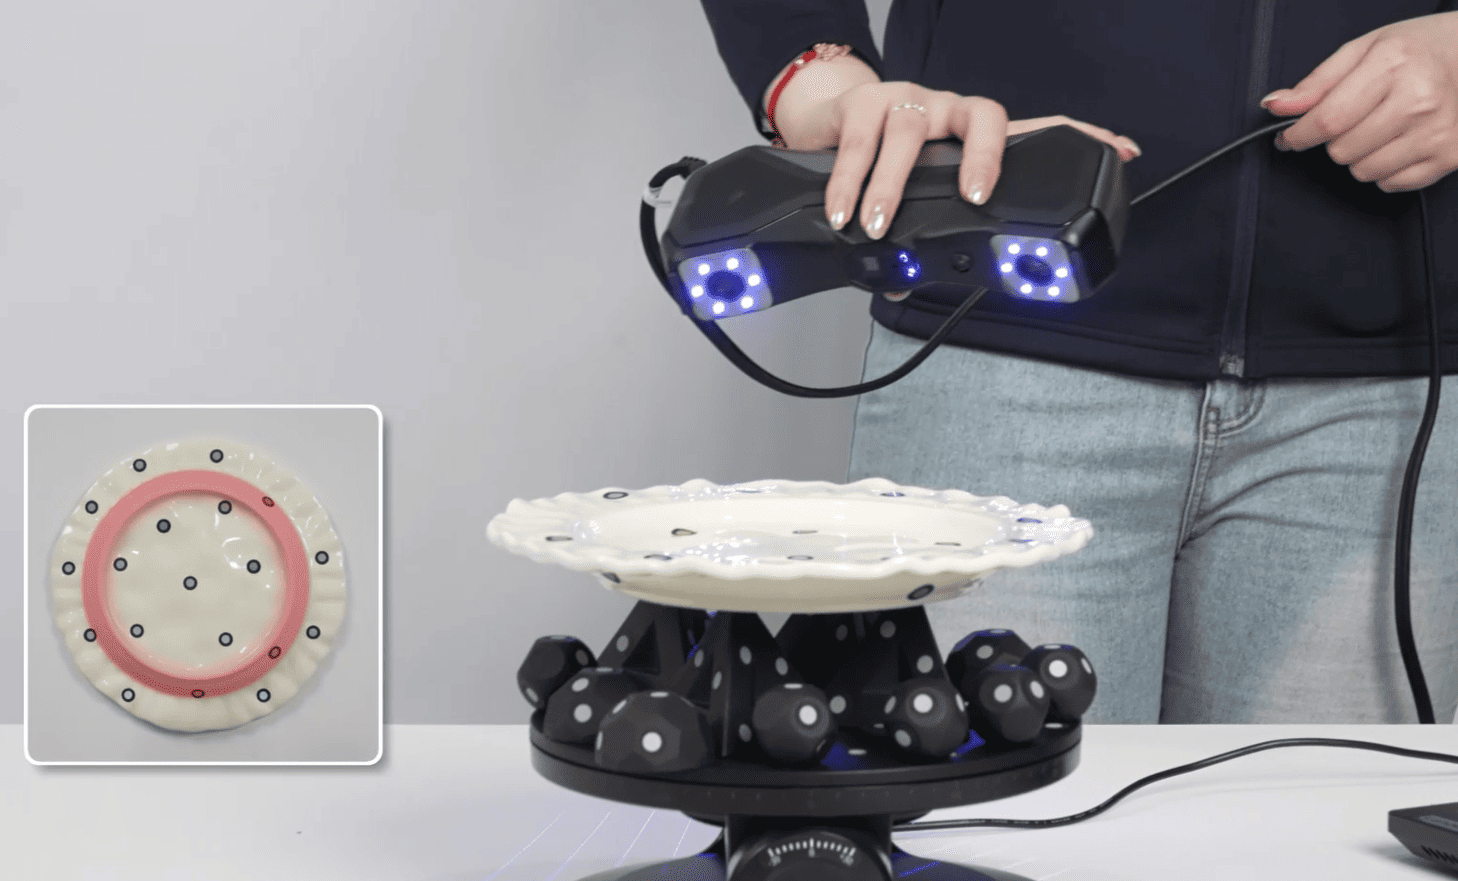
③ In Revo Scan 5 MetroX, connect the Dual-axis Turntable and set a slow rotation speed.
For the scan settings, select Marker Scan, Cross Lines scan mode, and General object type. Adjust the depth cameras' exposure to ensure the markers on the object's surface are clearly visible in the preview window. Then set the scanning distacne to excellent or good and click "Start."
④ During the scan, keep the scanner moving at s steady speed. Ensure the scanner captures multiple overlapping markers before moving to the edges and bottom areas. Otherwise, the software may alert you to insufficient markers, leading to lags or stitching errors.
⑤ When moving to the edges, hold the scanner horizontally to capture more marker points. Capturing some bottom areas will help the subsequent model merging.
⑥ Once the model's surfaces and edges turn totally green and there are no missing areas, click "Complete."
⑦ Then, perform a second scan on the plate's bottom.
⑧ After processing point cloud fusion on both models, click "Merge," select Feature Alignment, and click "Preview the Alignment" to check the result. Finally, click "Generate Model" for the final output.
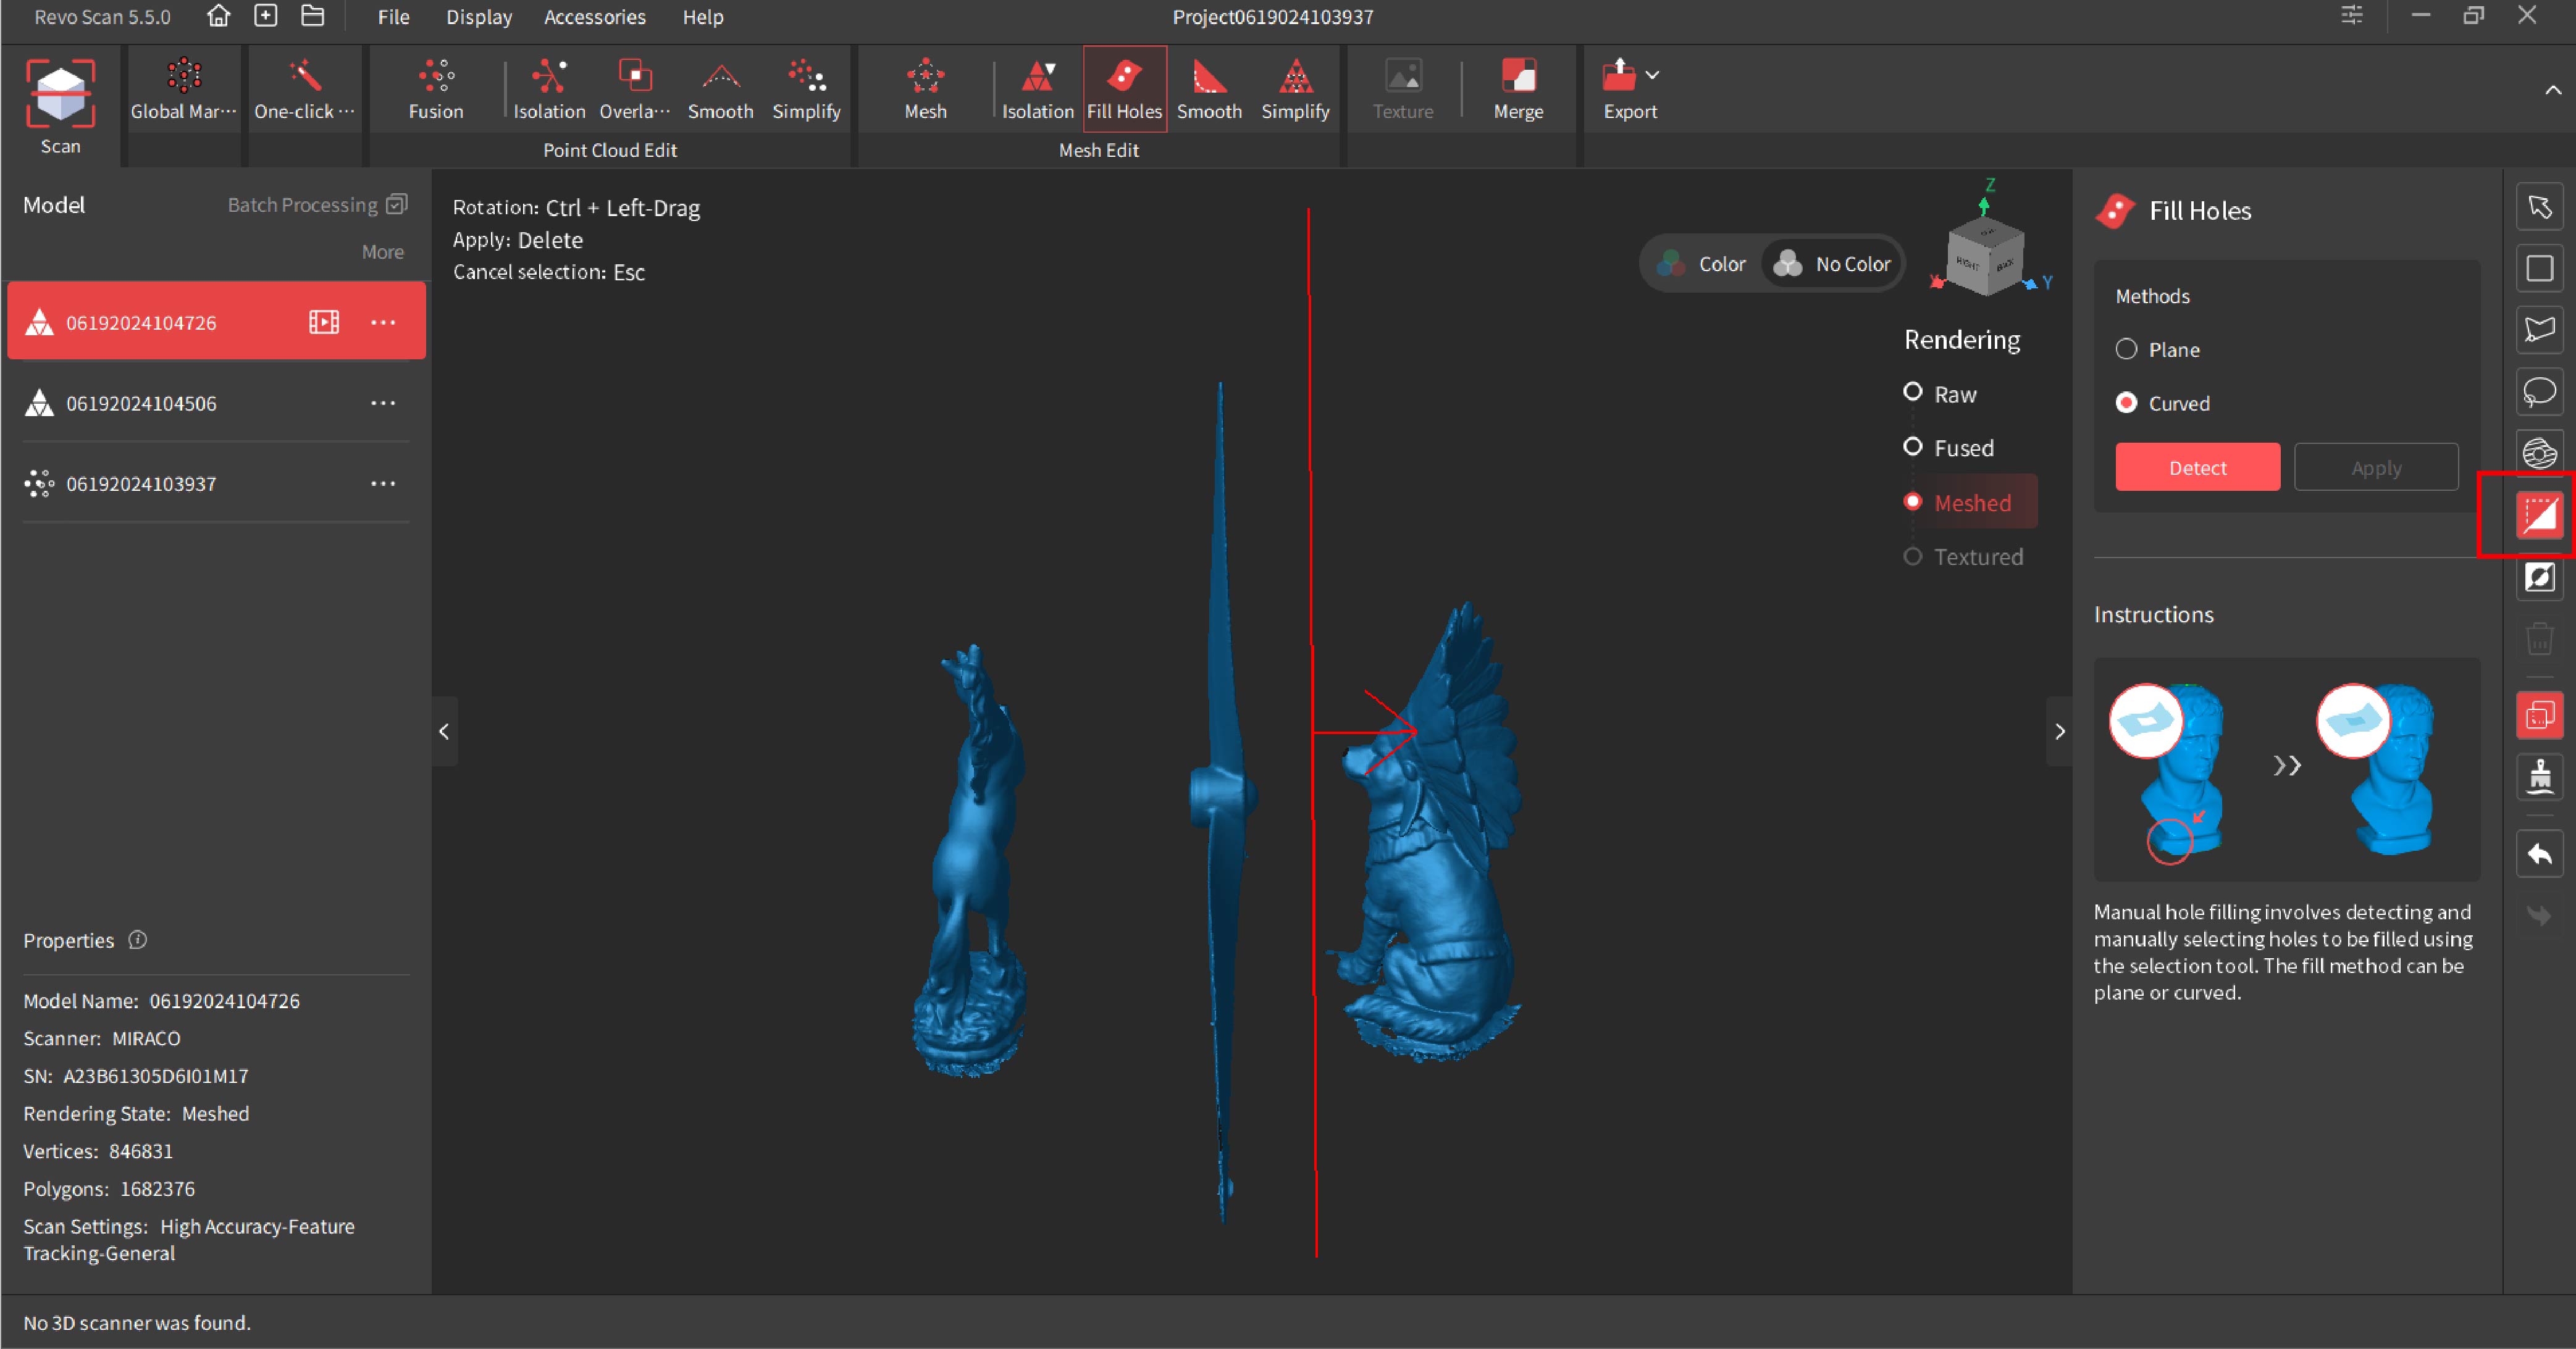
⑨ Mesh the model, and fill the holes using the "Fill Holes" tool.