¶ 1.About this Manual
Welcome to your Revopoint 3D scanner user manual! This manual provides INSPIRE 2 operation guide and instructions. Please read the manual before your first use to ensure you use this scanner correctly and safely. If needed, you can click on any topic in the navigation bar to quickly jump to that section.
Manual Download
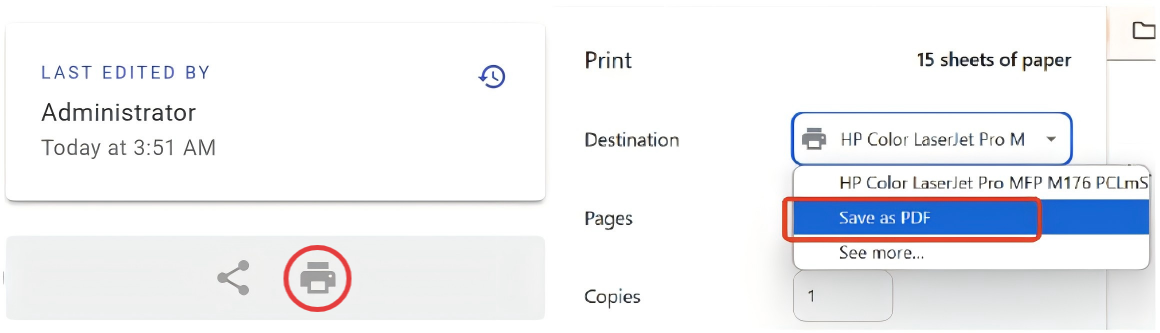
If you need a PDF manual, click the Print Format button at the bottom of the navigation bar on the left side of the manual, and select "Save as PDF" from the options.
¶ 2.About Product
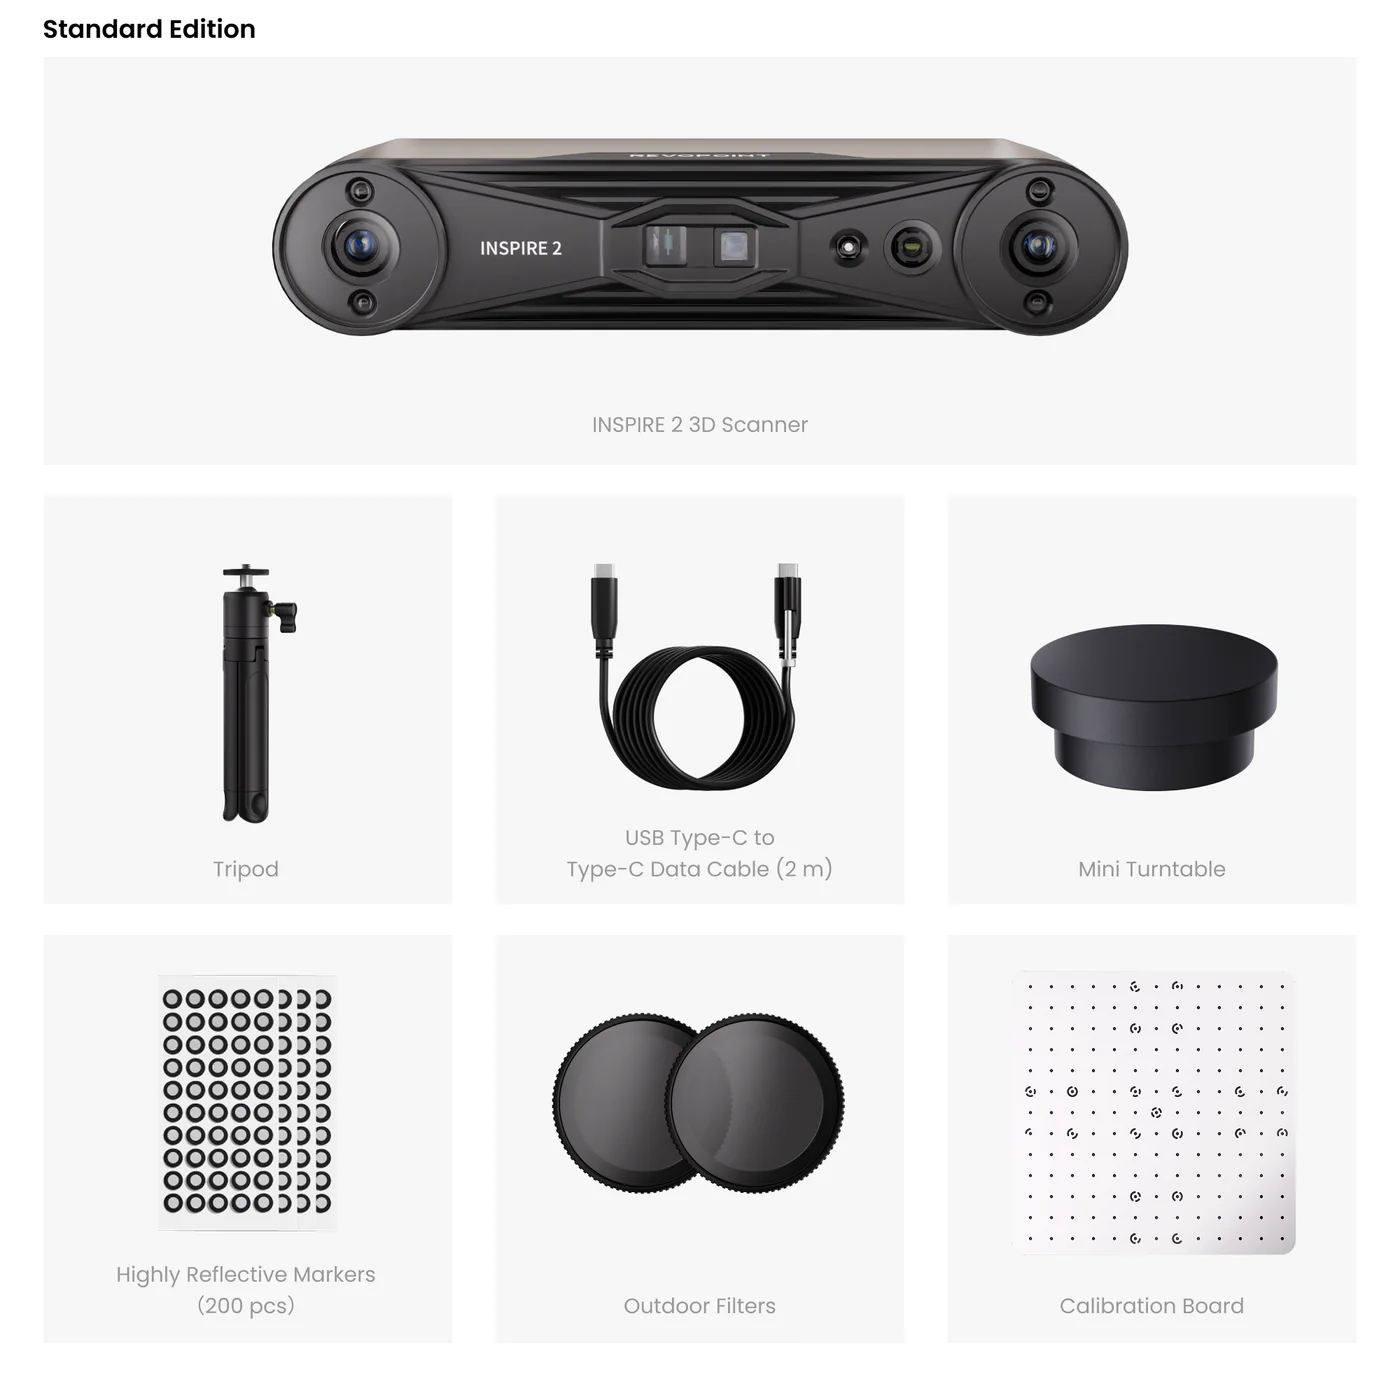
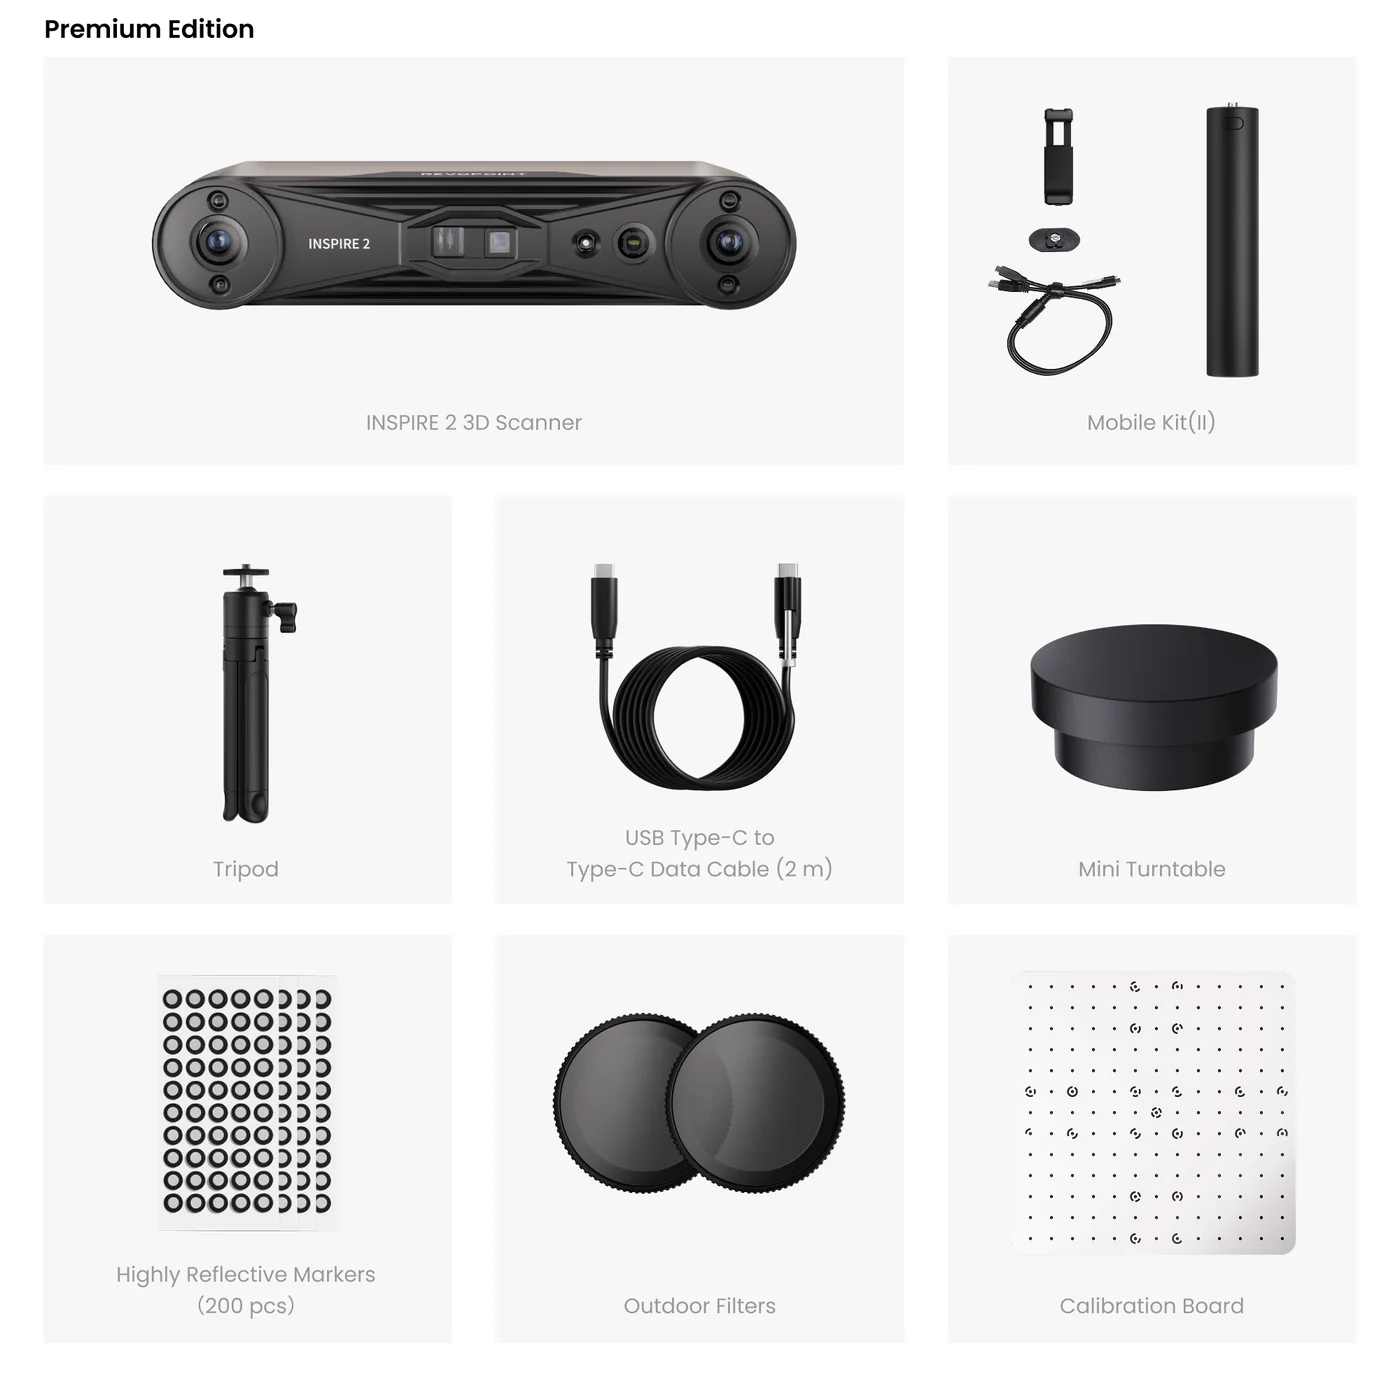
¶ 2.1 What's in the Box
※ It is recommended to use the official accessories provided in the package; otherwise, it may cause damage to the equipment.
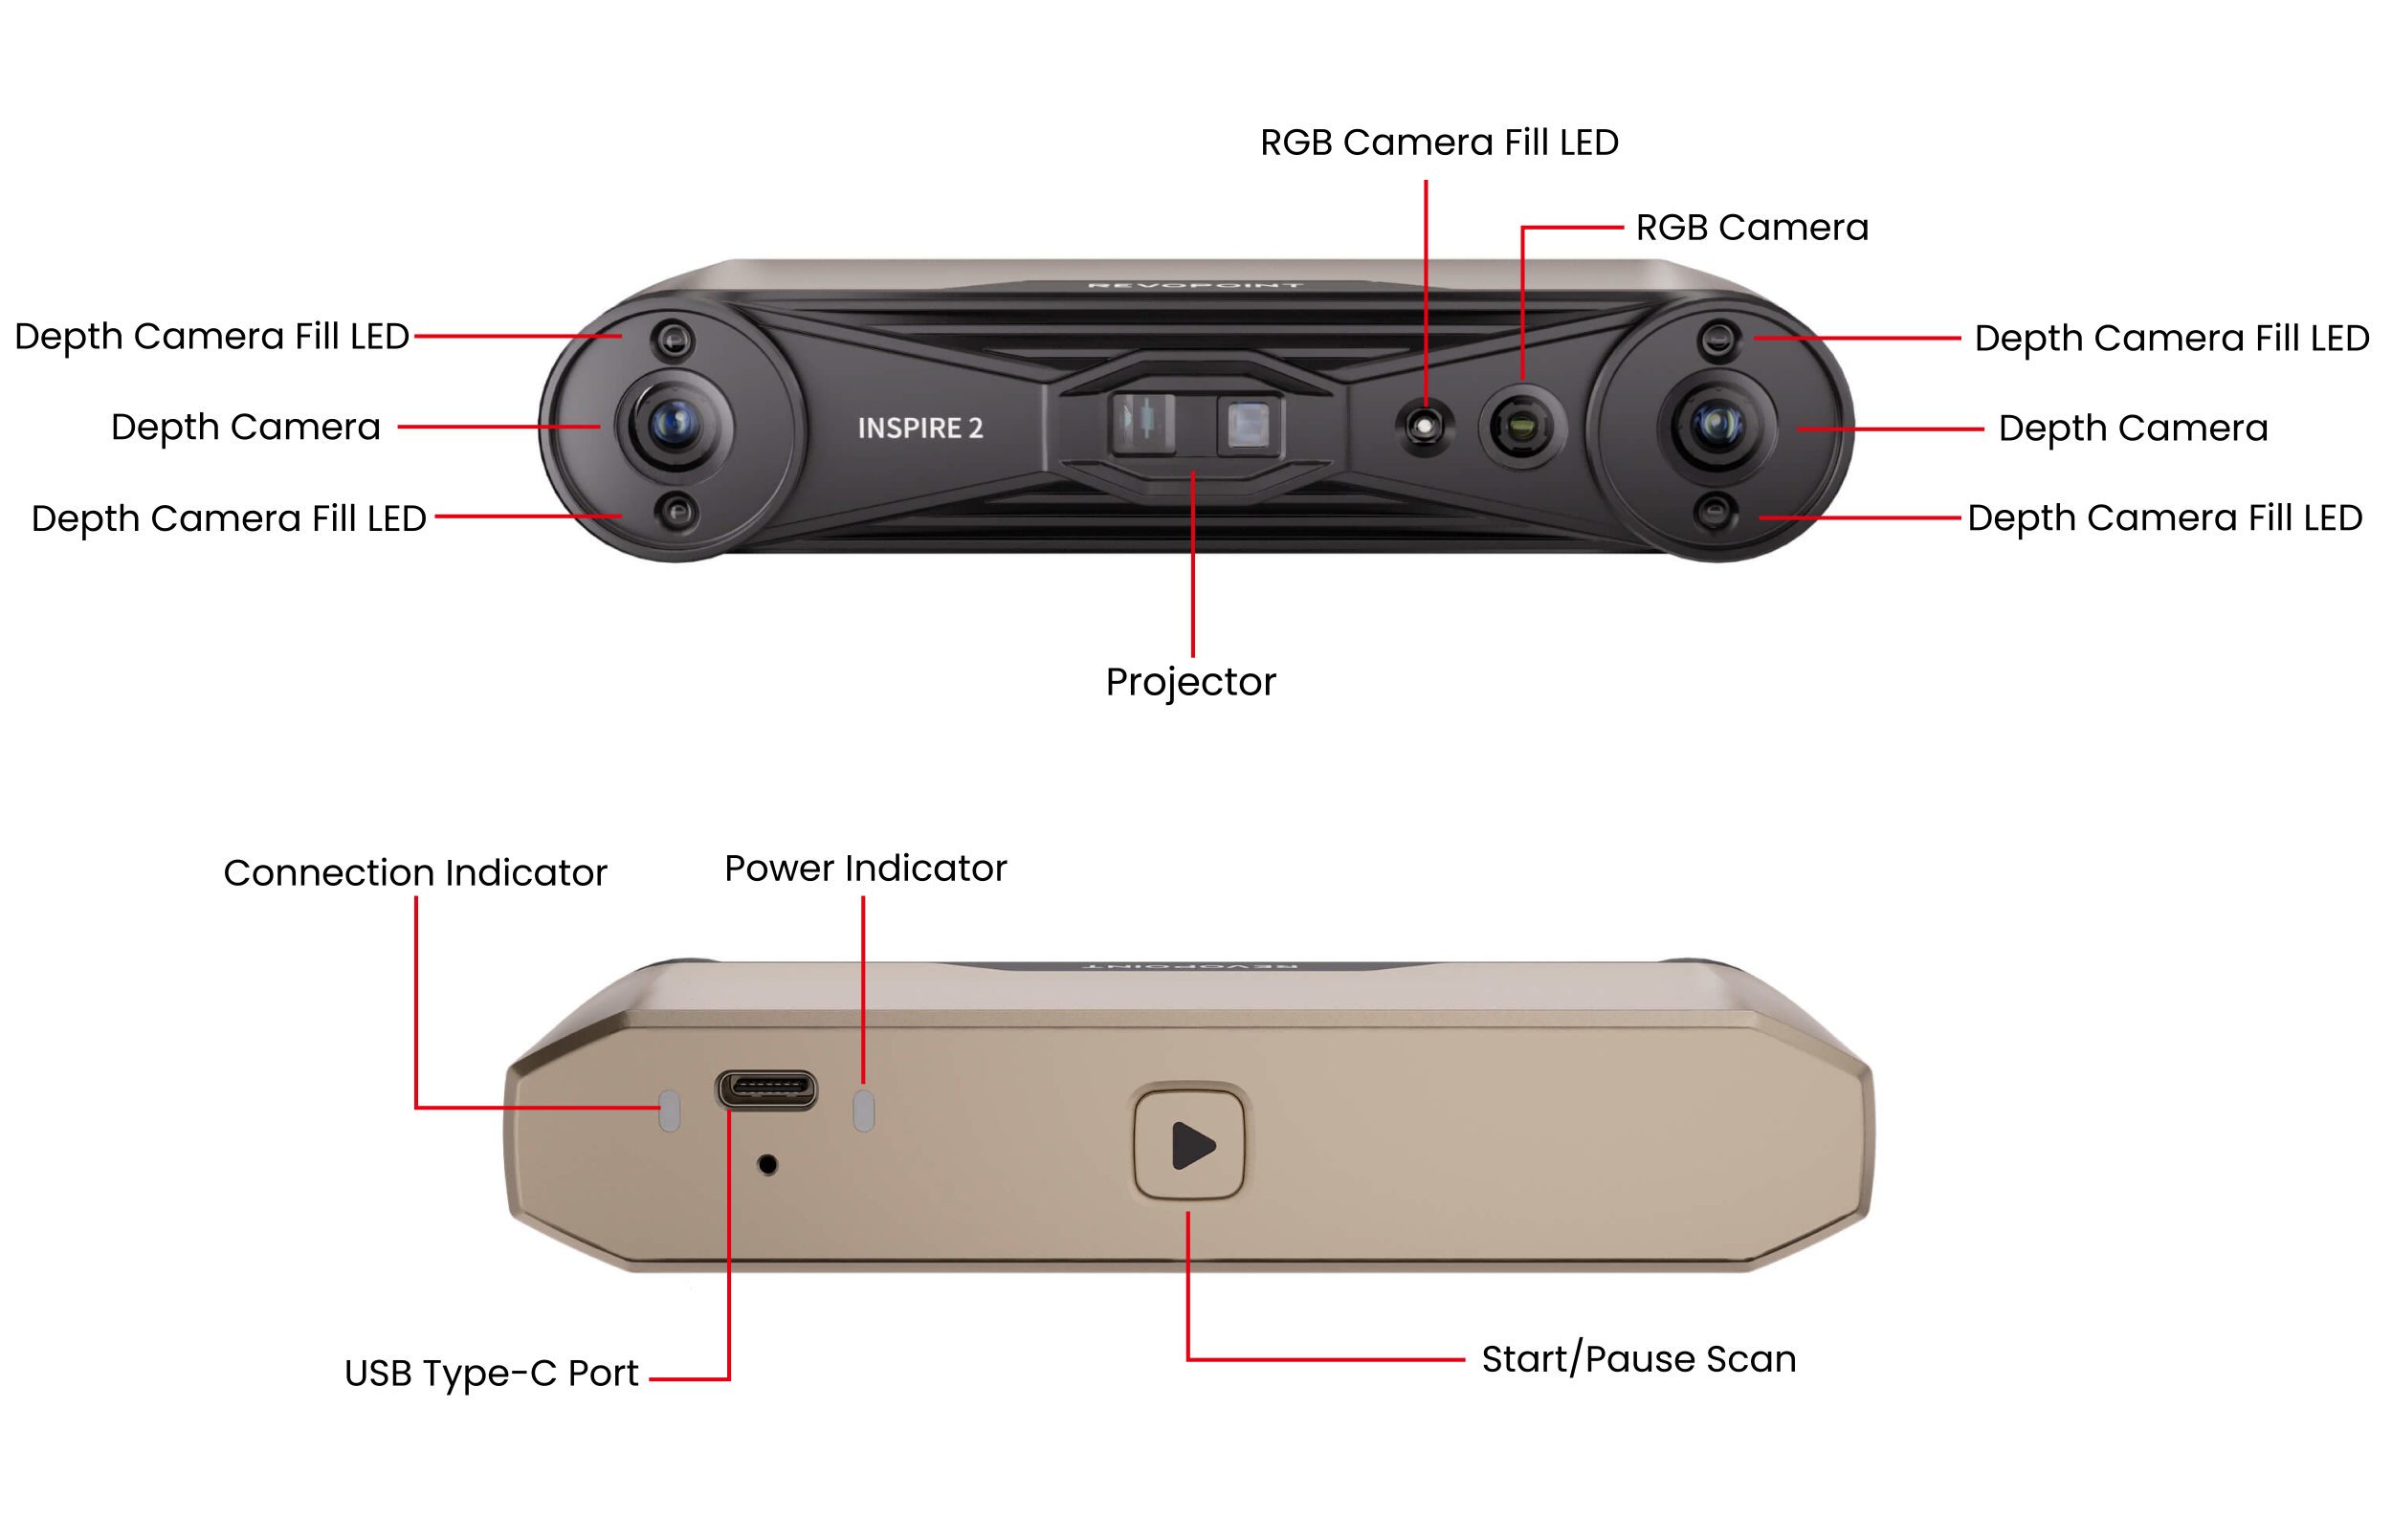
¶ 2.2 Product Profile
¶ 3.Software Download and Usage
INSPIRE 2 must be used with the Revo Metro (PC) or Revo Scan (Phone) version 5.4.2 or later software. Before use, go to download and install Revo Metro, or Revo Scan for Android/iOS.
|
Software |
Revo Metro (PC) |
Revo Scan (Phone) |
|
Official Download |
Support - Download |
|
|
Supported Scanning Modes |
Full Field / Parallel Line |
Full Field |
For detailed information on the software’s features and operations, please refer to the Revo Metro Software User Manual/ Revo Scan 5 Software User Manual.
¶ 4.Scanner Connection
¶ 4.1 Connecting INSPIRE 2 to a PC
To ensure the scanning effect, please connect the scanner directly to the PC and avoid using the docking station.
.png)
.png)
¶ 4.2 Connecting INSPIRE 2 to a Phone
.png)
.png)
Supported on PC and mirrored to a smartphone via Revo Mirror for preview and control.
① Visit the Revopoint official website and go to “Support - Download” menu to download and install Revo Mirror for both desktop and mobile.
② Mount the Mobile Kit (Phone Holder, Power Bank handle, Quick Release Plate) onto the scanner. Connect the Power Bank Handle to the scanner with the 2-in-1 Mobile cable.
③ Ensure both the computer and phone are connected to the network named “INSPIRE 2-REVO-XXXXXXXX.” Open Revo Metro, wait for the scanner to connect and enter the scanning page, then click the mirroring button.
④ Tap the detected device to be mirrored in the mobile Revo Mirror app.
⑤ Follow the prompt on the PC to enter the PIN code to complete the initial pairing. Then, click “Enter Screen Mirror Mode” to control the scanning process.
For detailed instructions on the software and screen casting, please refer to the Revo Mirror User Manual.
¶ 5. Scanner Calibration
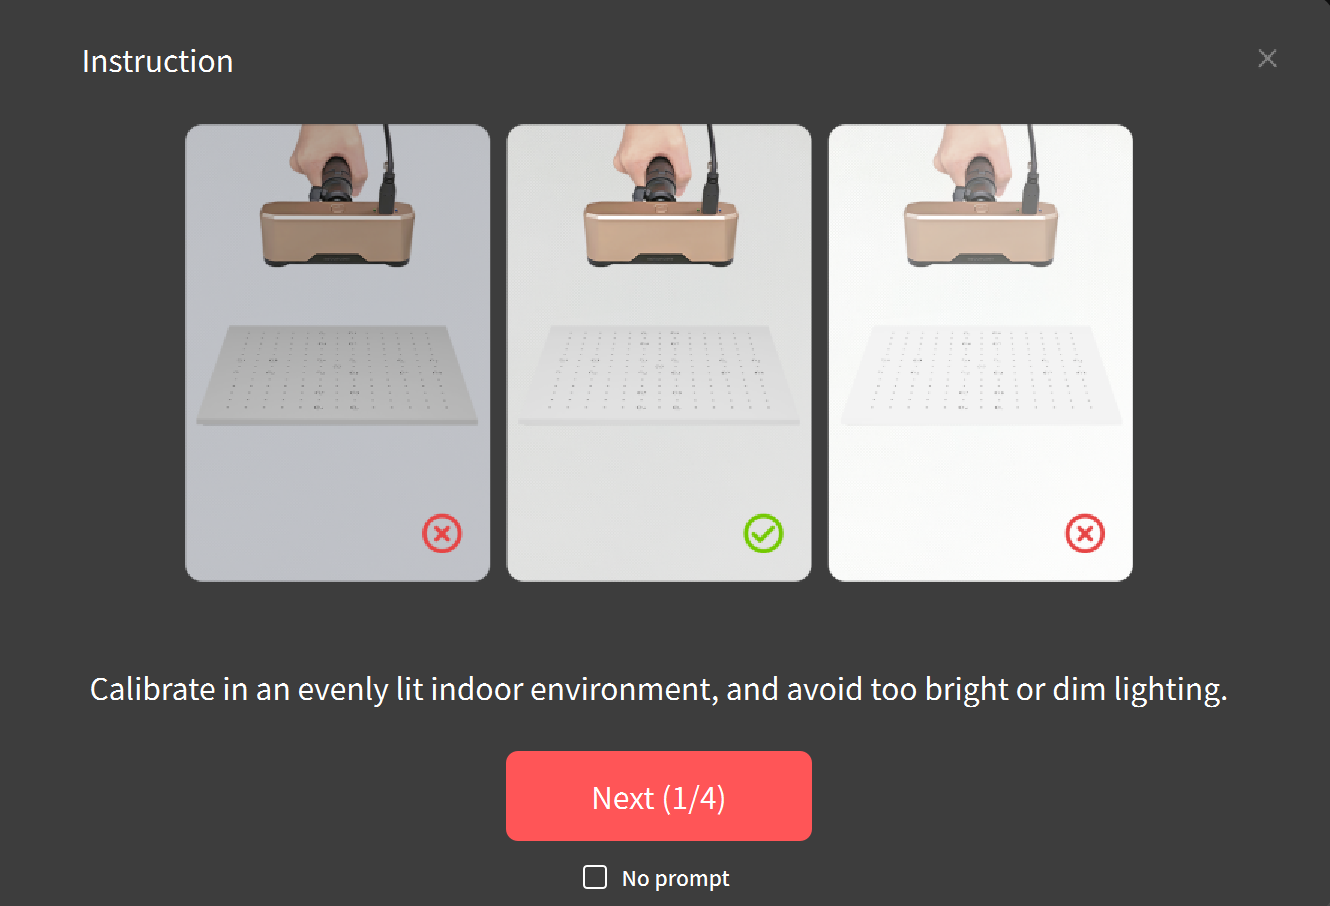
¶ Preparation
① Connect the Scanner to the computer using a USB data cable, then open Revo Metro on the PC.
② Place the Calibration Board and Click “Calibration” in Revo Metro.
③ Create an evenly lit environment. Avoid too bright or dim lighting.
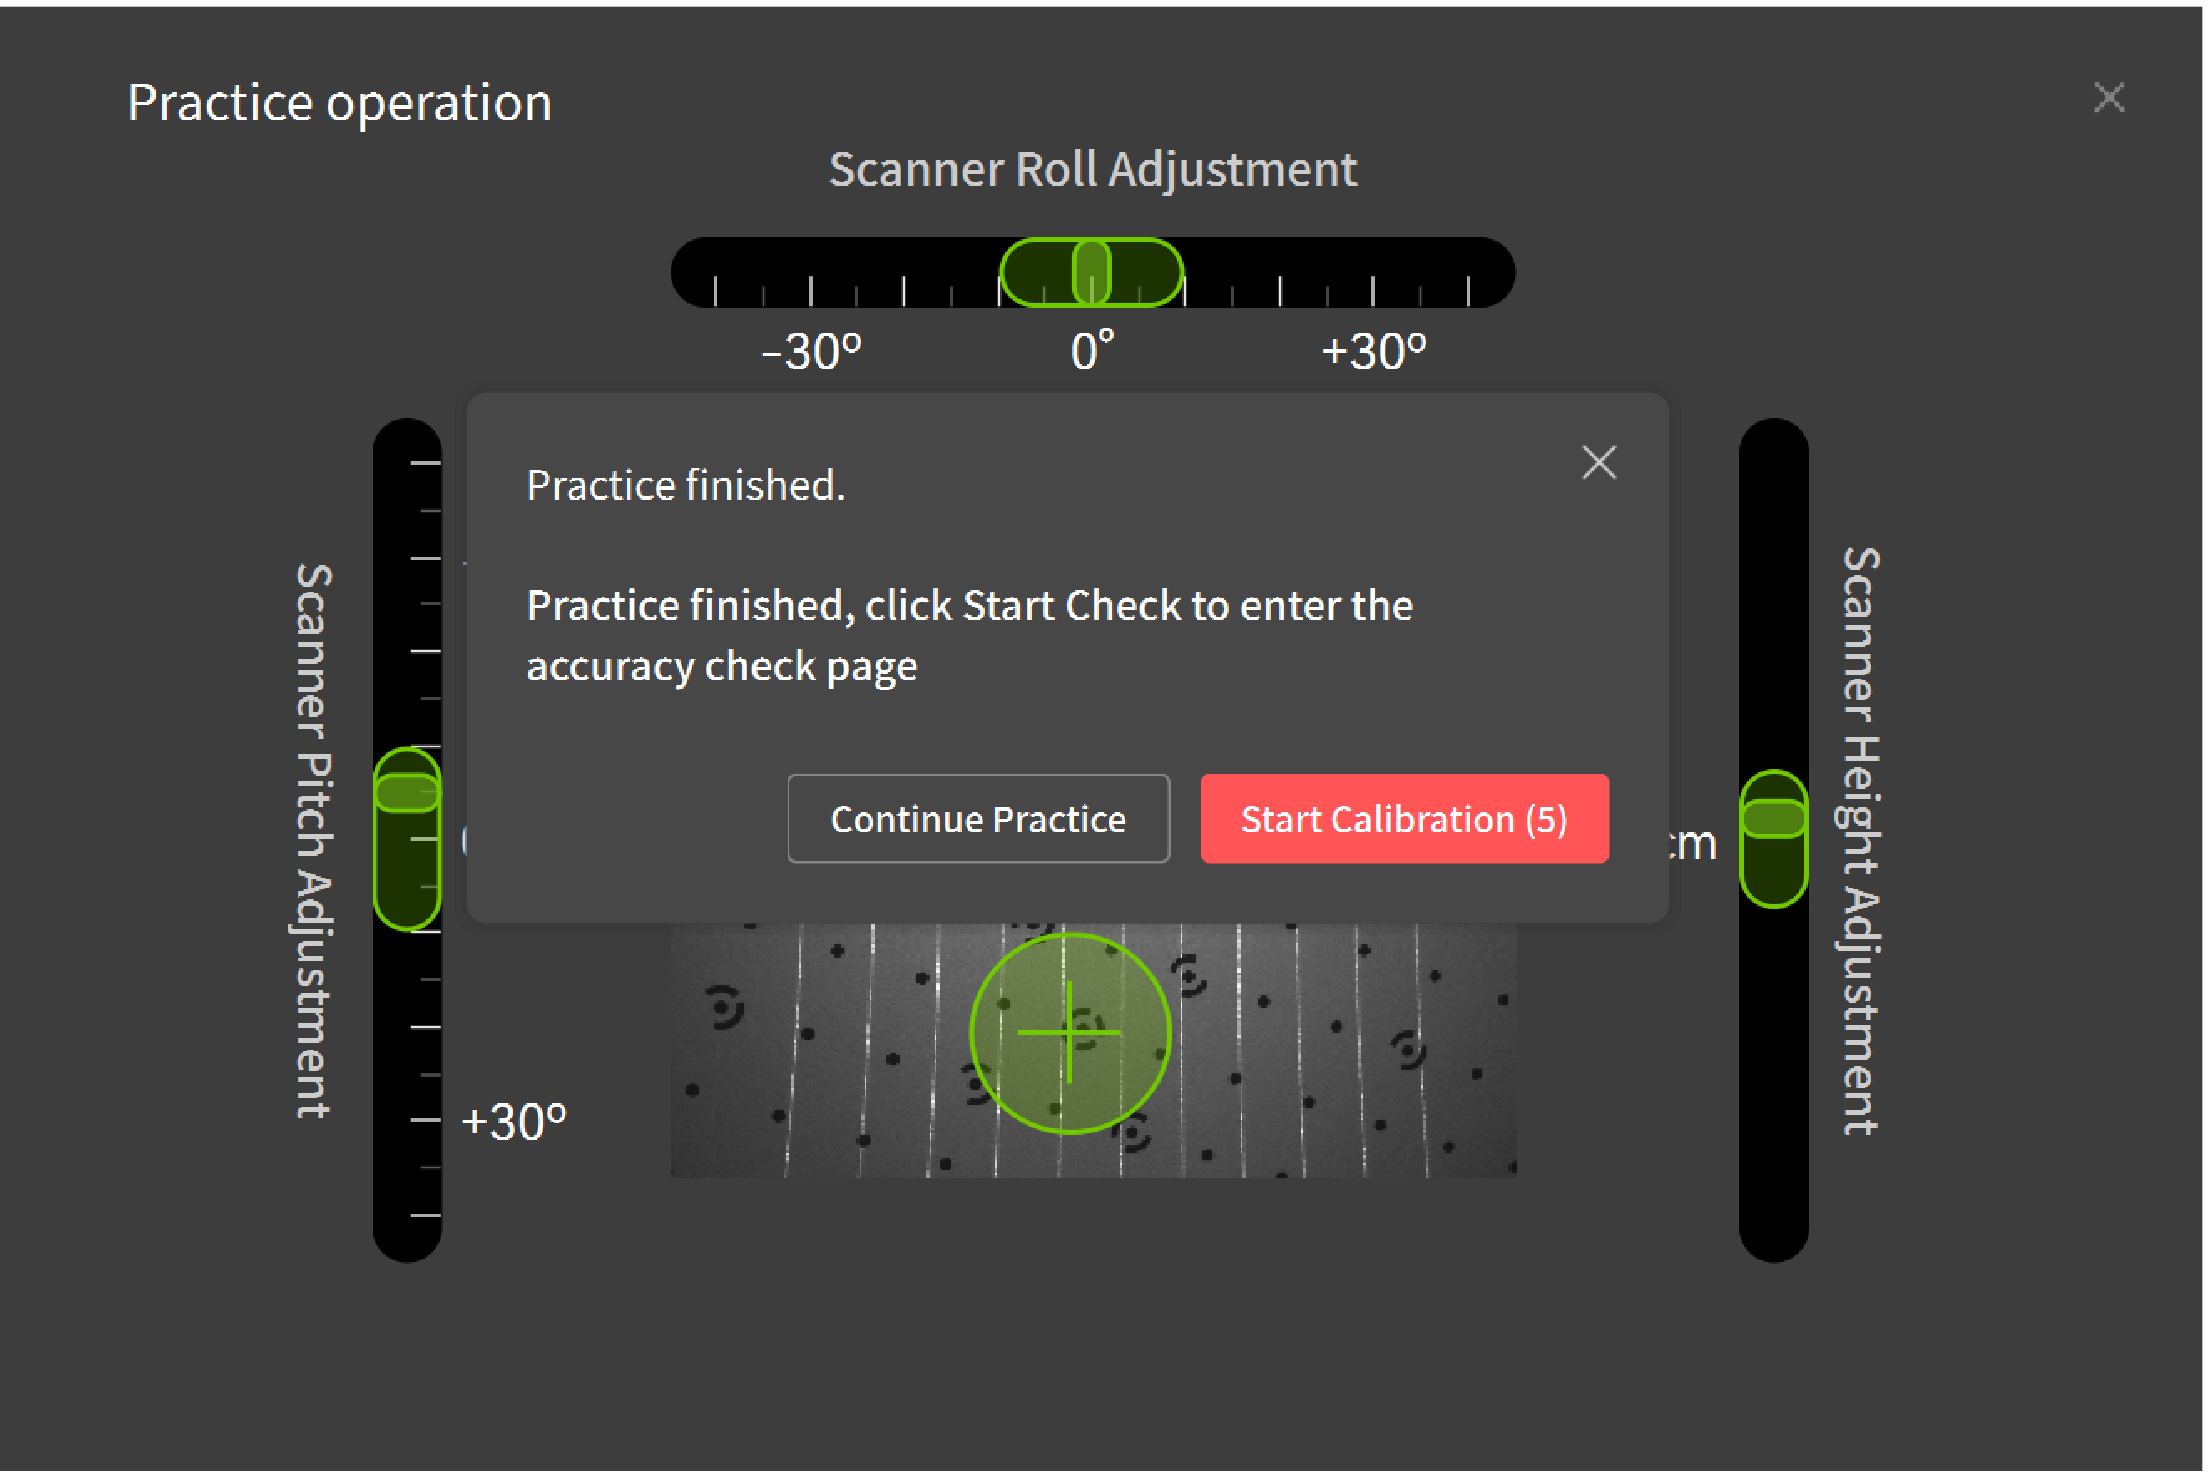
④ Follow the instructions to practice.
⑤ You’ll enter the accuracy check page after the practice and decide whether to calibrate the scanner according to the prompt.
¶ Dual-camera Calibration
① Follow the instructions on the left to adjust the scanner’s pitch, roll, and height.
② Follow the progress bar to collect data from the horizontal, left, right, front, and back.
③ Once the calibration accuracy meets the requirement, the system automatically proceeds to the light-plane calibration step.
¶ Light Plane Calibration
① Follow the instructions on the left to adjust the scanner’s pitch, roll, and height.
② Follow the progress bar to collect data from the horizontal, left, right, front, and back.
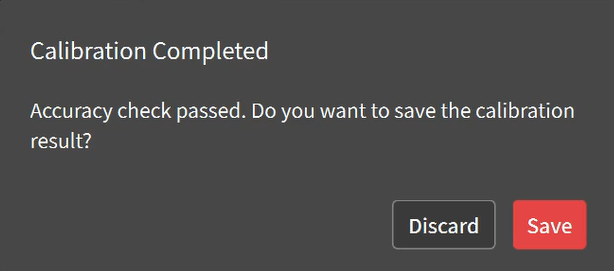
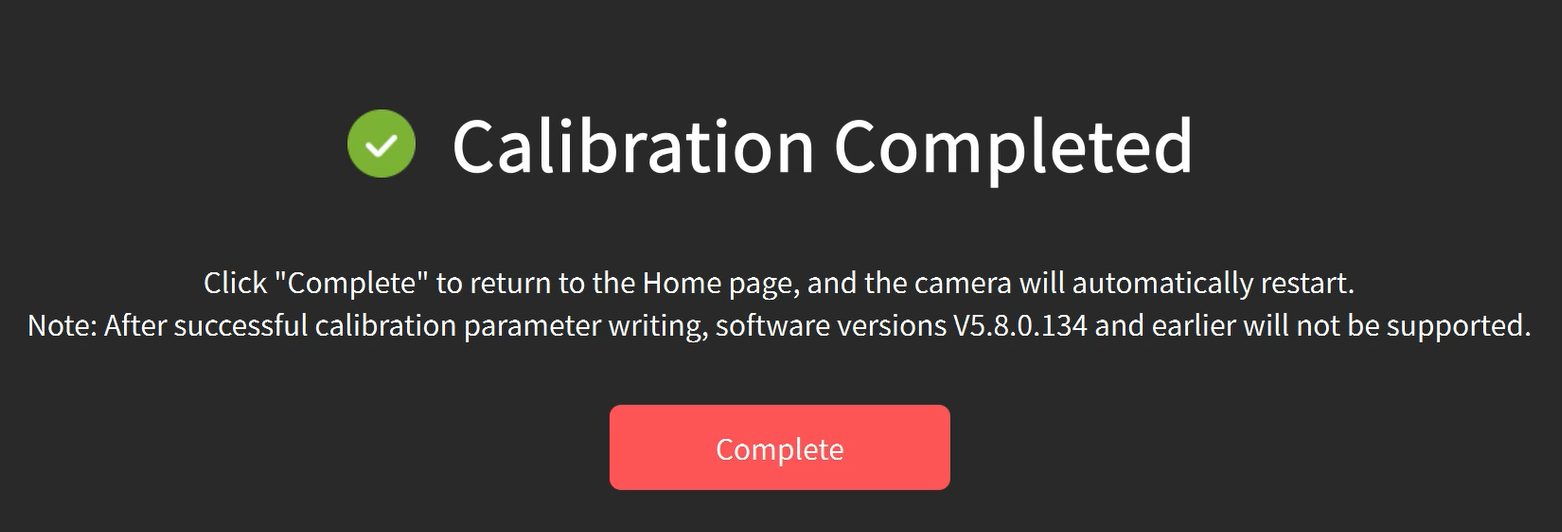
③ Save the calibration result when calibration is completed.
④ Click Complete to return to the homepage, and the scanner will reboot.
¶ 6. First Scan
INSPIRE 2 offers two scanning modes, as explained below.
Full Field: High scanning speed for rapid point cloud capture of common objects, supported on PC and mobile apps.
Parallel Lines: Designed for precision scanning, it handles reflective metal and black objects without spray coating. Supported on PC and mirrored to a smartphone via Revo Mirror for preview and control.
¶ 6.1 Full Field Scan
To help you get familiar with the scanning process, this section demonstrates a complete example of scanning a sample bust in Full Field mode. Beginners can follow the steps below to practice in real time.
¶ 6.1.1 Preparation Before Scanning
¶ Scanner Connection
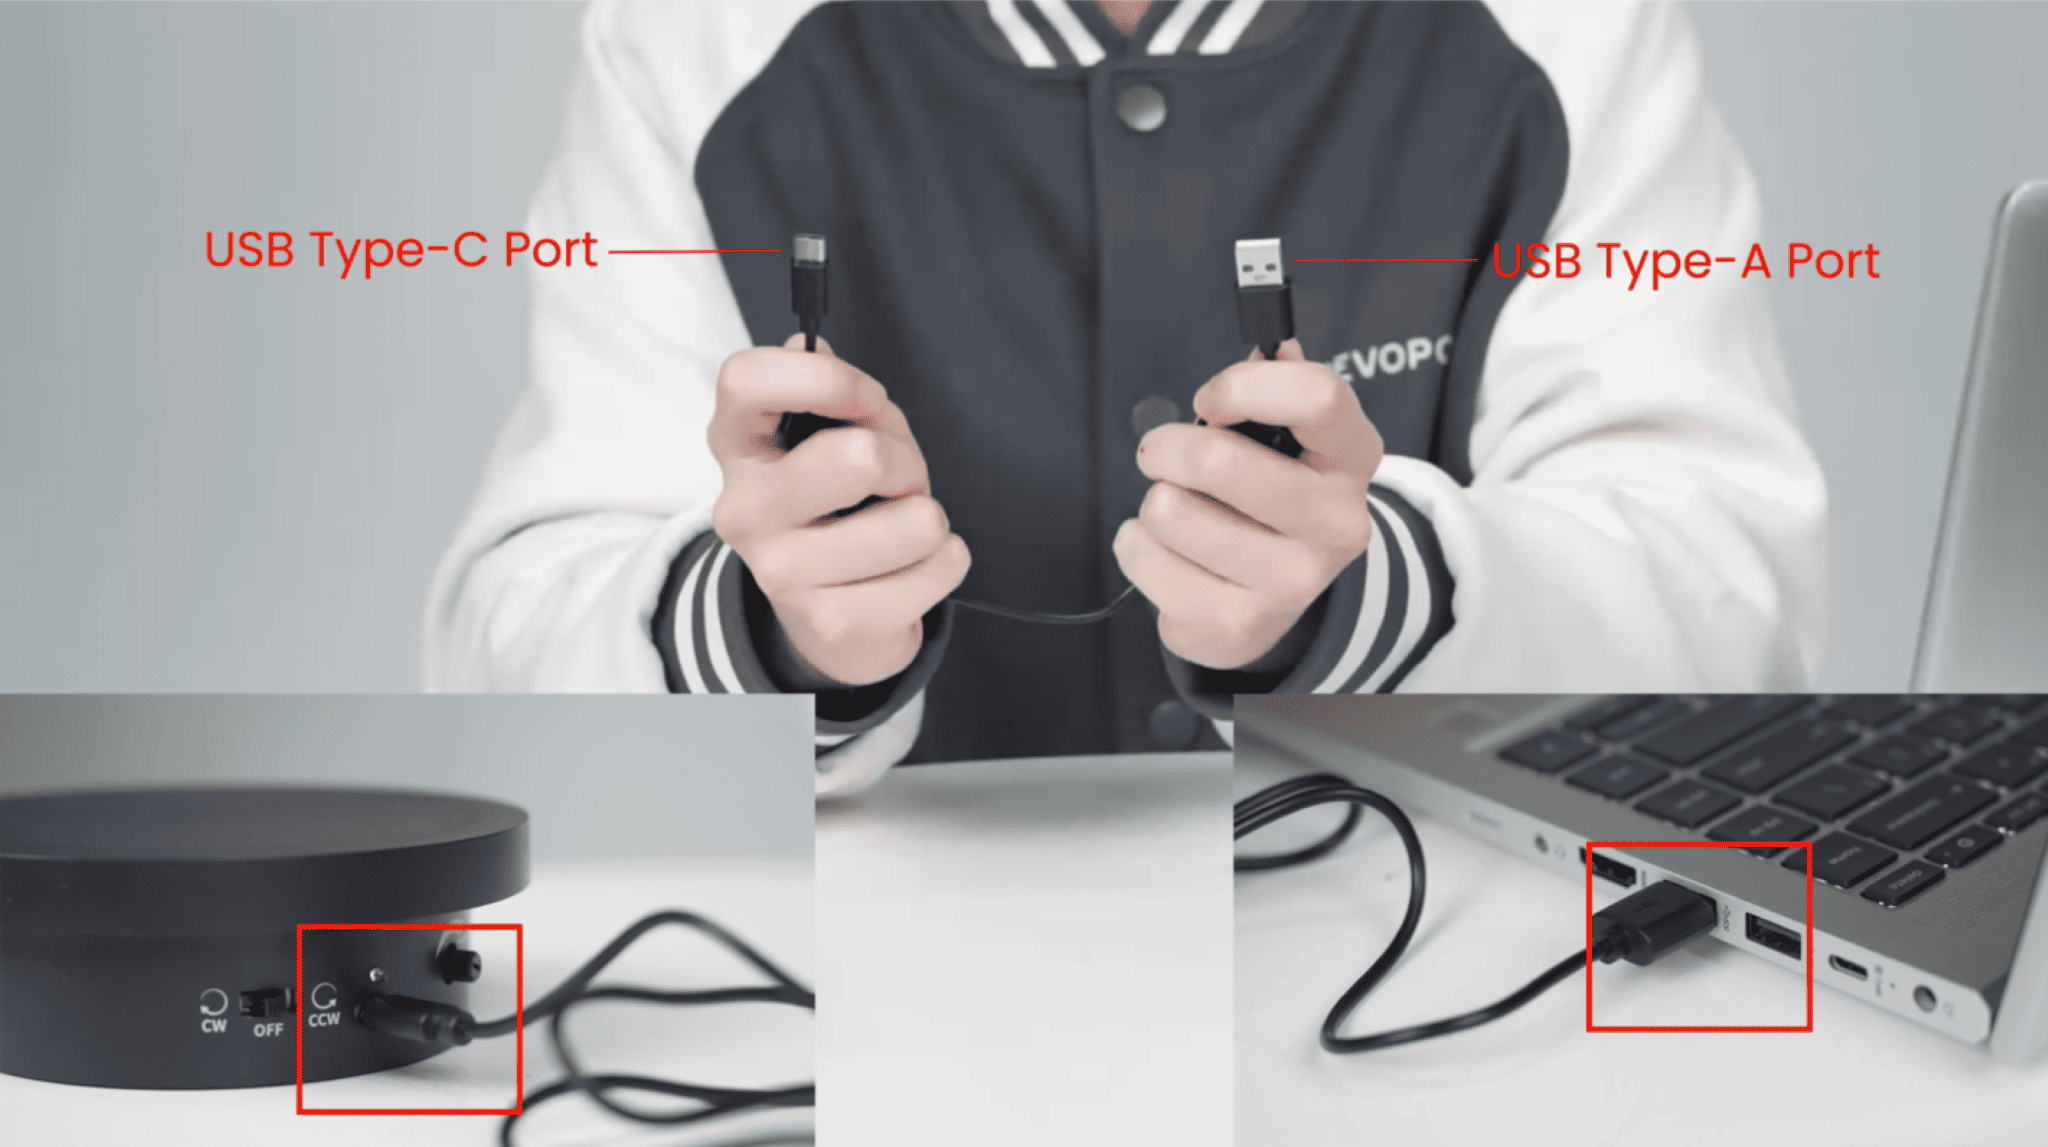
① Connect the scanner to your PC using the USB Type-C to Type-C cable. (Insert the end with a screw into the scanner’s rear port and tighten it securely, then insert the other end into the PC.)
② Open Revo Metro and wait for the scanner to connect successfully.

¶ Set Up the Scanning Environment
① Prepare the workspace: Ensure the scanning area is clean and free of clutter.
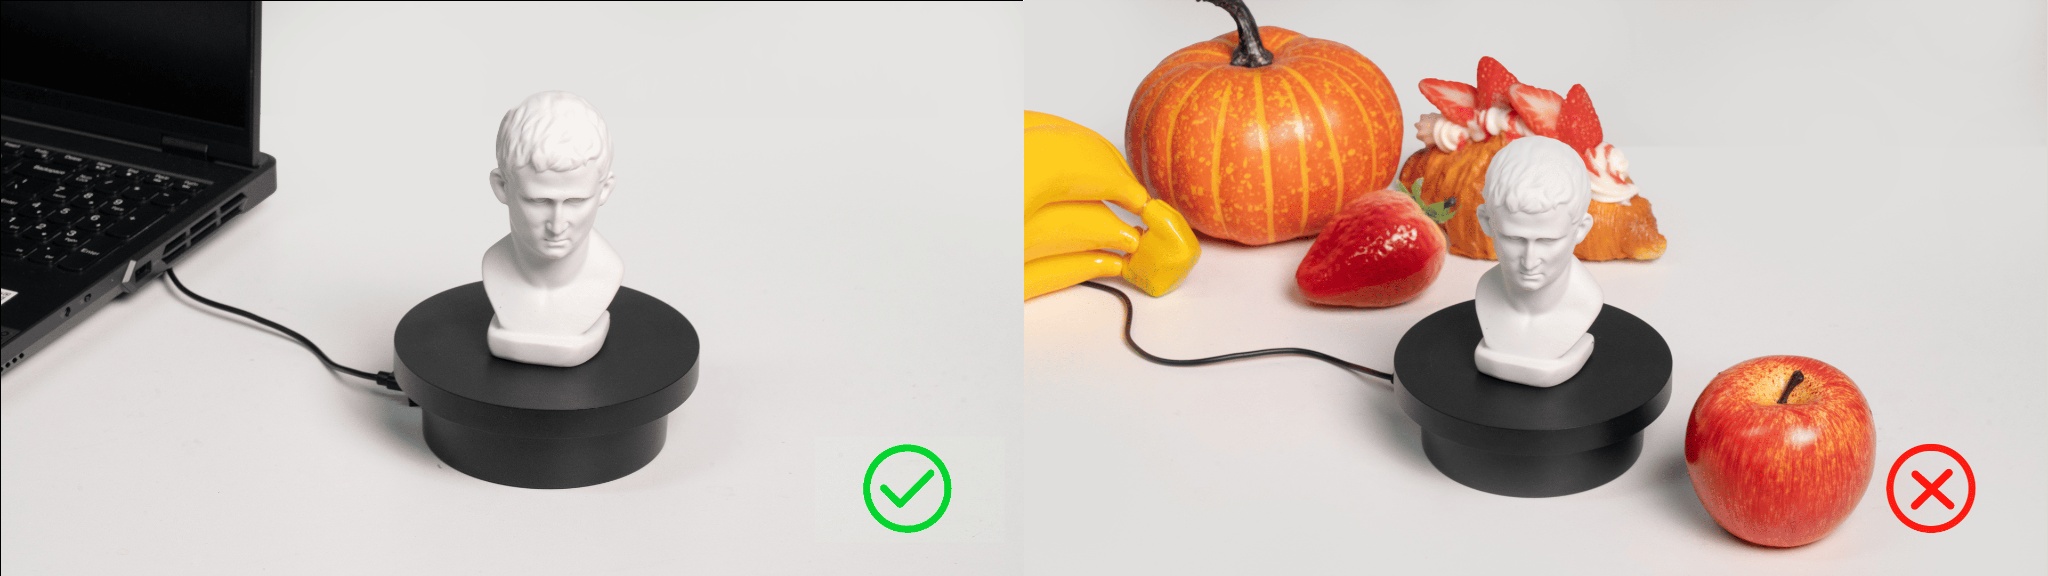
② Connect the accessories: Use the turntable cable to connect the turntable to the PC port or power outlet, adjusting it to an appropriate rotation speed.
③ Check the object: Position the sample bust on the turntable, ensuring its surface is shadow-free.
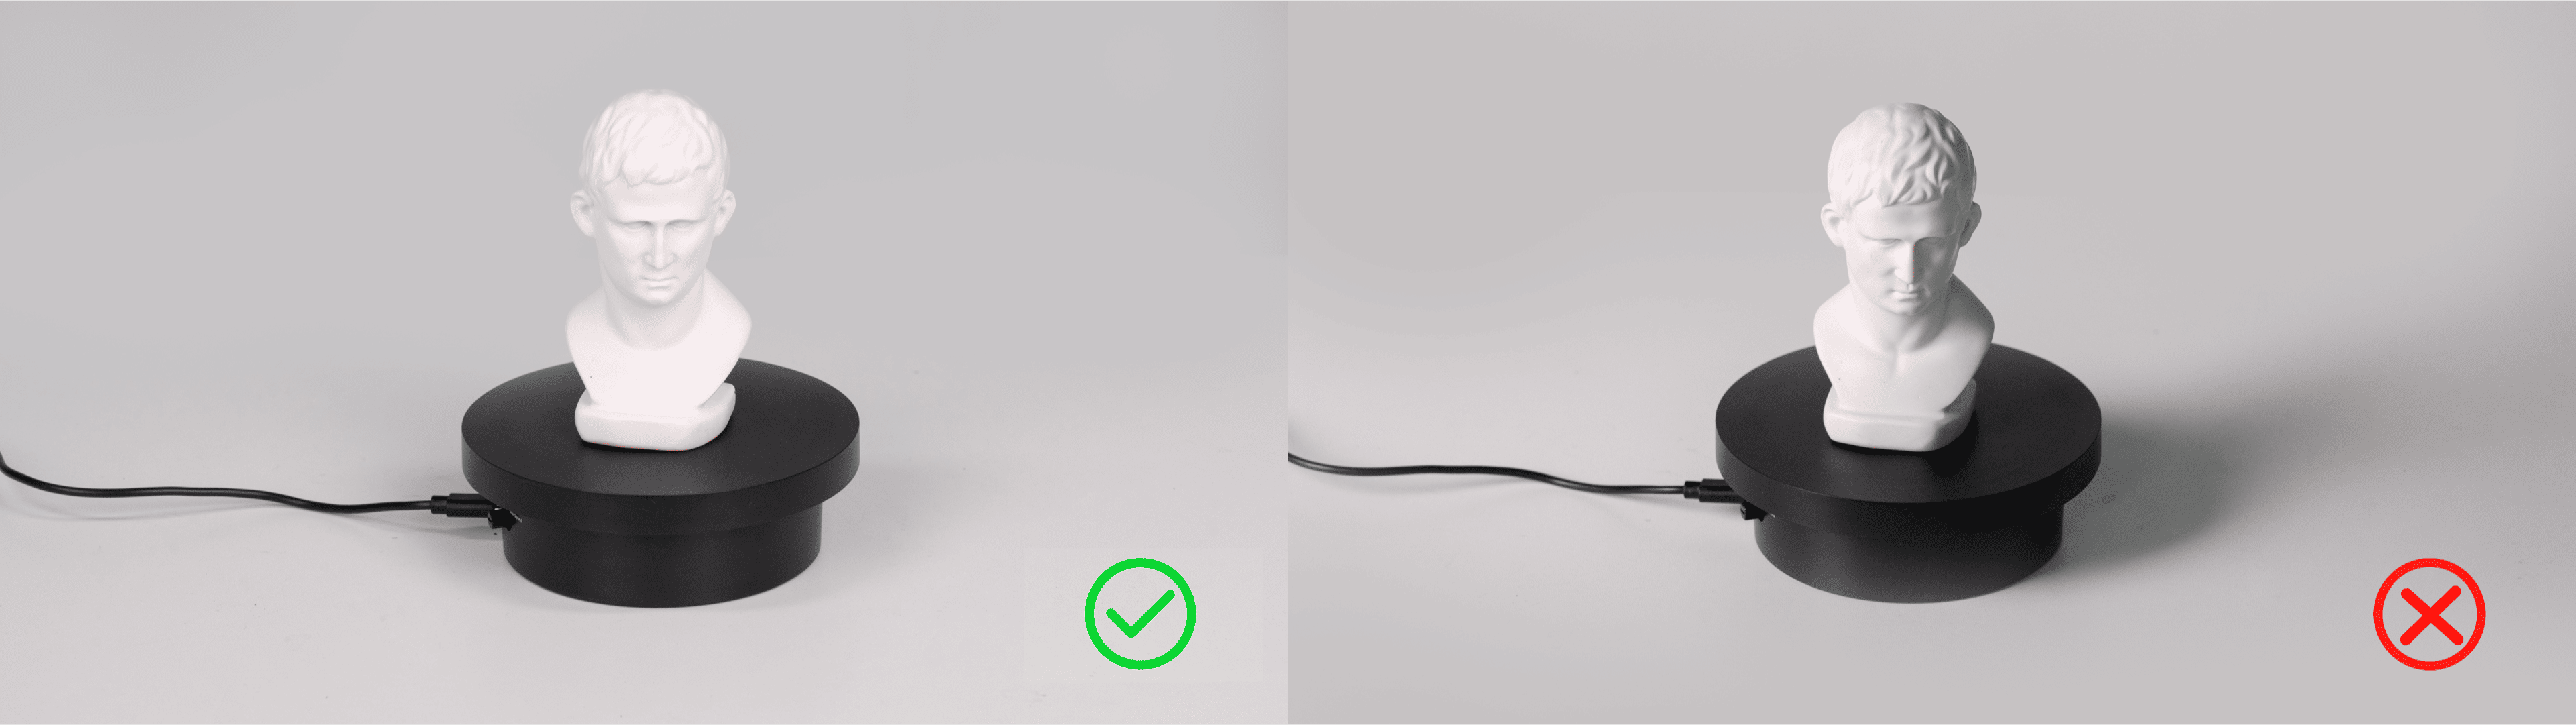
④ Adjust the scanner's height and angle to ensure the camera can fully capture the object.

¶ 6.1.2 Start Scan
¶ Create New Project
Click “New Project” on the software home page. Name the file, choose the location to store the file (or use the default location), click “New,” and enter the scanning interface.

¶ Scan Settings
① Select “Feature Scan”.
② Select “Full Field” in Scan Mode.
③ Select “High Accuracy” > “General” in Scan Settings.
④ View the model’s position through the camera preview window on the left, and ensure the model is within the camera’s field of view.
⑤ Adjust the distance between the scanner and the sample bust to ensure that the color on the distance indicator bar is displayed in green.
⑥ Adjust the Depth Camera exposure until the object surface in the preview window appears mostly gray, with minimal red or blue areas.
¶ Scan Controls
① After setting the above parameters, click the "Start" button to begin the scanning.

② During scanning, pause to review progress in the model display area. If the model appears incomplete (as shown in the example), click "Start" again to continue.
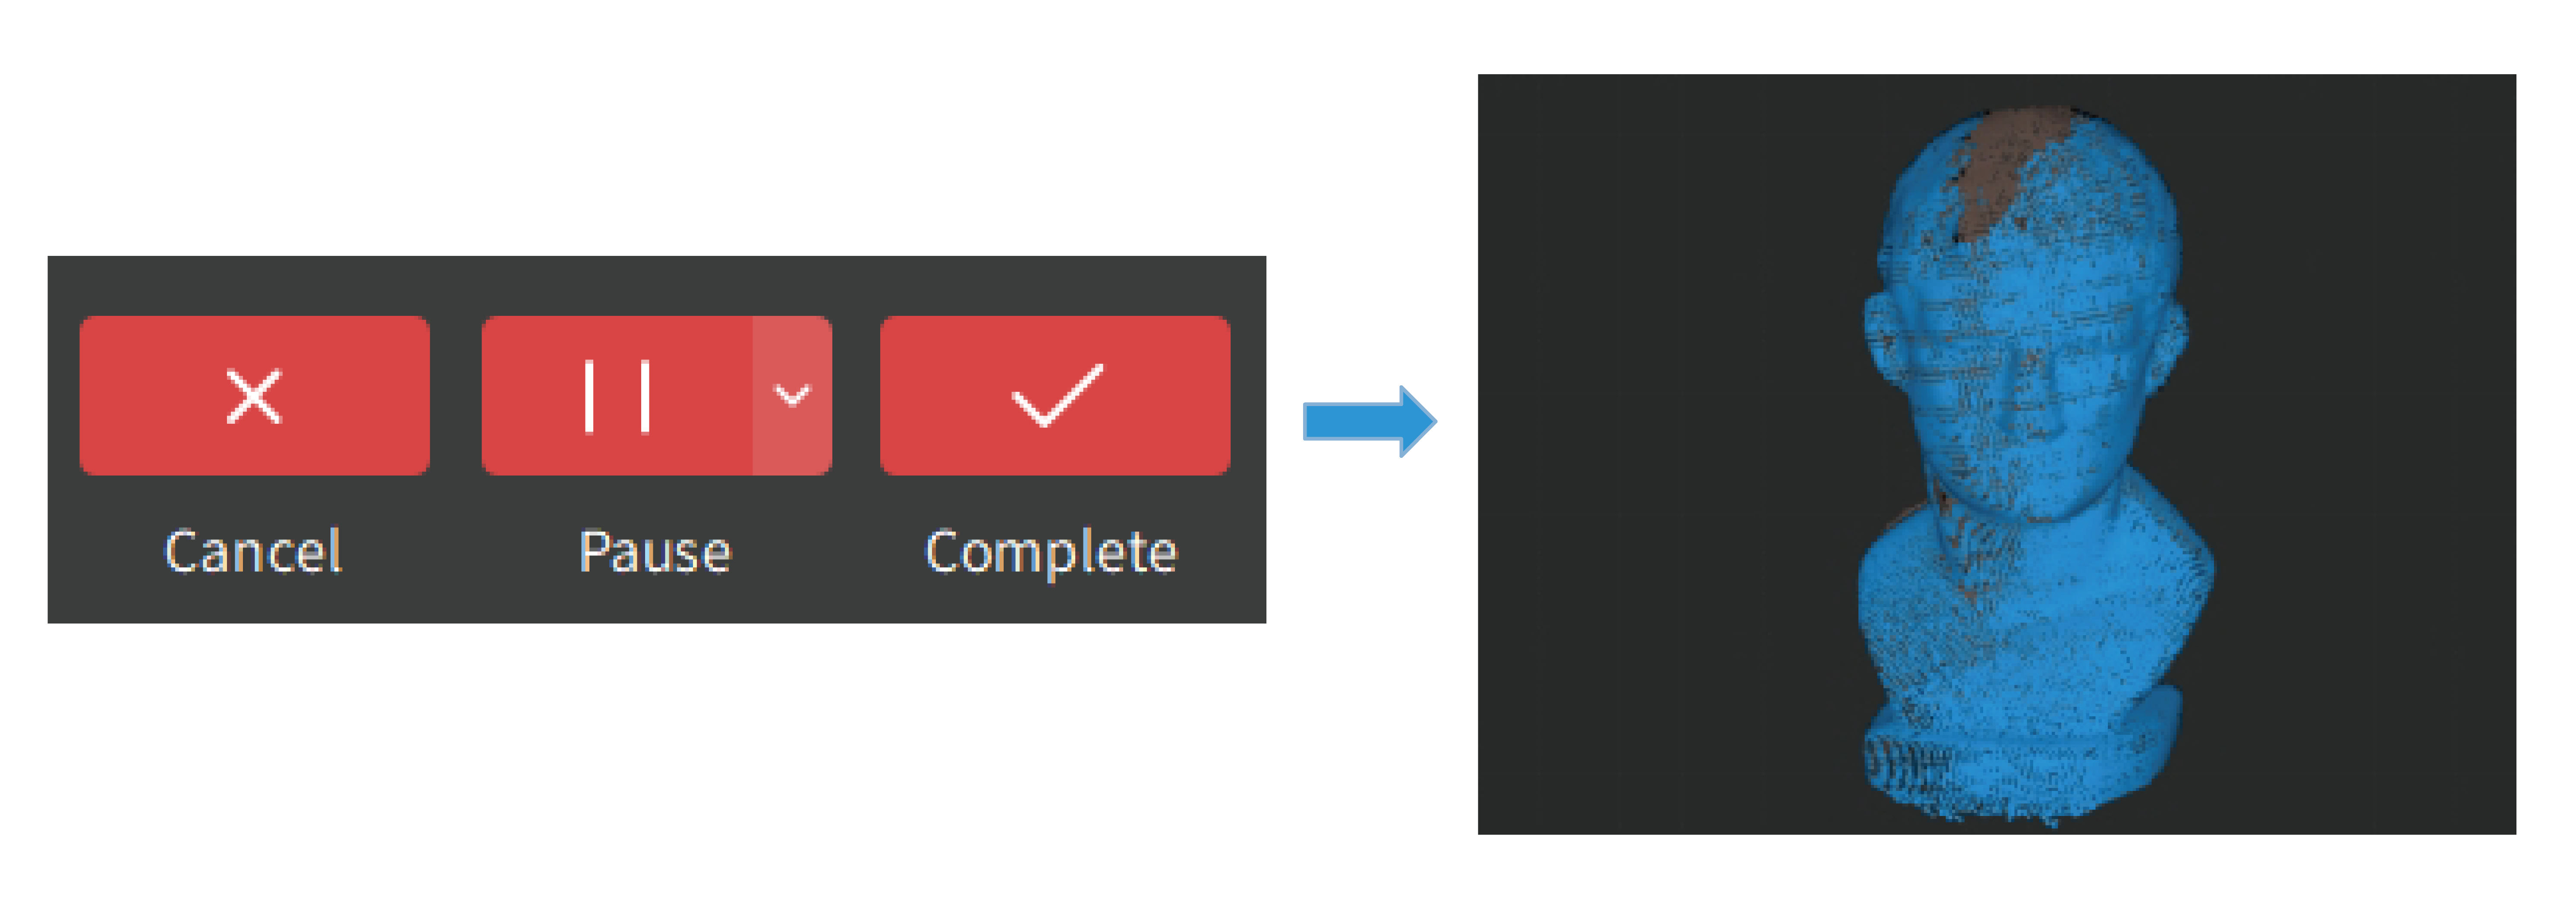
③ Once the model’s surface data has been fully captured, click “Complete” to complete the scan.

¶ 6.1.3 Model Editing
In the model editing area, click “One-click Editing” > “Apply” to automatically complete model editing.

¶ 6.1.4 Model Export
Click "Export" and select the formats to export.

¶ 6.2 Parallel Lines Scan
To help you get familiar with the scanning process, this section demonstrates a complete example of scanning a small metal part in Parallel Lines mode. Beginners can follow the steps below to practice in real time.
¶ 6.2.1 Preparation Before Scanning
¶ Scanner Connection
① Connect the scanner to your PC using the USB Type-C to Type-C cable. (Insert the end with a screw into the scanner’s rear port and tighten it securely, then insert the other end into the PC.)
② Open Revo Metro and wait for the scanner to connect successfully.
¶ Set Up the Scanning Environment
① Prepare the workspace: Ensure the scanning area is clean and free of clutter.
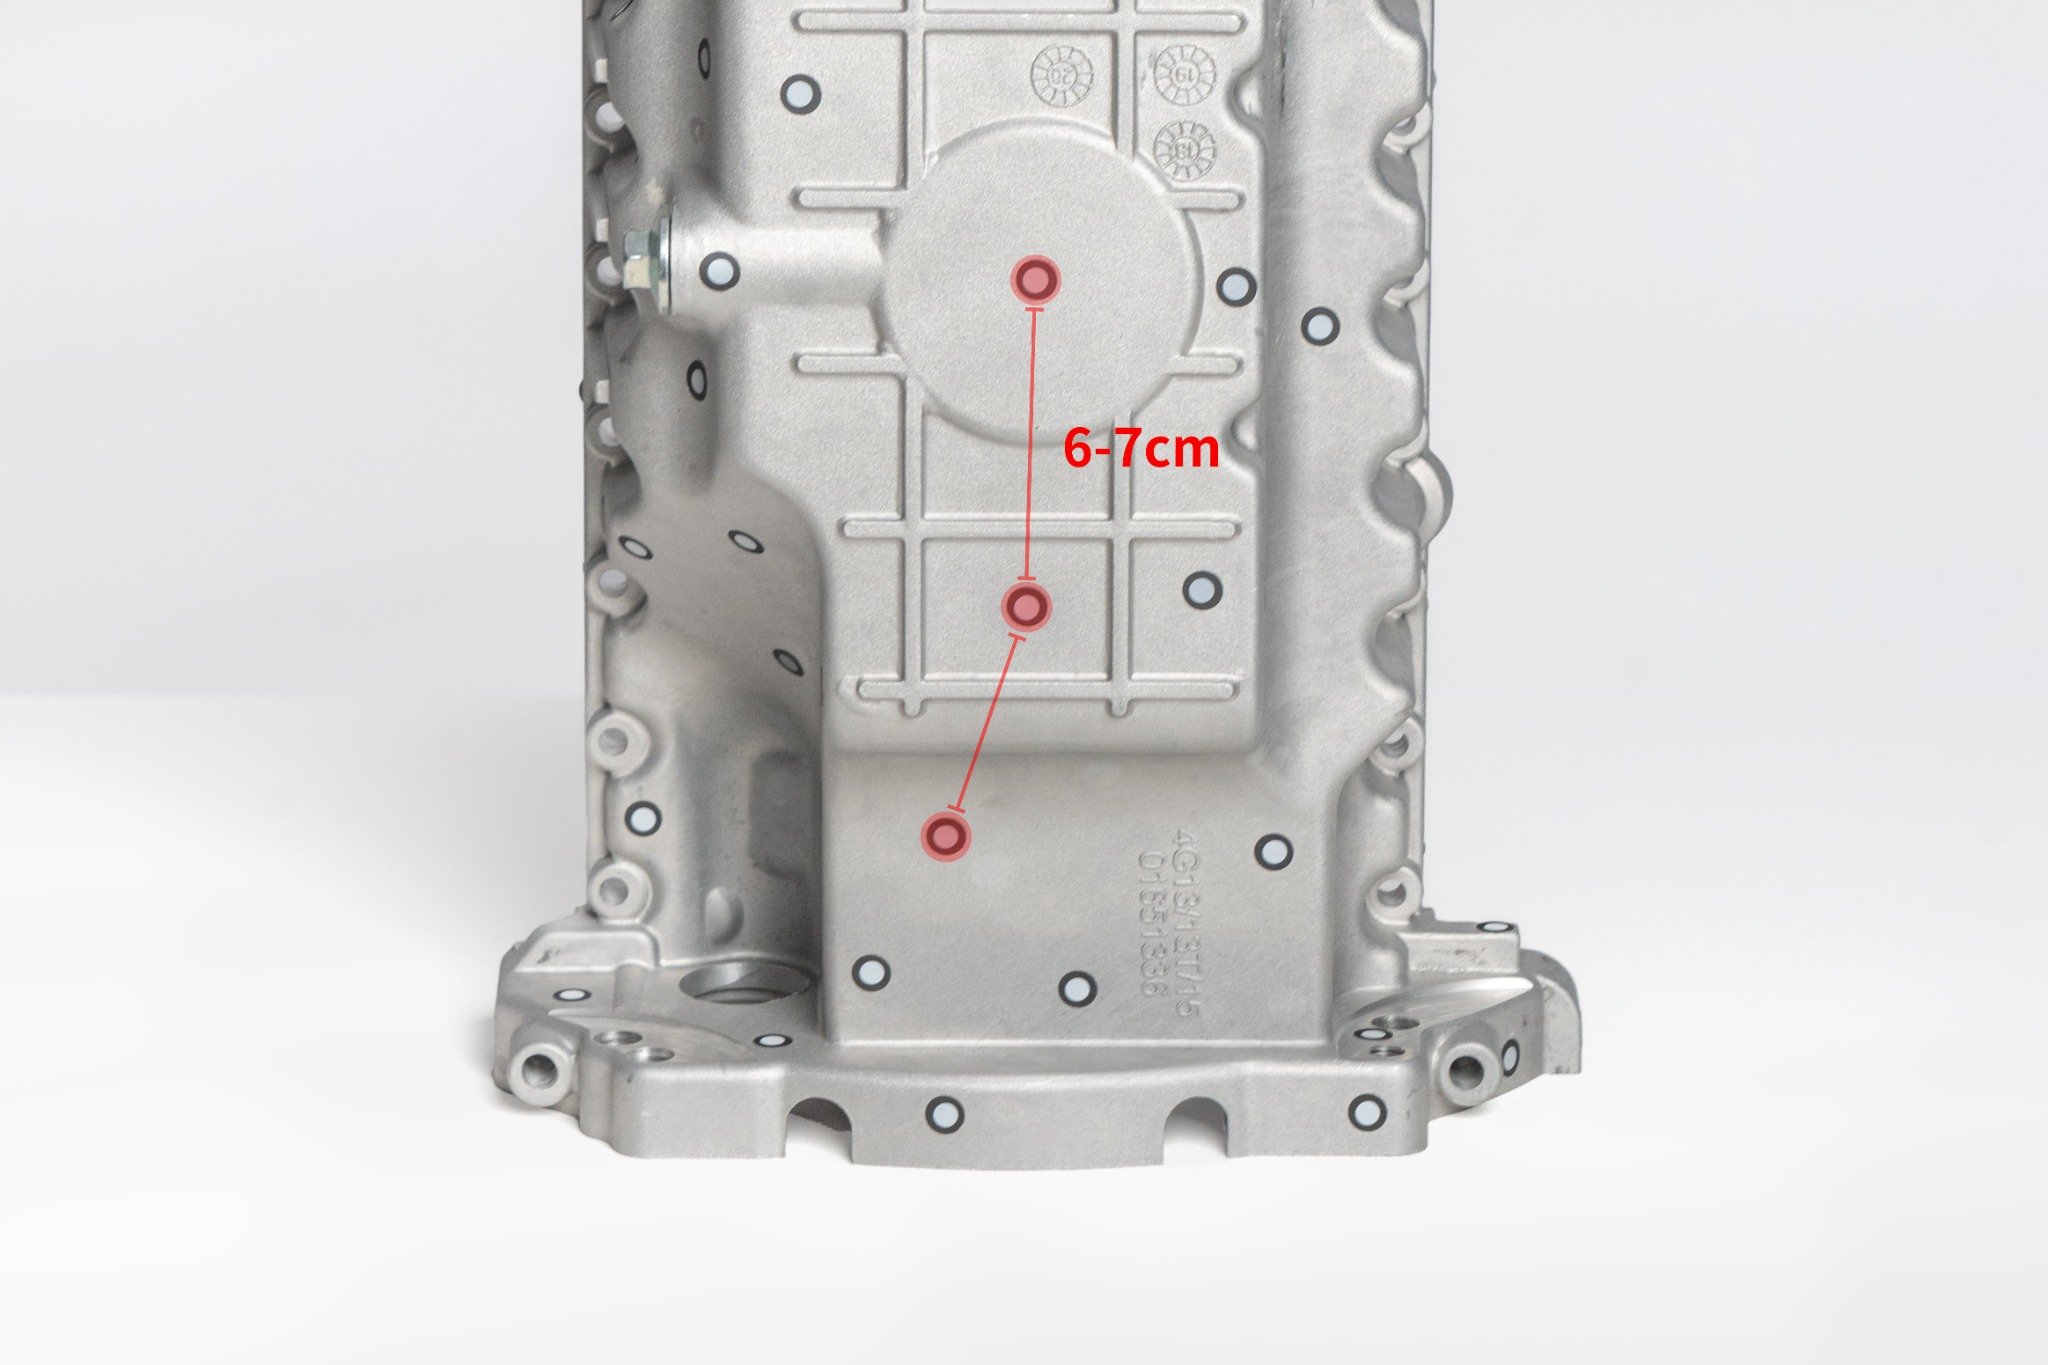
② Place Markers: Attach the markers irregularly on the surface, ensuring at least 5 can be captured in one frame. For best accuracy, place markers on flat surfaces and avoid curved areas.
③ Adjust the scanner's height and angle to ensure the camera can fully capture the object.
¶ 6.2.2 Start Scan
¶ Create New Scan
Click “New Project” on the software home page. Name the file, choose the location to store the file (or use the default location), click “New,” and enter the scanning interface.
¶ Scan Settings
① Select “Marker Scan”.
② Select “Parallel Lines” in Scan Mode.
③ Select “Marker Tracking” in Tracking Mode and “Metallic Shinny Object” in Object Type.
④ Select the inner diameter of the markers currently in use to enhance the scanning accuracy.
⑤ Set the Target Point Distance.
Note: Increasing point distance speeds up scanning, decreasing it enhances details but slows the process.
⑥ Adjust the distance between the scanner and the metal part to ensure that the color on the distance indicator bar is displayed in green.
⑦ Adjust the exposure of the depth camera to ensure the laser lines are clearly visible in its preview window.
¶ Scanning Controls
① After setting the above parameters, click the "Start" button to begin the scanning.
② During scanning, pause to review progress in the model display area. If the model appears incomplete, click "Start" again to continue.
③ Once the model’s surface data has been fully captured, click “Complete” to complete the scan.
¶ 6.2.3 Model Editing
In the model editing area, click “One-click Editing” > “Apply” to automatically complete model editing.
For detailed specific functions and operations for model editing, click Revo Metro Model Editing to learn more.
¶ 6.2.4 Model Export
Click "Export" and select the formats to export.
¶ 6.3 Outdoor Scanning Tips
When scanning outdoors, set “Object Type” to “Outdoor Object” in the scan settings.

- Attach the two outdoor filters onto the front of the left and right depth cameras before outdoor scanning with structured light.

Note: When using Parallel Lines mode for outdoor scanning, do not install the outdoor filters.
- When scanning outdoors, avoid direct sunlight to minimize interference from reflective surfaces.
- Avoid scanning in rainy or windy weather to prevent water damage or reduced data accuracy from wet surfaces.