¶ 1. About This Manual
Welcome to your Revopoint 3D scanner user manual! This manual provides MetroX Pro operation guide and instructions. Please read the manual before your first use to ensure you use this scanner correctly and safely. If needed, you can click on any topic in the navigation bar to quickly jump to that section.
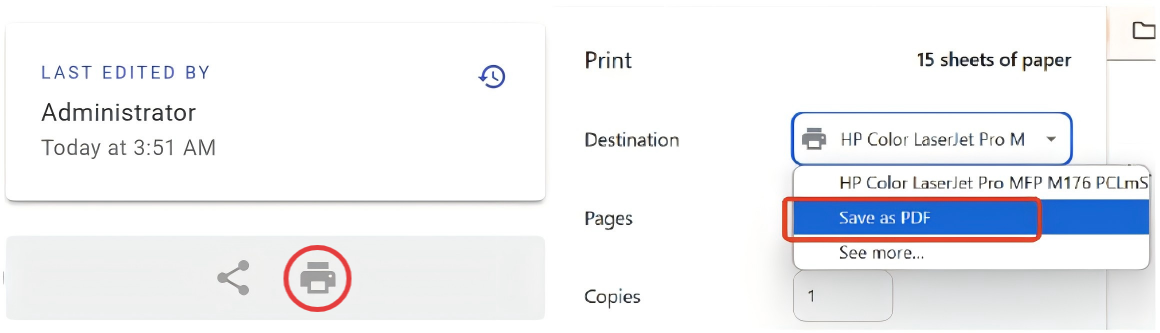
Manual Download:
If you need a PDF manual, click the Print Format button at the bottom of the navigation bar on the left side of the manual, and select "Save as PDF" from the options.
¶ 1.1 Read Before Using
- This manual is specifically for the MetroX Pro 3D scanner. Some operations may differ depending on the scanner's model.
- This manual is frequently updated to cover the product's latest features and improvements.
- Verify that all components in your box are complete and undamaged before first use.
¶ 1.2 Safety Instructions
- This product has a Class 2M laser projector. Avoid looking directly at the laser up close, and do not use magnifying tools like telescopes or cameras to view the beam, as it can damage your retina. Keep reflective surfaces such as mirrors and glass away from the laser beam's path.
- Please keep the scanner away from water and any other liquids, as they can damage the components.
- Store the scanner and all accessories in a cool, dry place away from direct sunlight.
- Do not hit or drop the scanner.
- Do not disassemble the scanner, as this may cause equipment failure.
- Do not use unauthorized software or plug-ins, as they may cause system instability or data loss.
- Keep all components out of reach of children and animals to avoid serious injury.
¶ 1.3 Online Resources


¶ 2. About MetroX Pro
¶ 2.1 What's in the Box
.png)
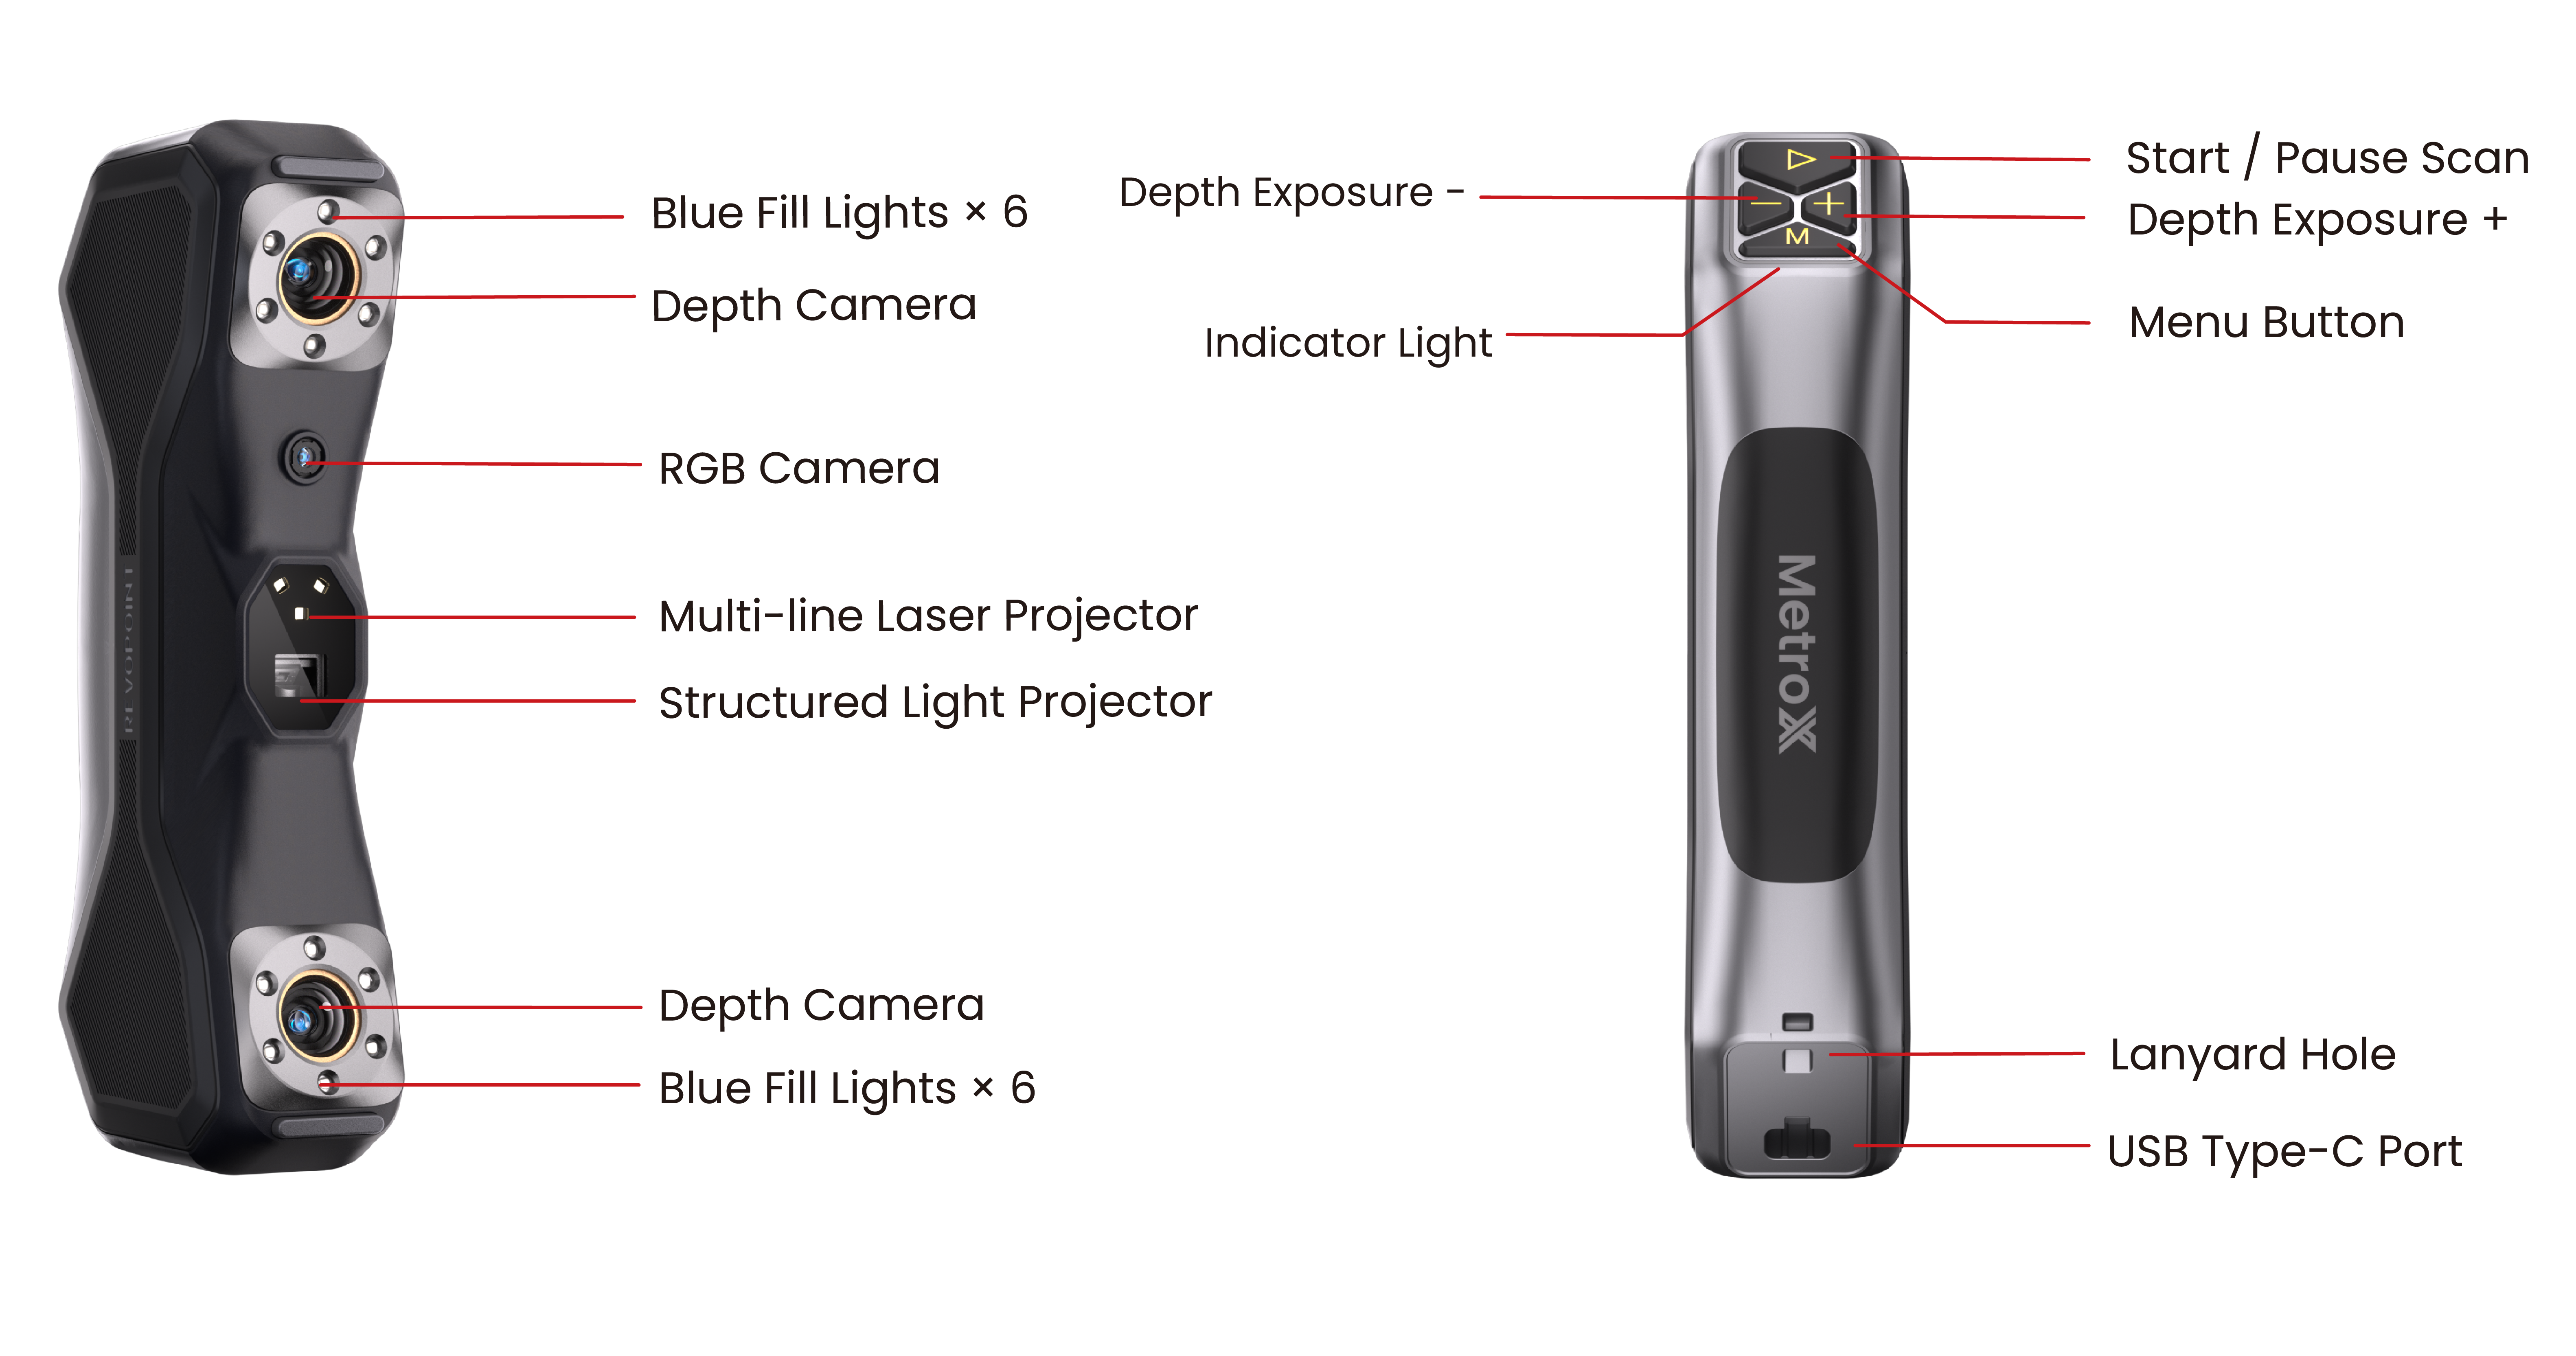
¶ 2.2 Product Profile
¶ 3. About Revo Metro
The scanner is used together with the Revo Metro software. For detailed information on the software’s features and operations, please refer to Revo Metro Software User Manual .

¶ 4. Scanner Connection
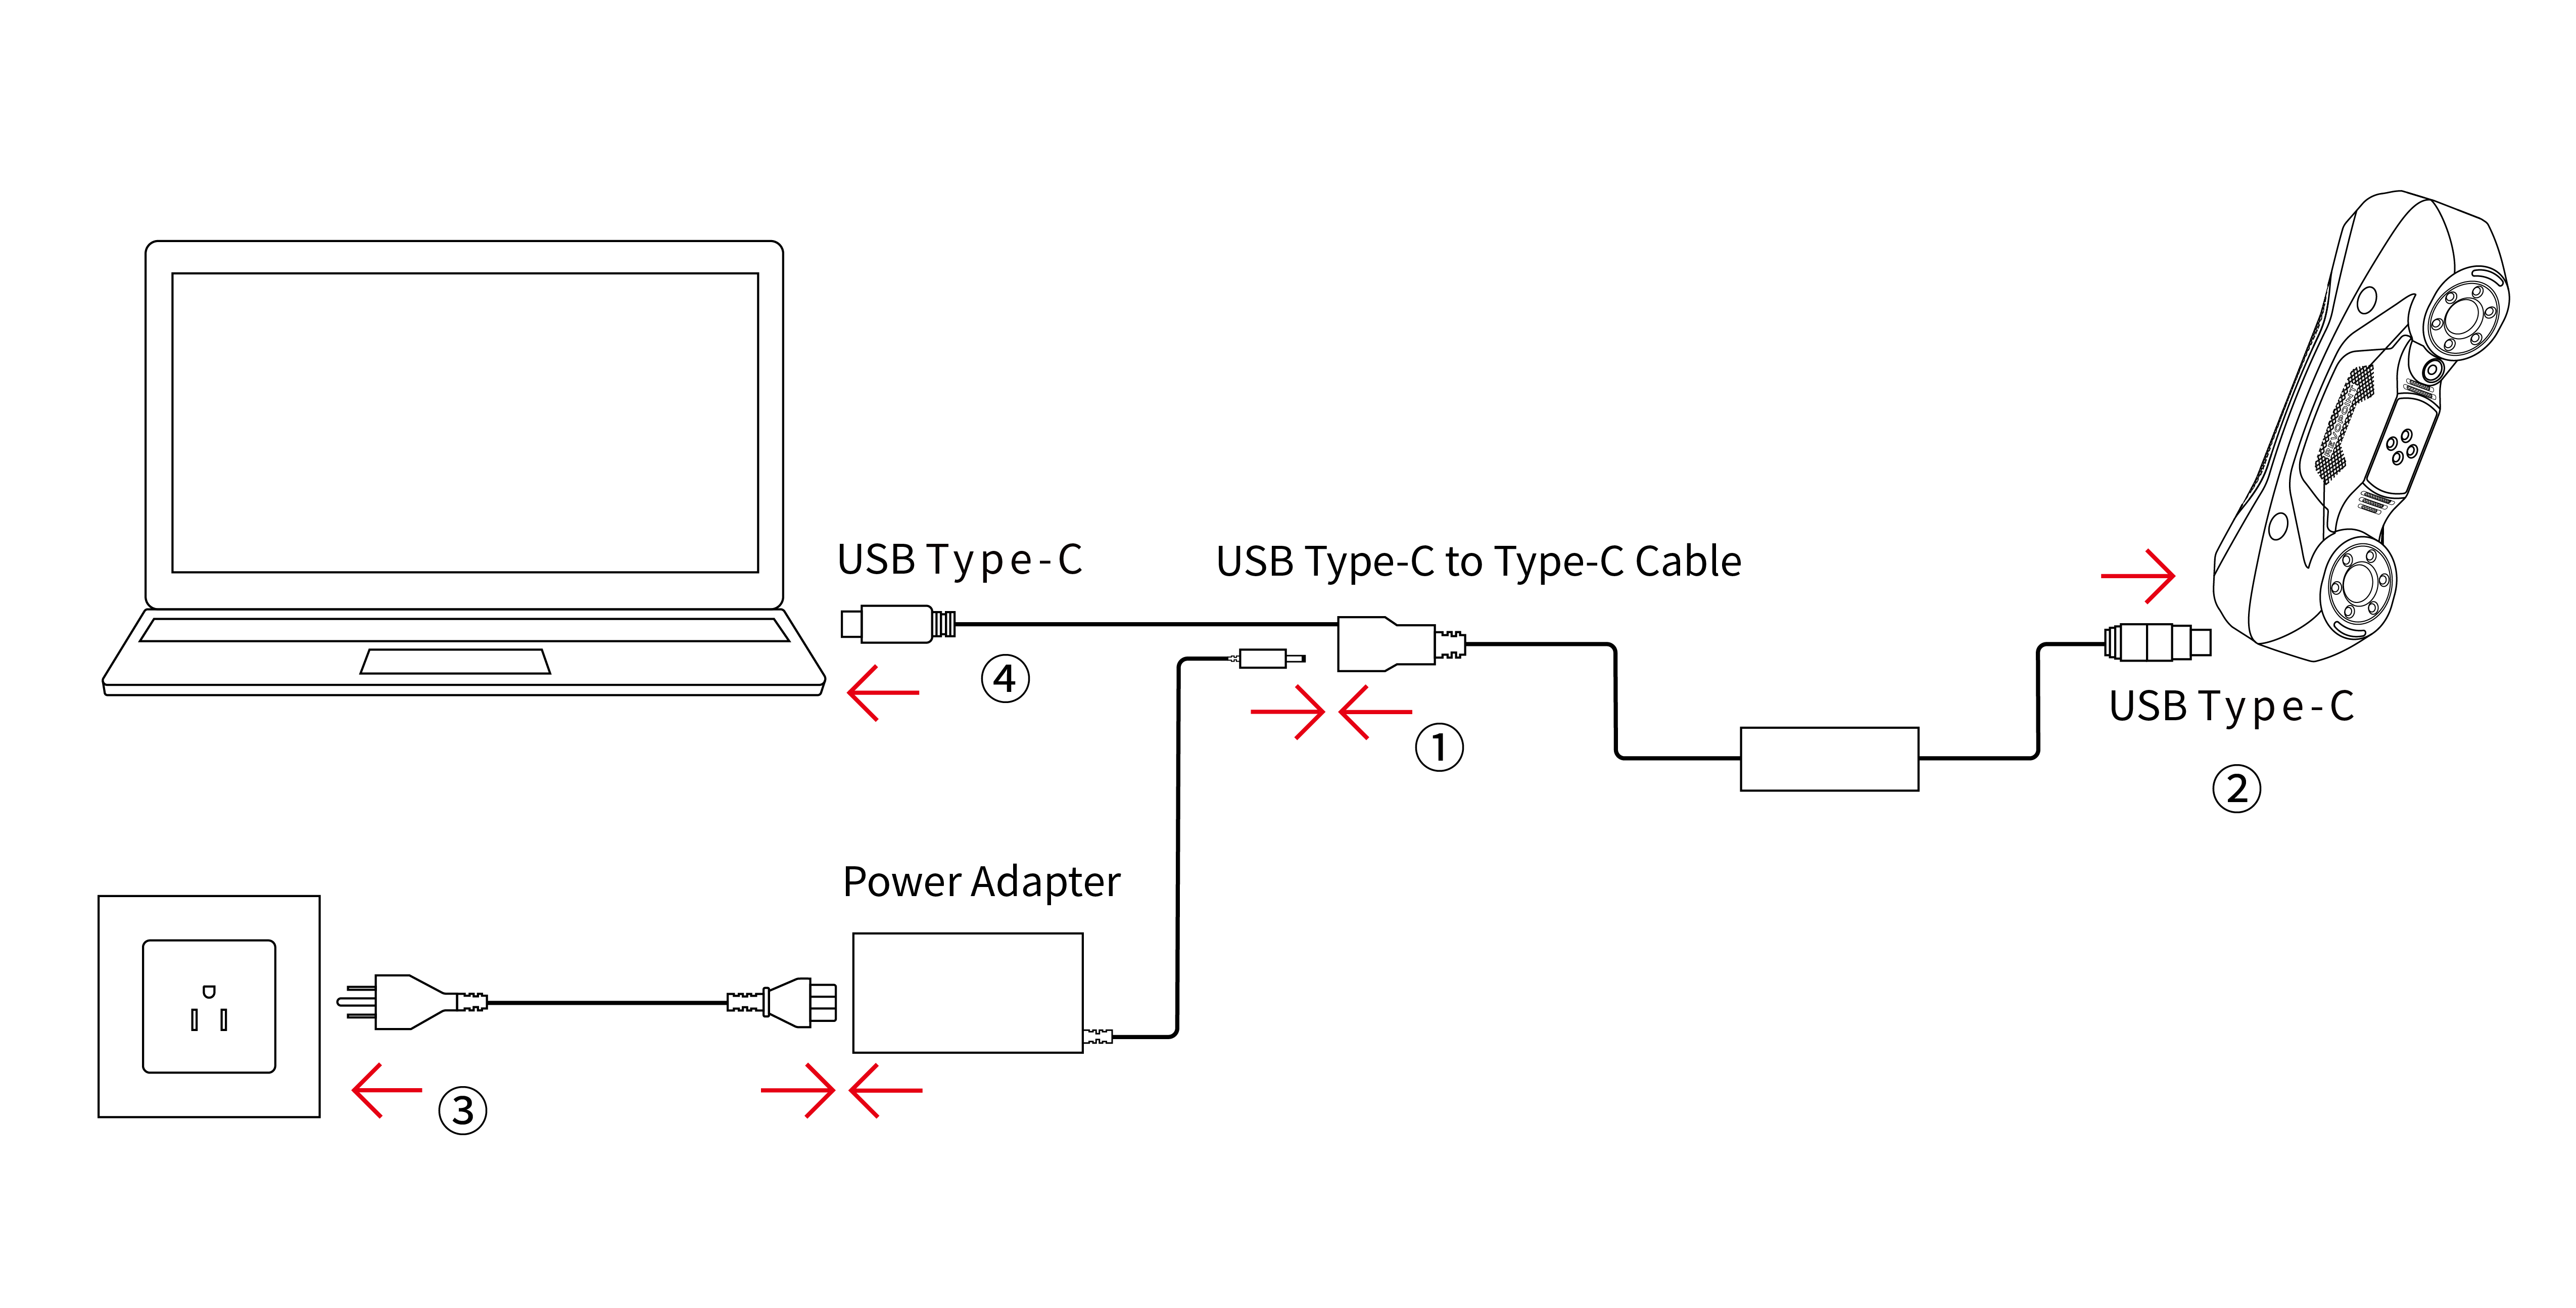
It is recommended to connect the scanner to the power supply and the PC’s USB 3.0 Type-C port in the order shown from ① to ④.
Note:
If the connection fails or the frame rate drops below 10 fps, disconnect from the PC while keeping power on. Then, repeat step 4 to reboot the device.
To ensure the scanning effect, please connect the scanner directly to the PC and avoid using the docking station.
¶ 5. Screen Mirroring
MetroX Pro also supports wireless casting to a phone via Revo Mirror:
① Download the Revo Mirror software for both your PC and phone from the Support - Download section on Revopoint’s website.
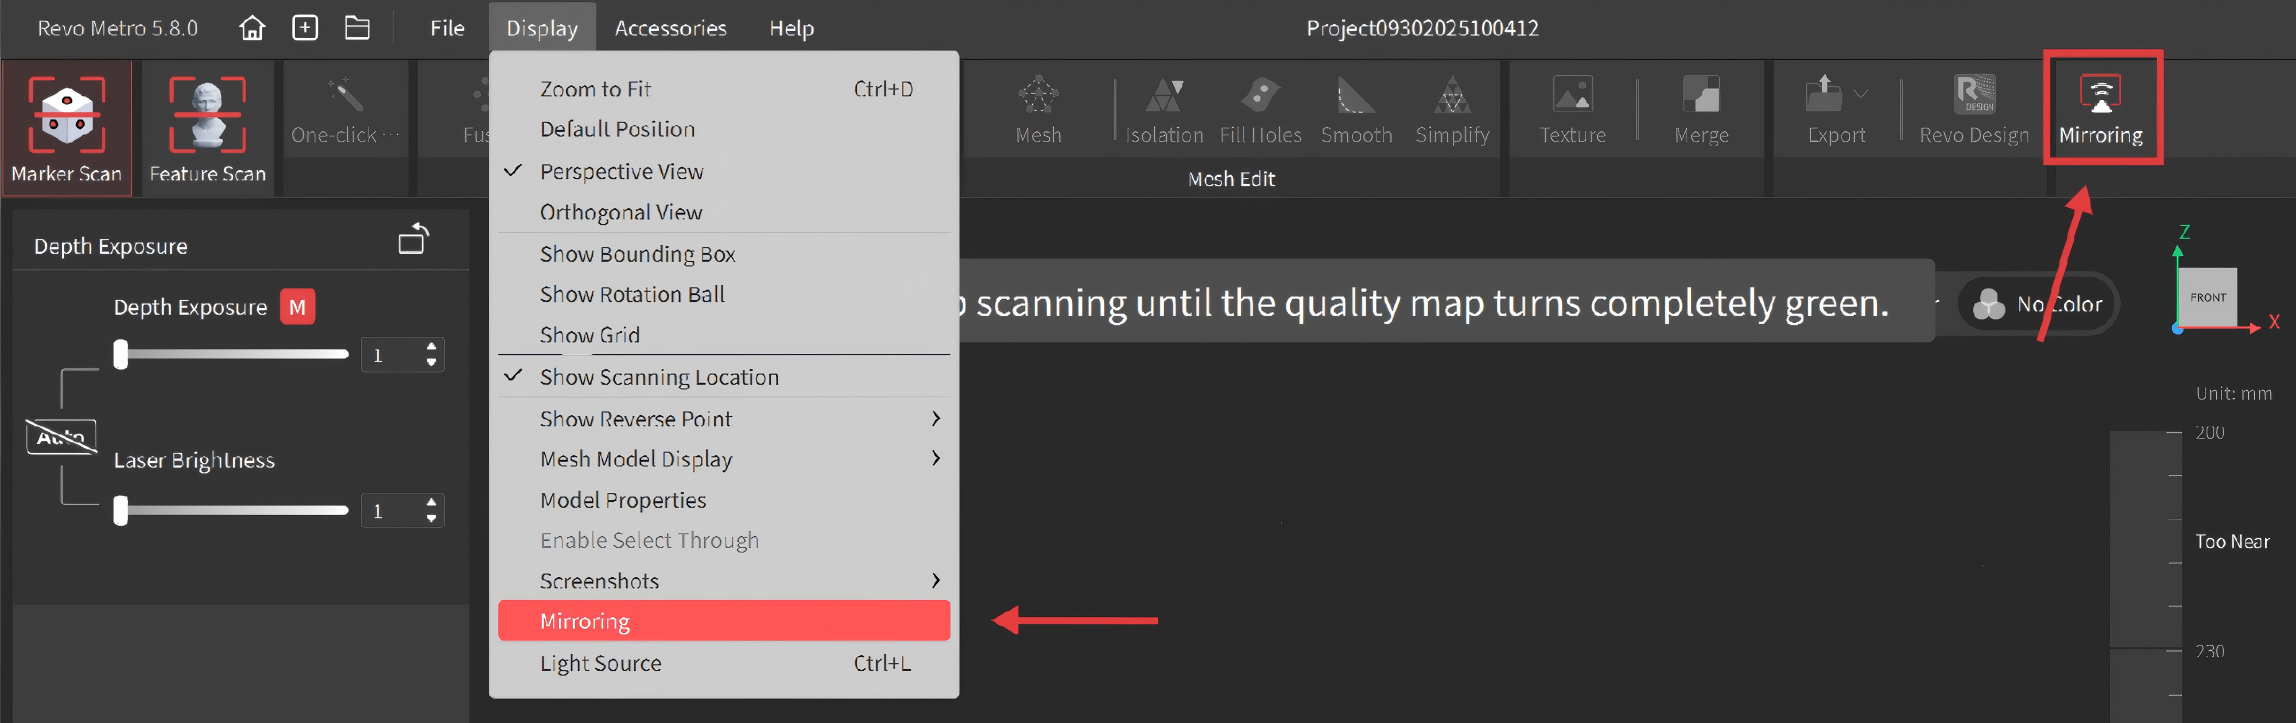
② After connecting the scanner to your PC, ensure both your PC and phone are on the same stable Wi-Fi network. Open Revo Metro on the computer, wait for the scanner to connect and reach the scanning page, then click the  button or go to Display > Mirroring.
③ Tap the detected device to be mirrored in the mobile Revo Mirror app.
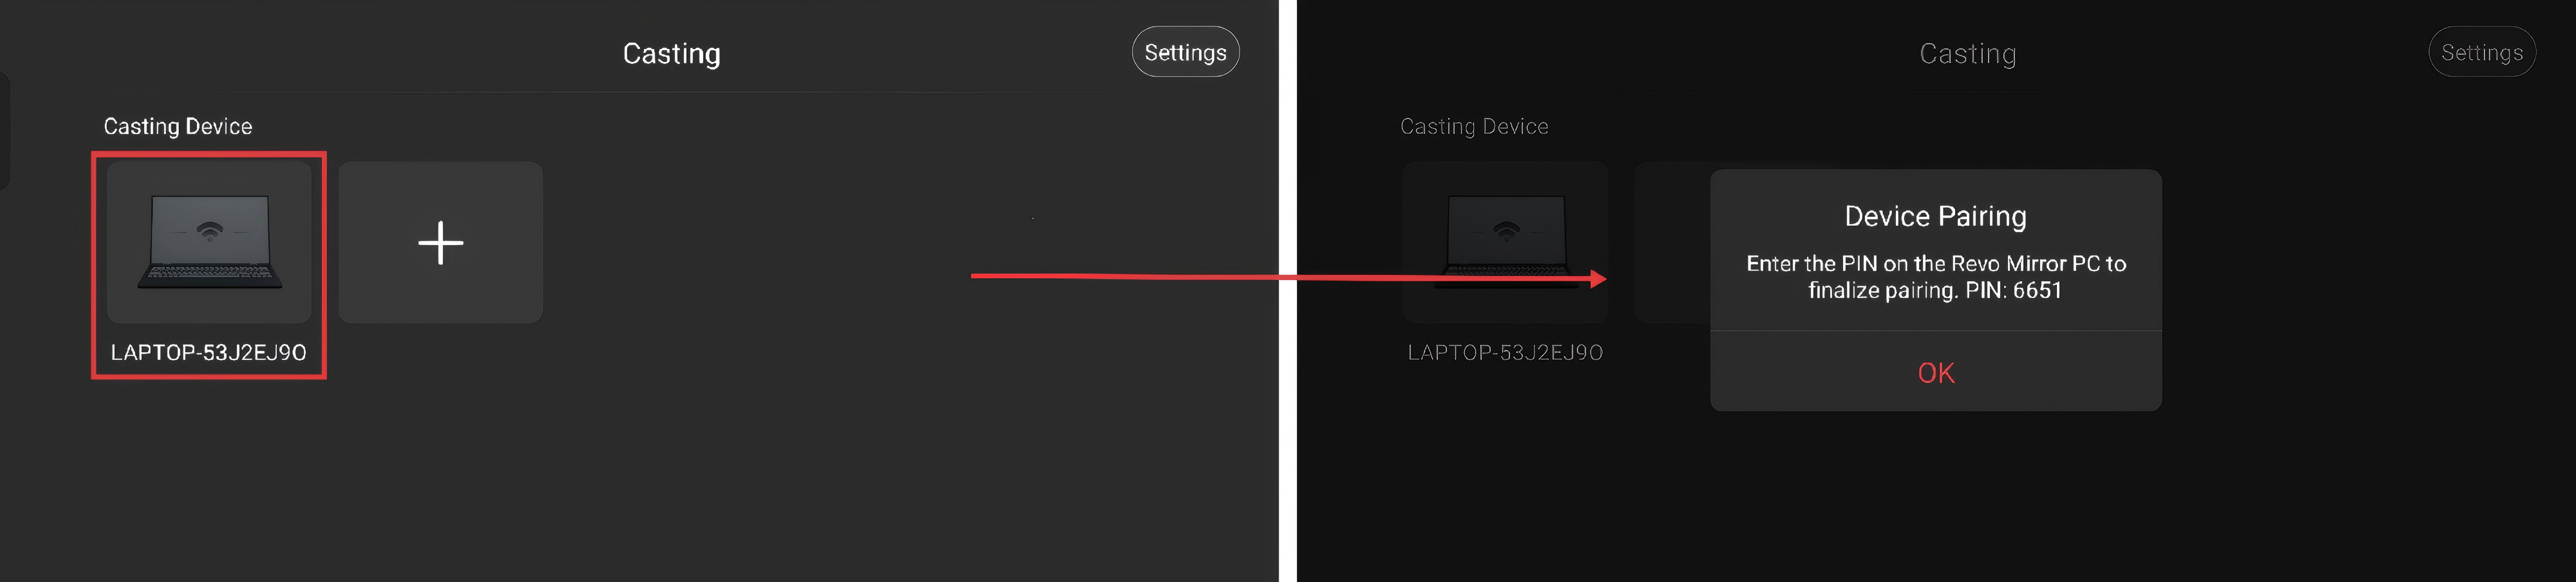
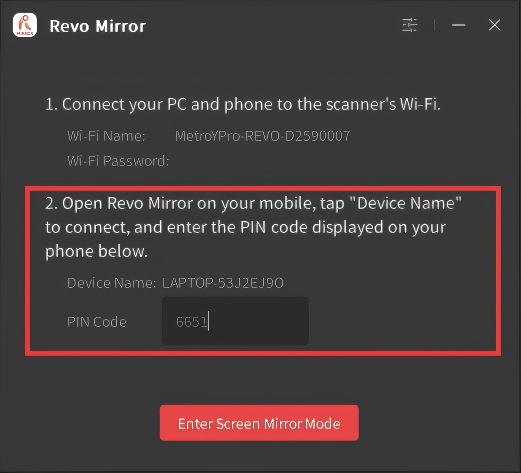
④ Follow the prompt on the PC to enter the PIN code to complete the initial pairing. Then, click “Enter Screen Mirror Mode” to control the scanning process.
¶ 6. Scanner Calibration
¶ 6.1 Preparation Before Calibration
① Connect your scanner to the PC using the provided USB cable. Launch Revo Metro and wait for the "Connected" status. For optimal accuracy, allow the device to warm up for 10 minutes before starting.
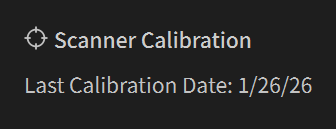
② Click "Scanner Calibration" in the bottom left corner to enter calibration program.
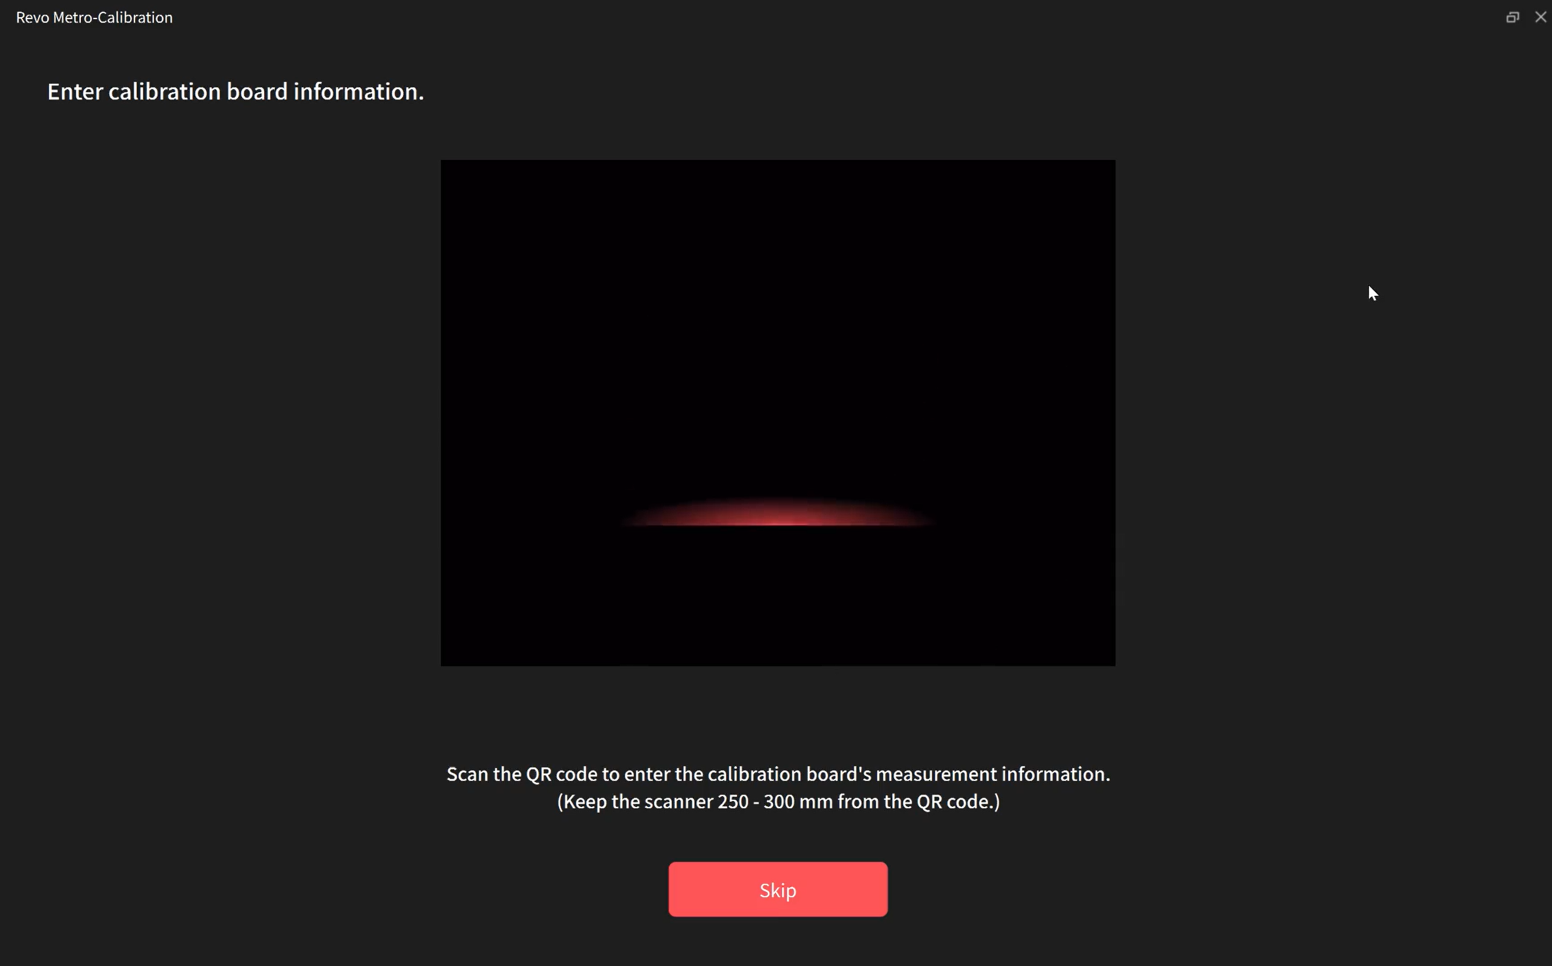
③ Scan the QR code on the back of the Calibration Board to import its metrology data.
④ Follow the on-screen instructions to perform accuracy check and light plane alignment.
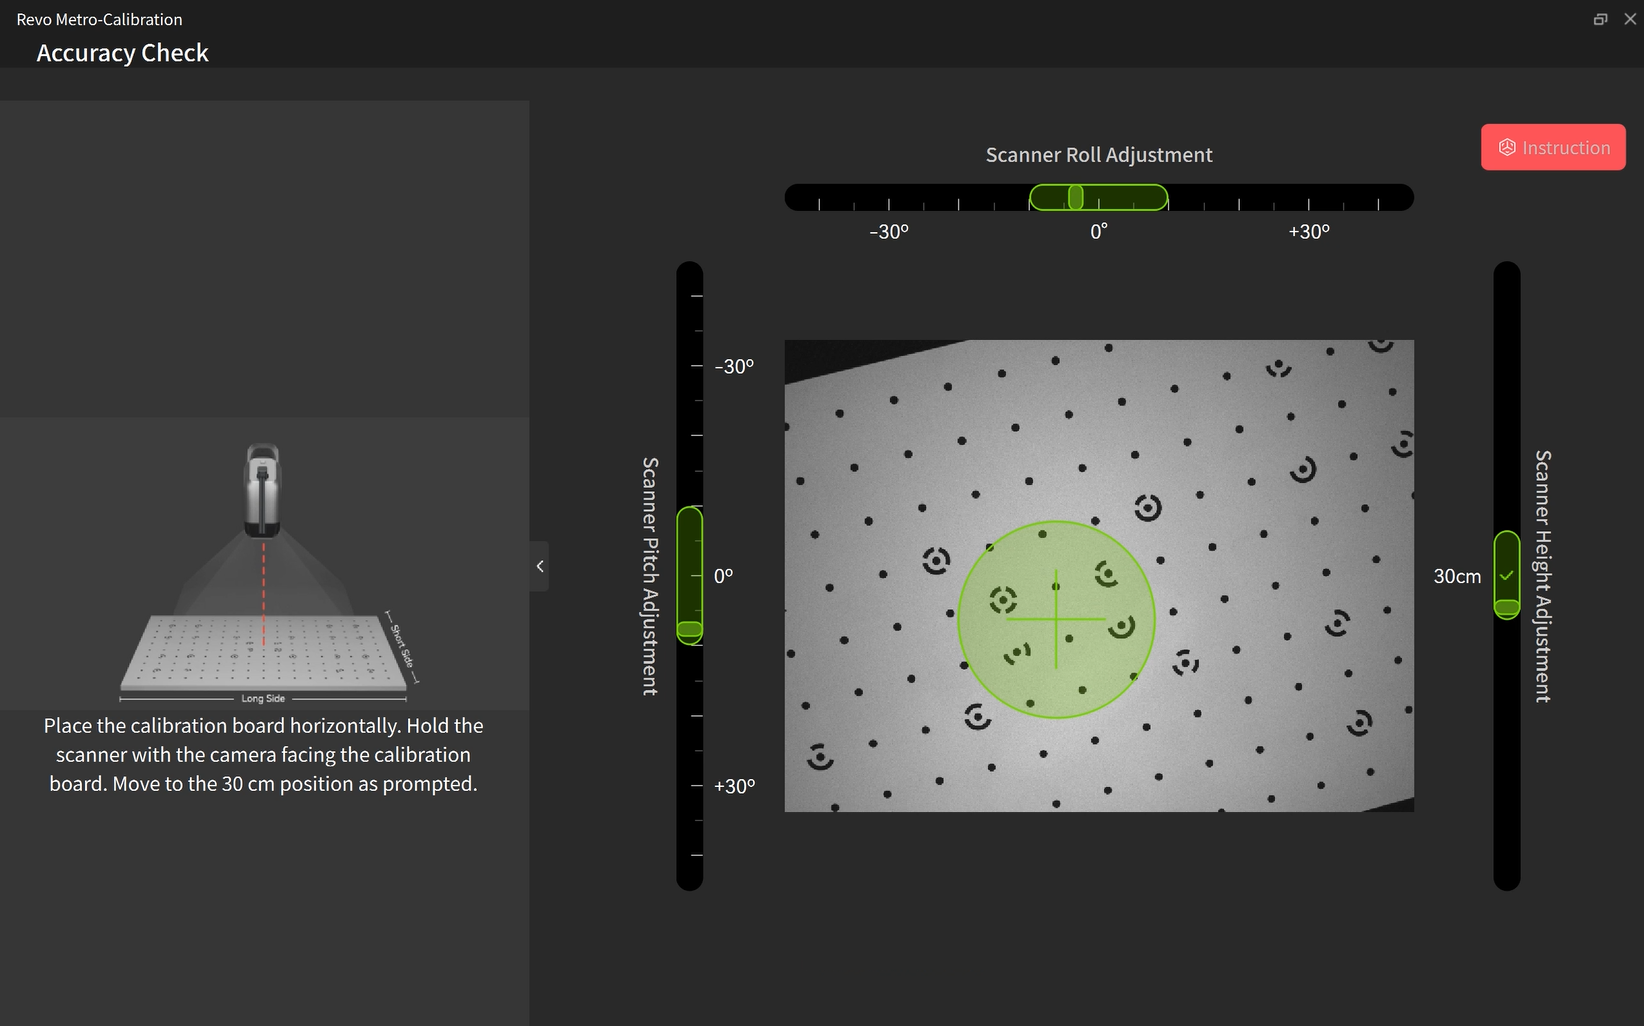
Note:If the accuracy check passes but the light plane alignment does not, the software will proceed with light plane calibration only.
¶ 6.2 Dual-camera Calibration
Adjust the scanner's pitch, tilt, and height as prompted. You will need to complete the calibration process across five orientations: horizontal, left, right, front, and back.
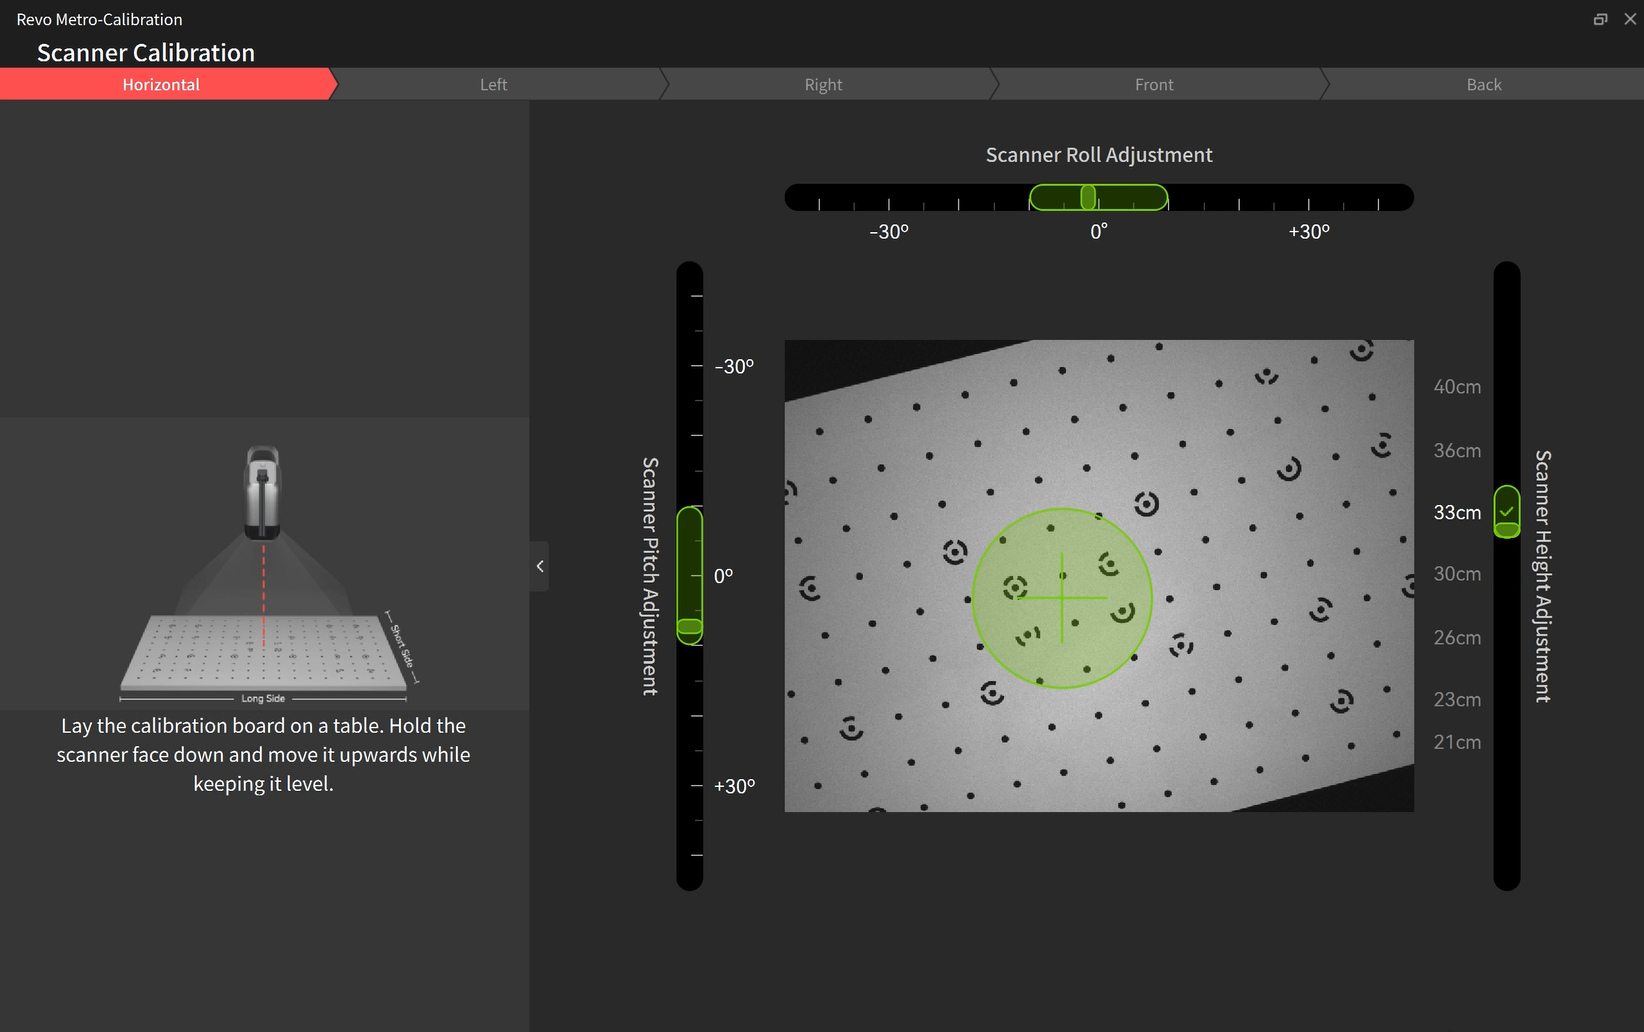
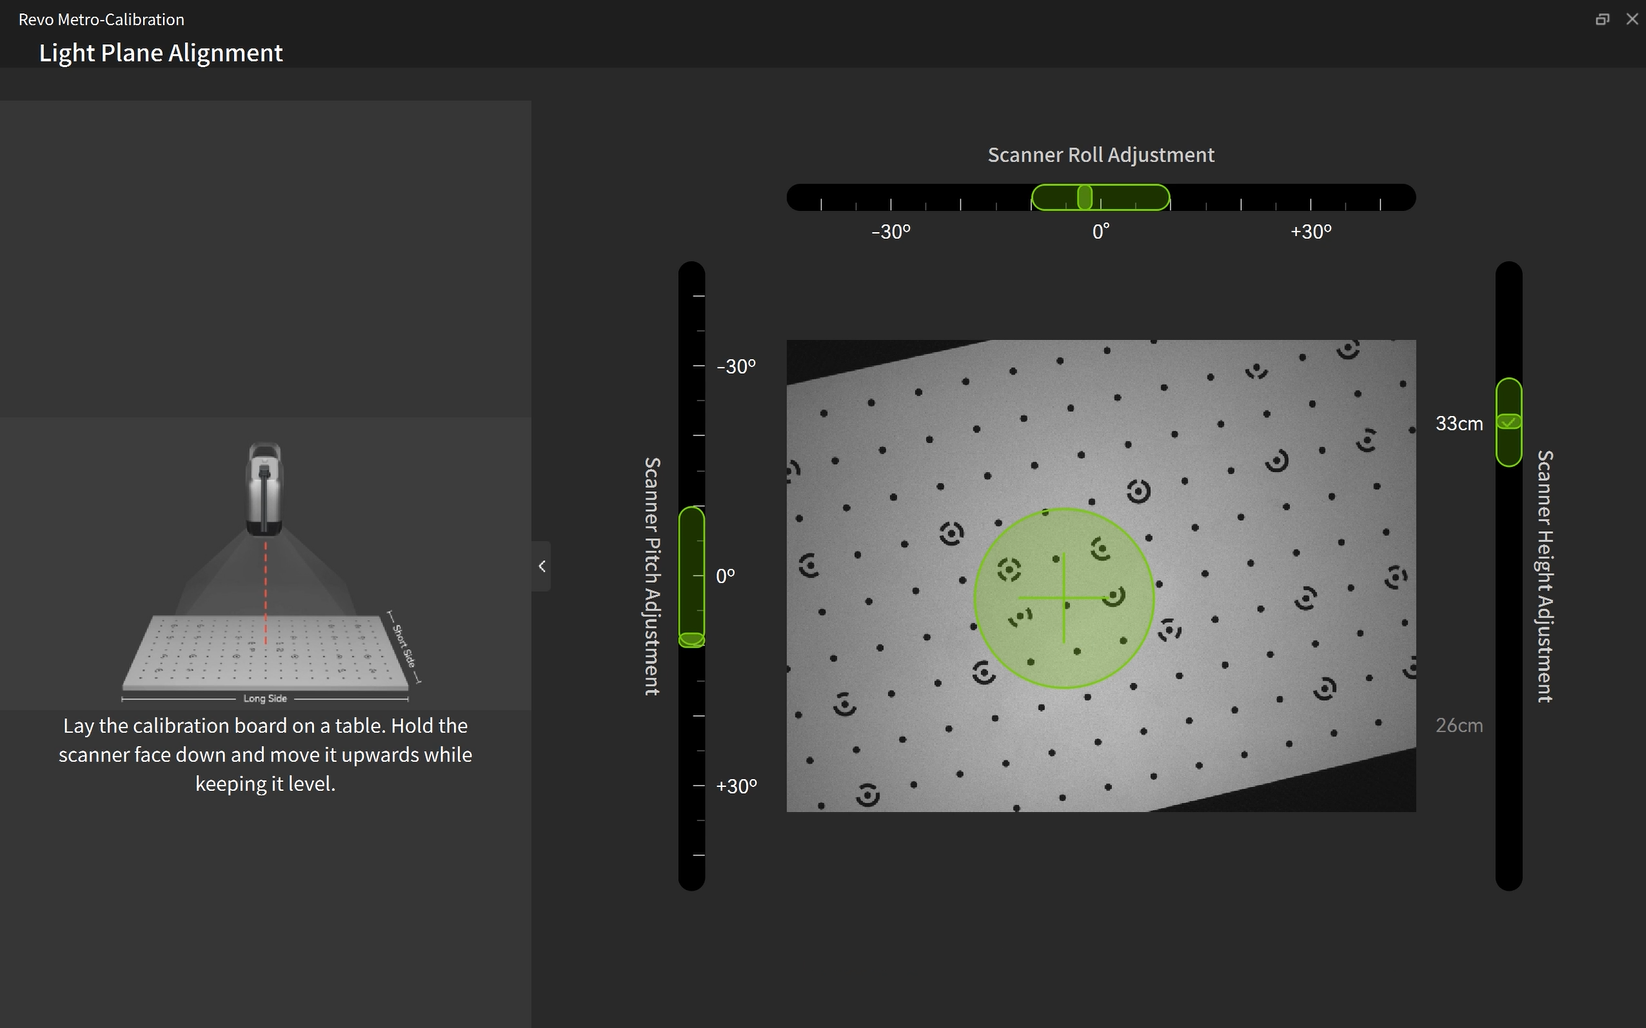
¶ 6.3 Light Plane Calibration
Adjust the scanner's pitch, tilt, and height as prompted. You will need to complete the calibration process across five orientations: horizontal, left, right, front, and back.
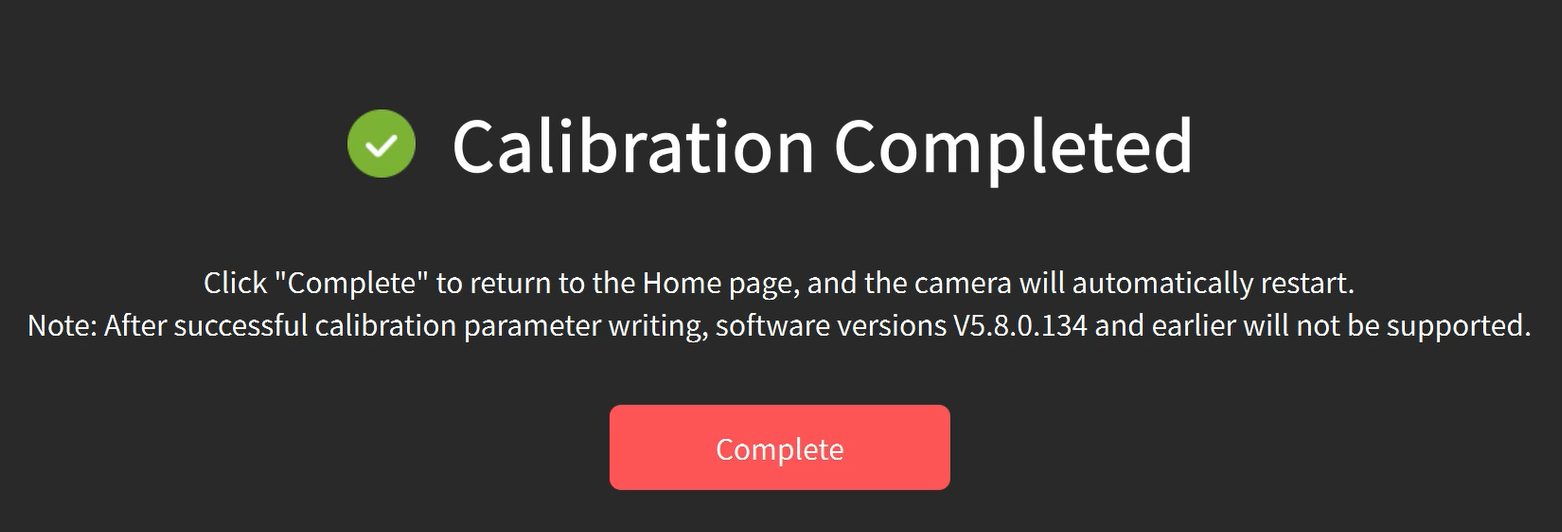
¶ 6.4 Finish
① Once the calibration is verified, click "Save."
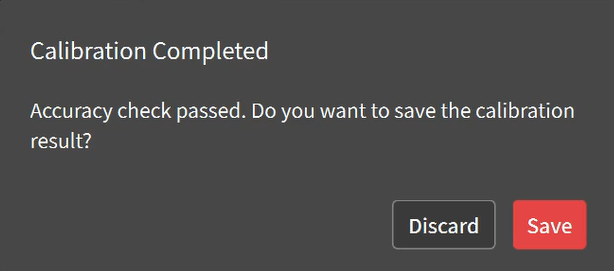
② When the process is finished, click "Complete" to exit. The software will return to the project page and automatically reconnect the scanner.
¶ 7. Scanning Demonstration
¶ 7.1 Pre-Scan Preparation
① Object Preparation
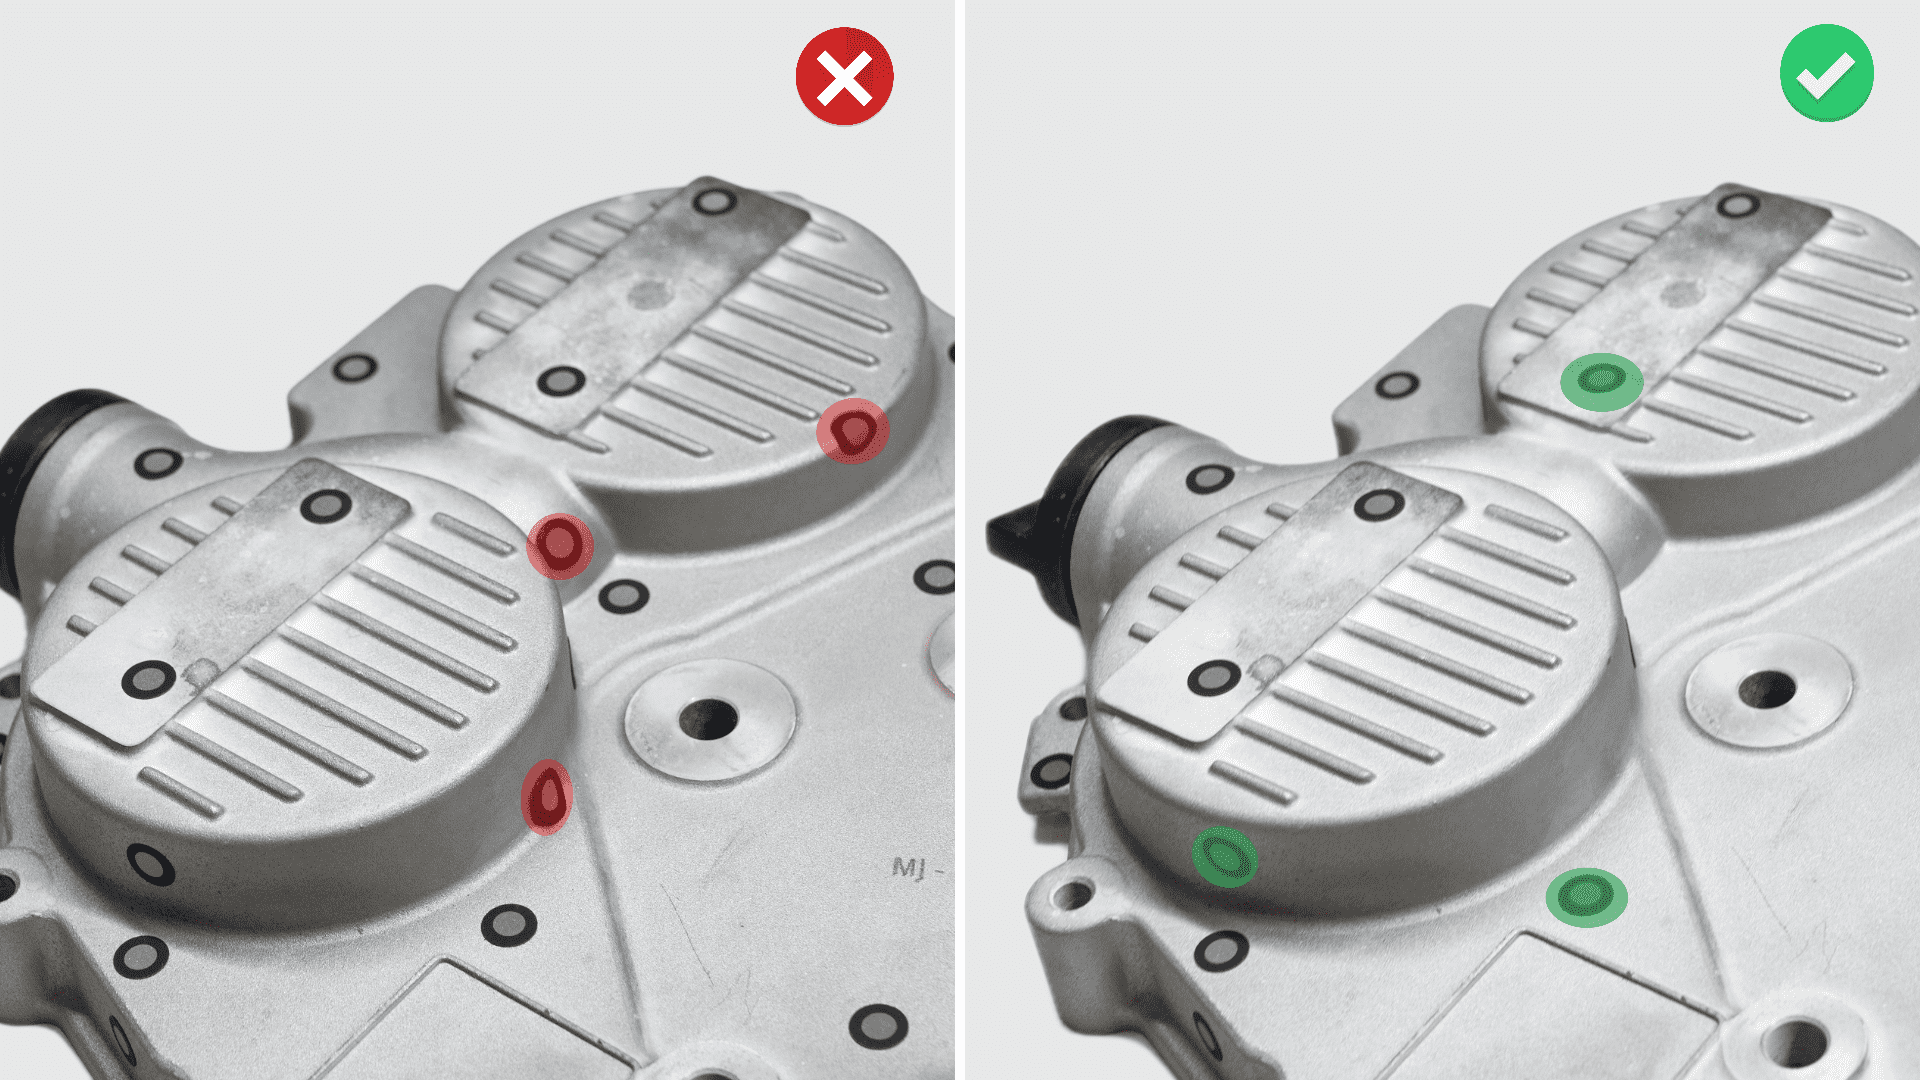
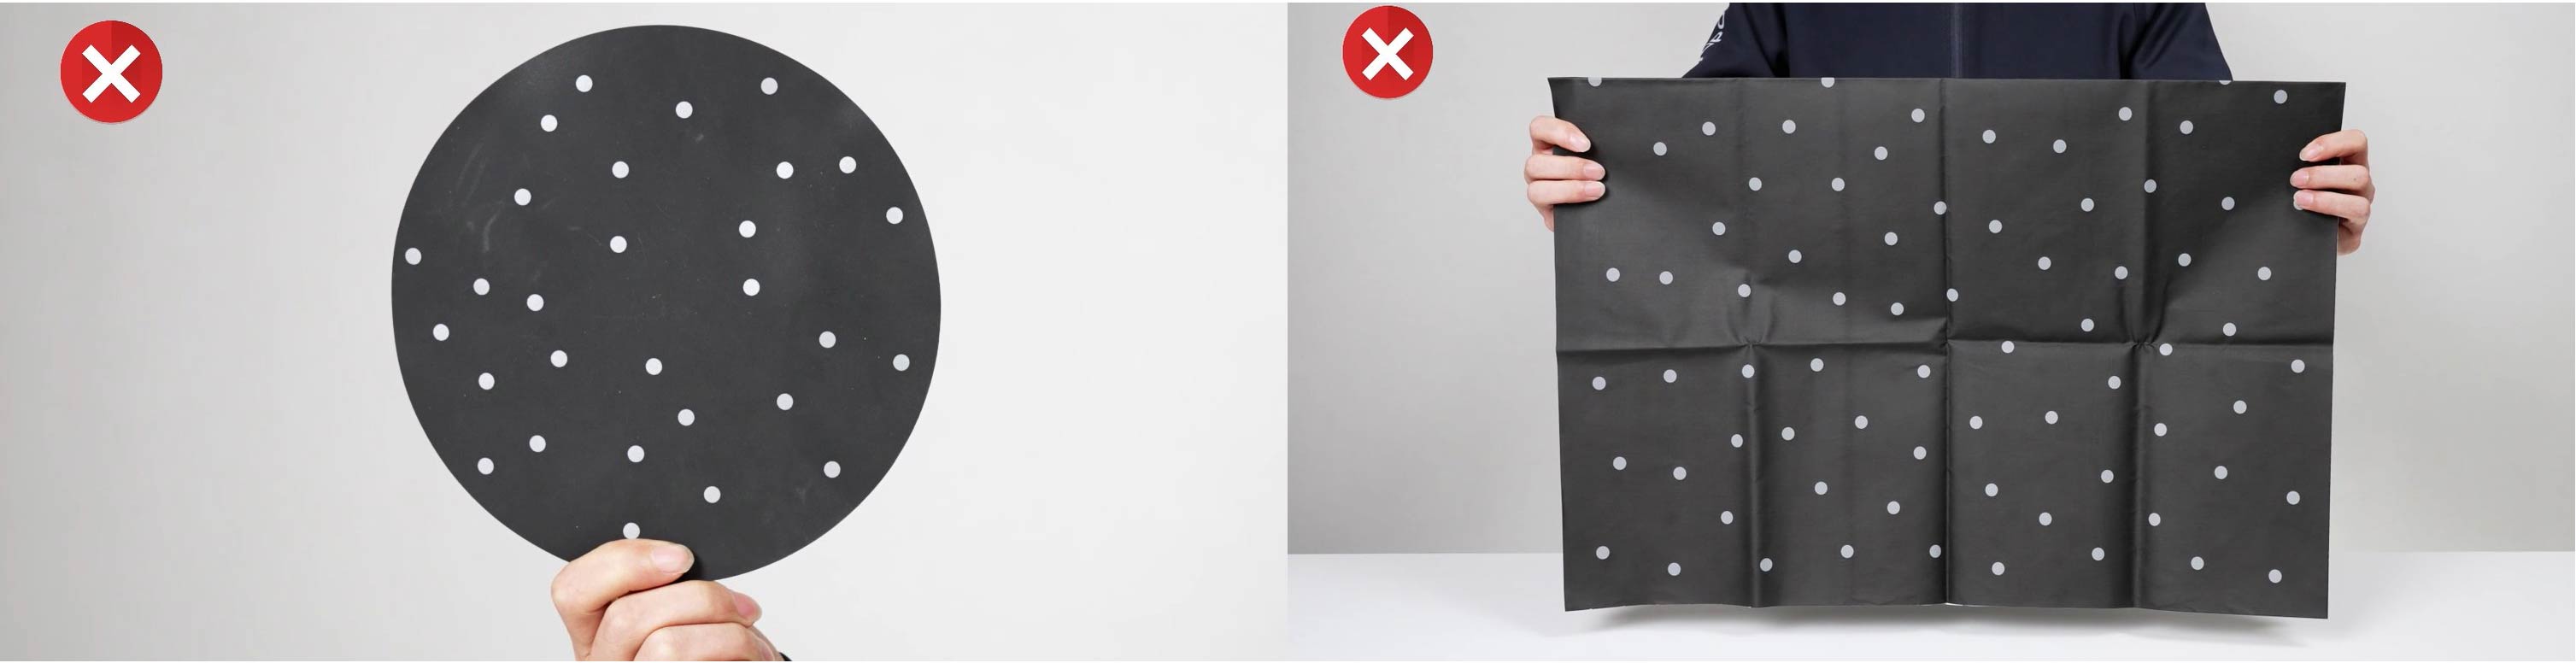
- Using Markers
Markers are required for tracking if you choose Marker Scan when entering project interface. Keep the distance between markers around 6–7 cm.
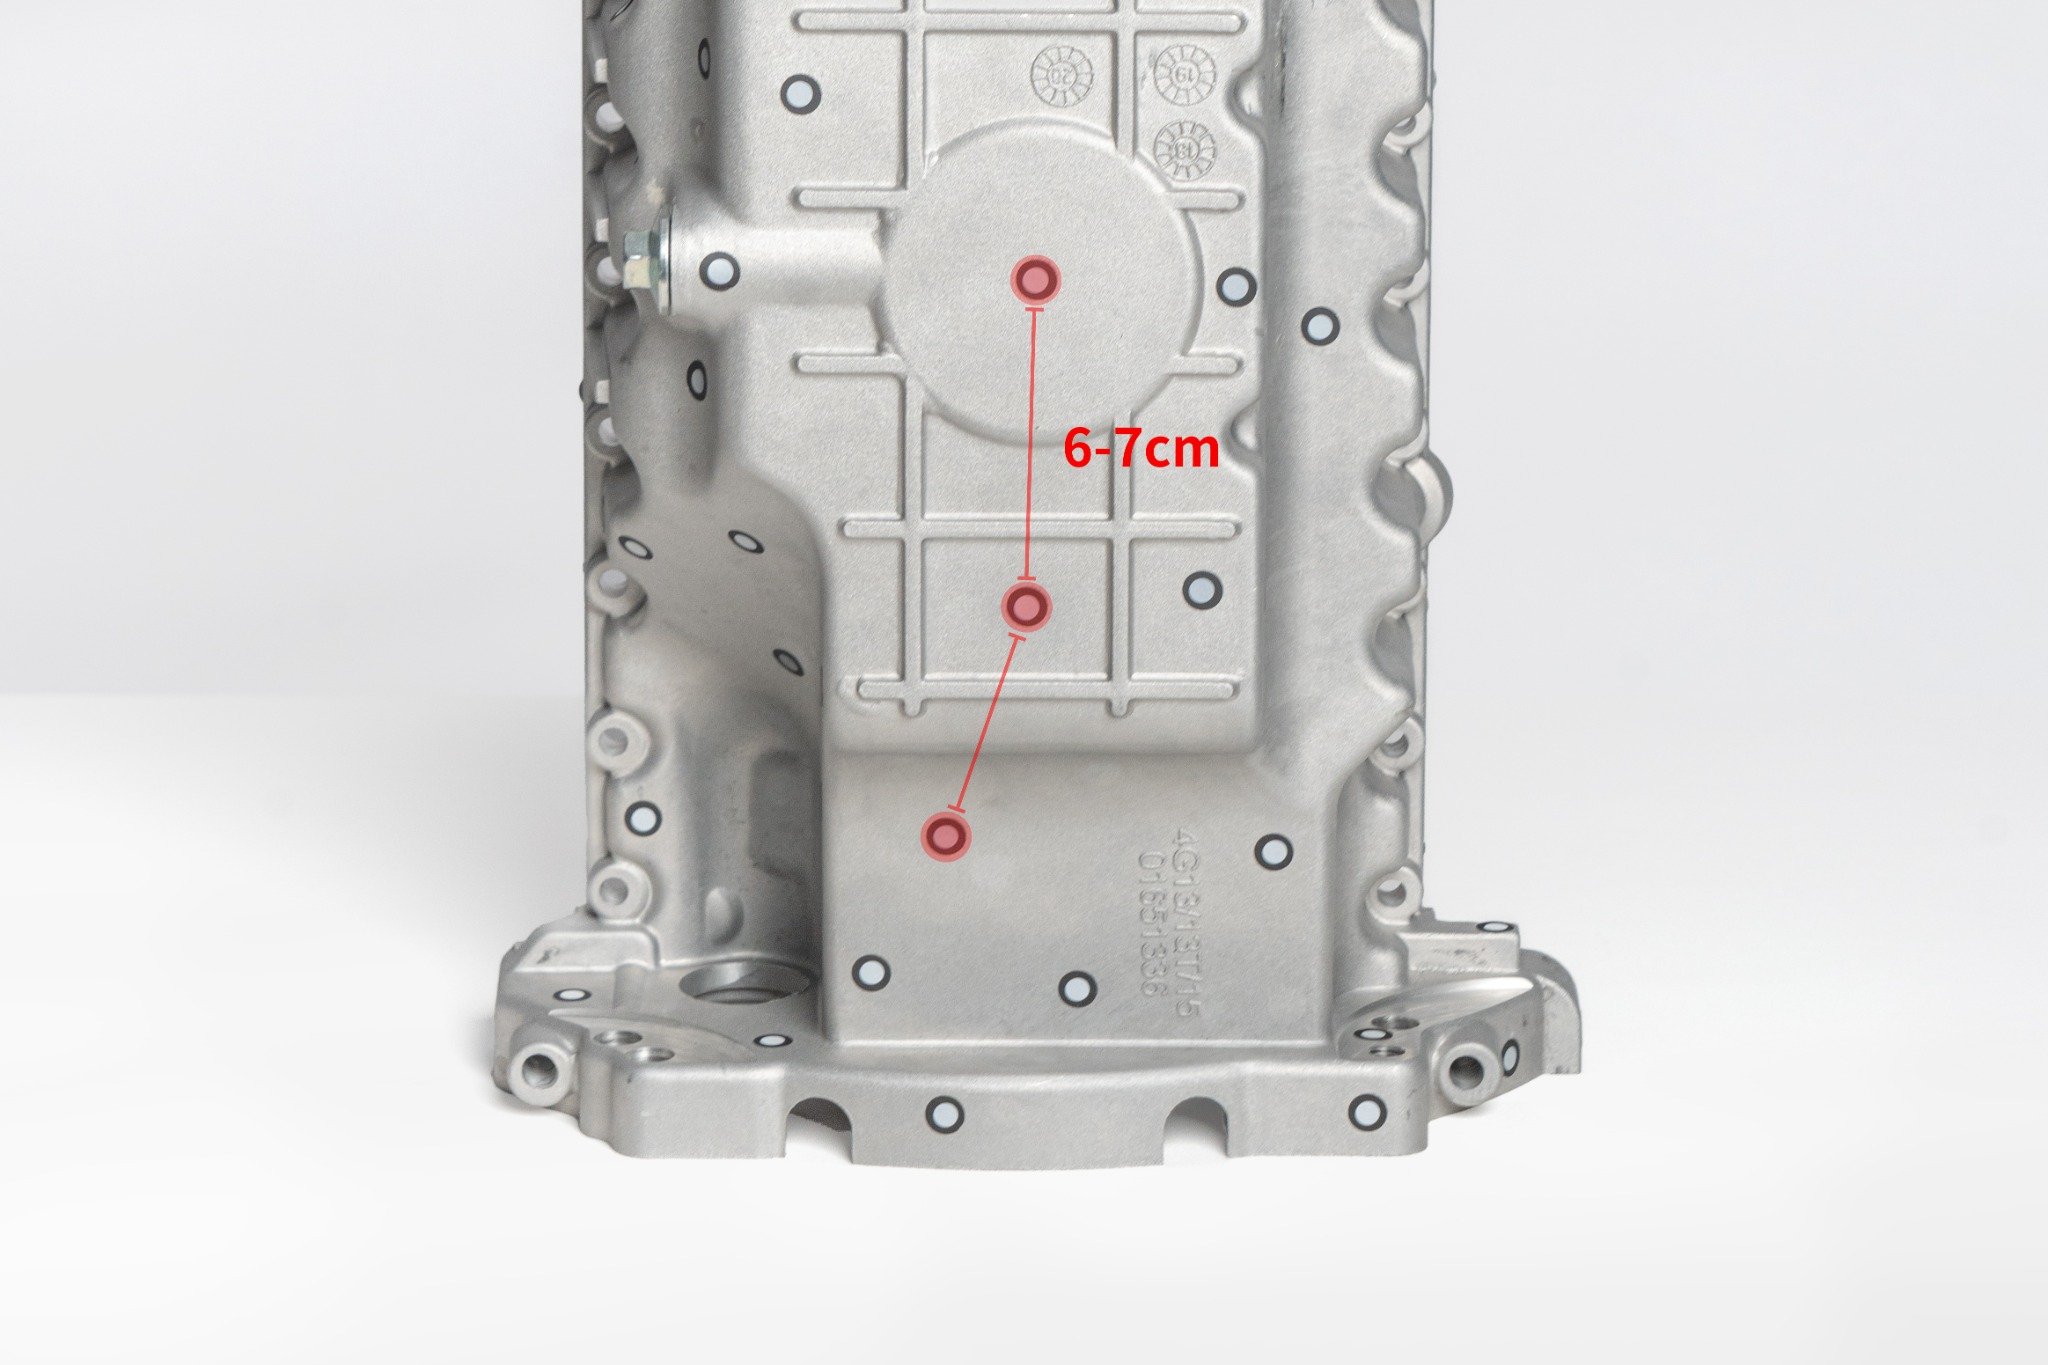
Don't use too many markers, but ensure that at least 5 markers are placed irregularly per scanned frame.
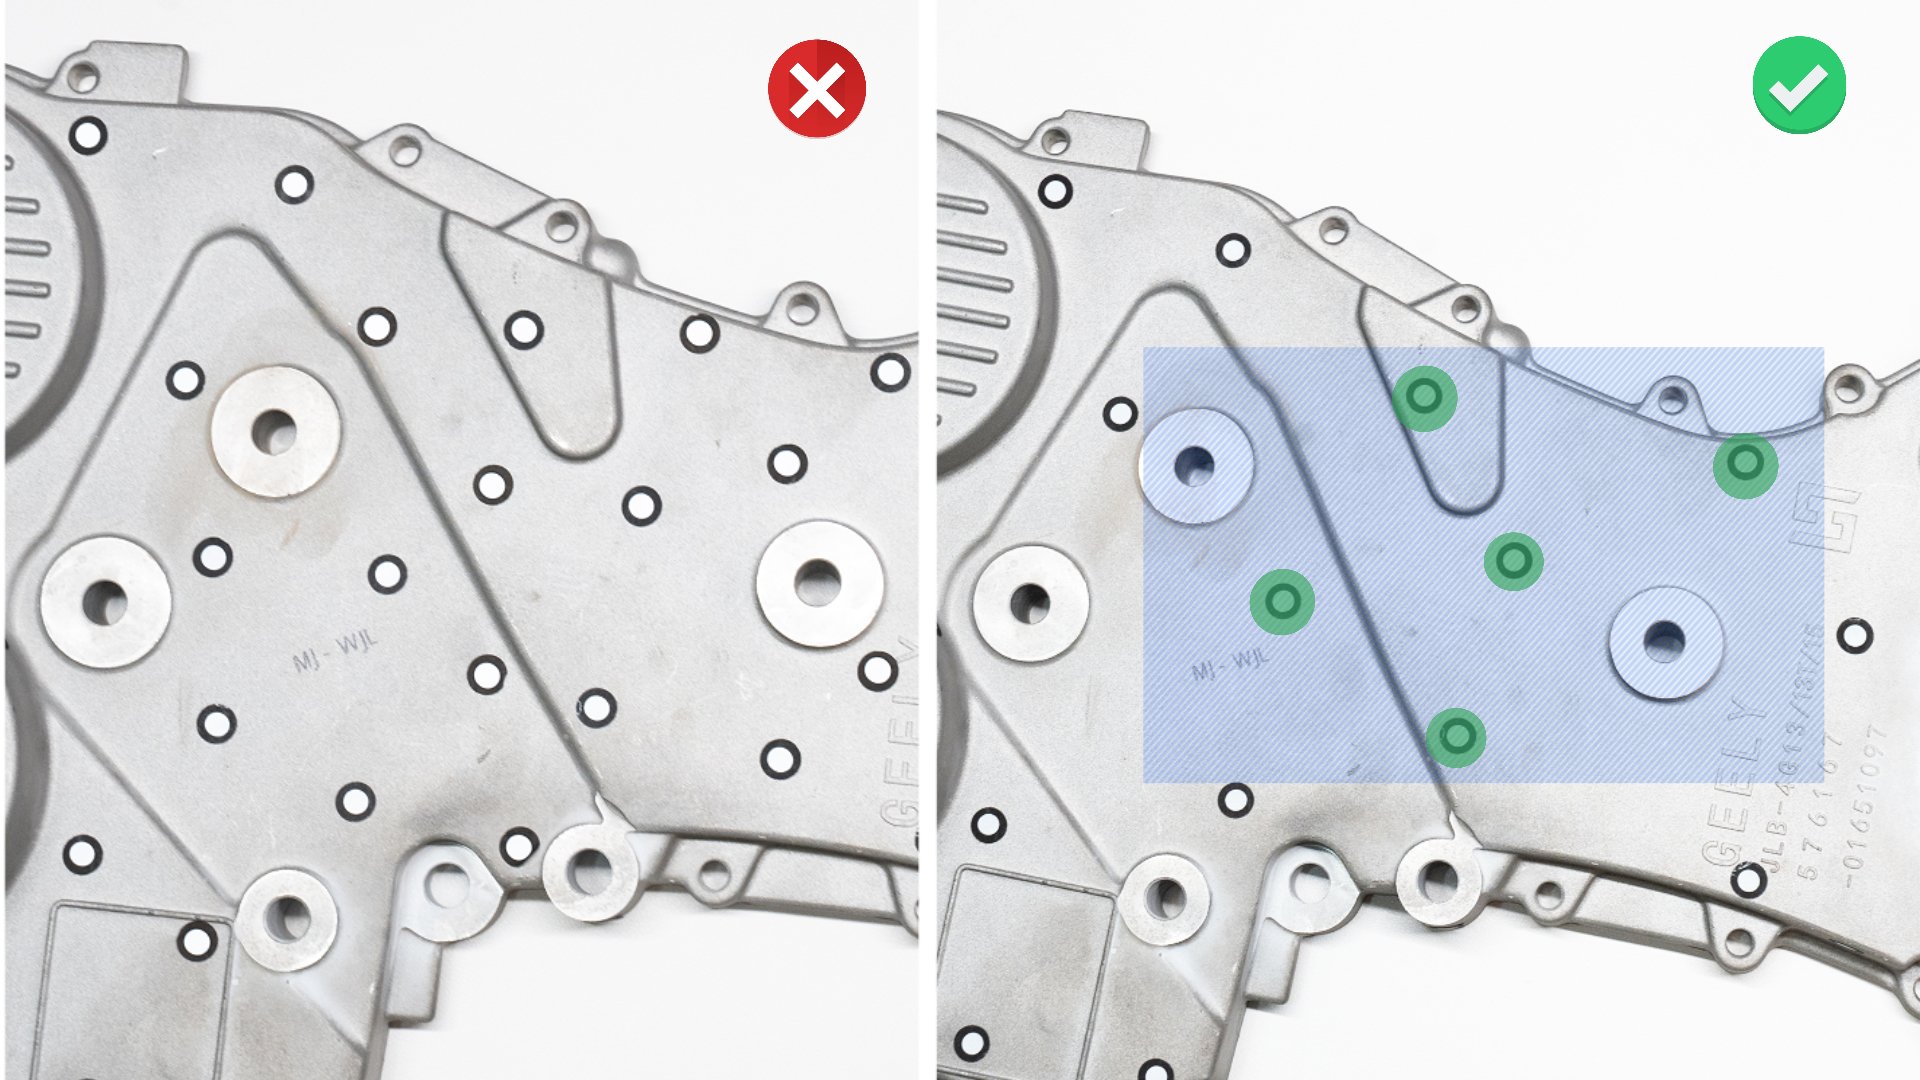
For best accuracy, attach the markers to flat surfaces rather than curved ones. Also, please avoid using soft pads or cloths with markers.
For more detailed marker tips, please refer to the Markers Use Tips Tutorial Video (for reference only)
Note:You can also use the Marker Block Kit to create a more ideal and complete scanning environment.
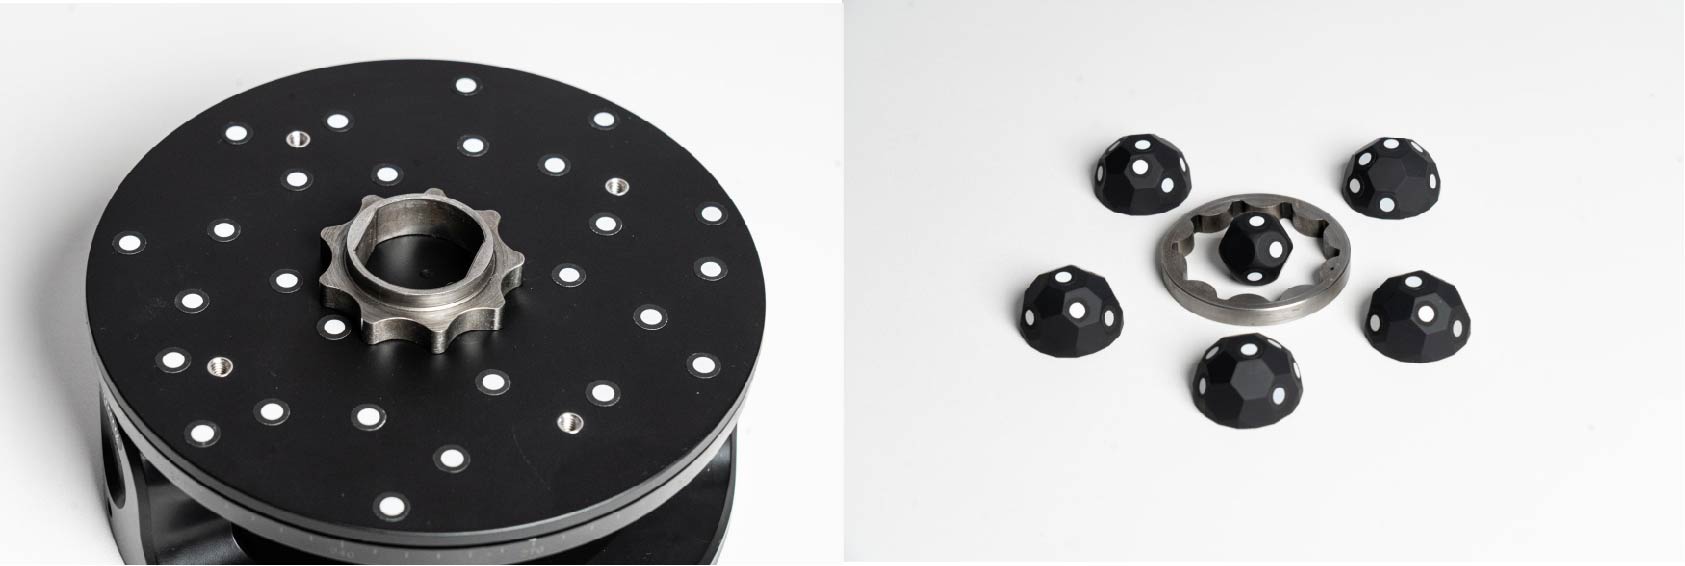
Marker Block Kit Quick Start Guide
Marker Block Kit Tutorial Video
- Using Scanning Spray
- For transparent or specular objects (e.g., glass, stainless steel, electroplated surfaces), both line laser and structured light scanning require scanning spray.
- For dark reflective or metallic reflective surfaces (e.g., black paint, machined aluminum alloy), line laser scanning can be performed without spray, but Full Field scanning and Auto Turntable scanning require scanning spray.
Note: Scanning spray can be purchased from Revopoint's online stores.
② Set Up the Scanning Environment
1) Prepare the workspace: Ensure the scanning area is clean and free of clutter (for reference only).
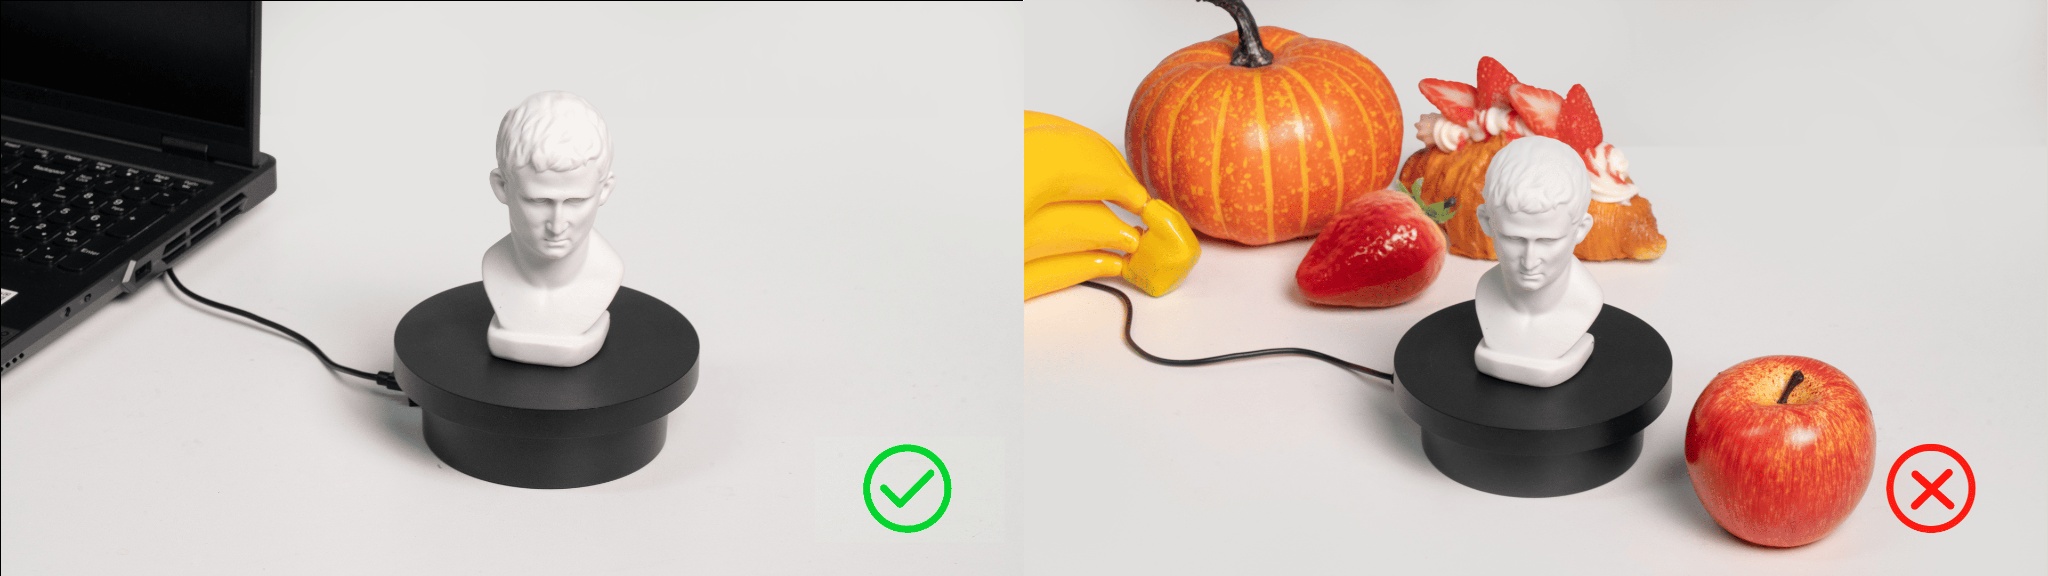
2) Check the object: Ensure the object is stable and free from strong shadows, obstructions, or reflective disturbances on its surface (for reference only).
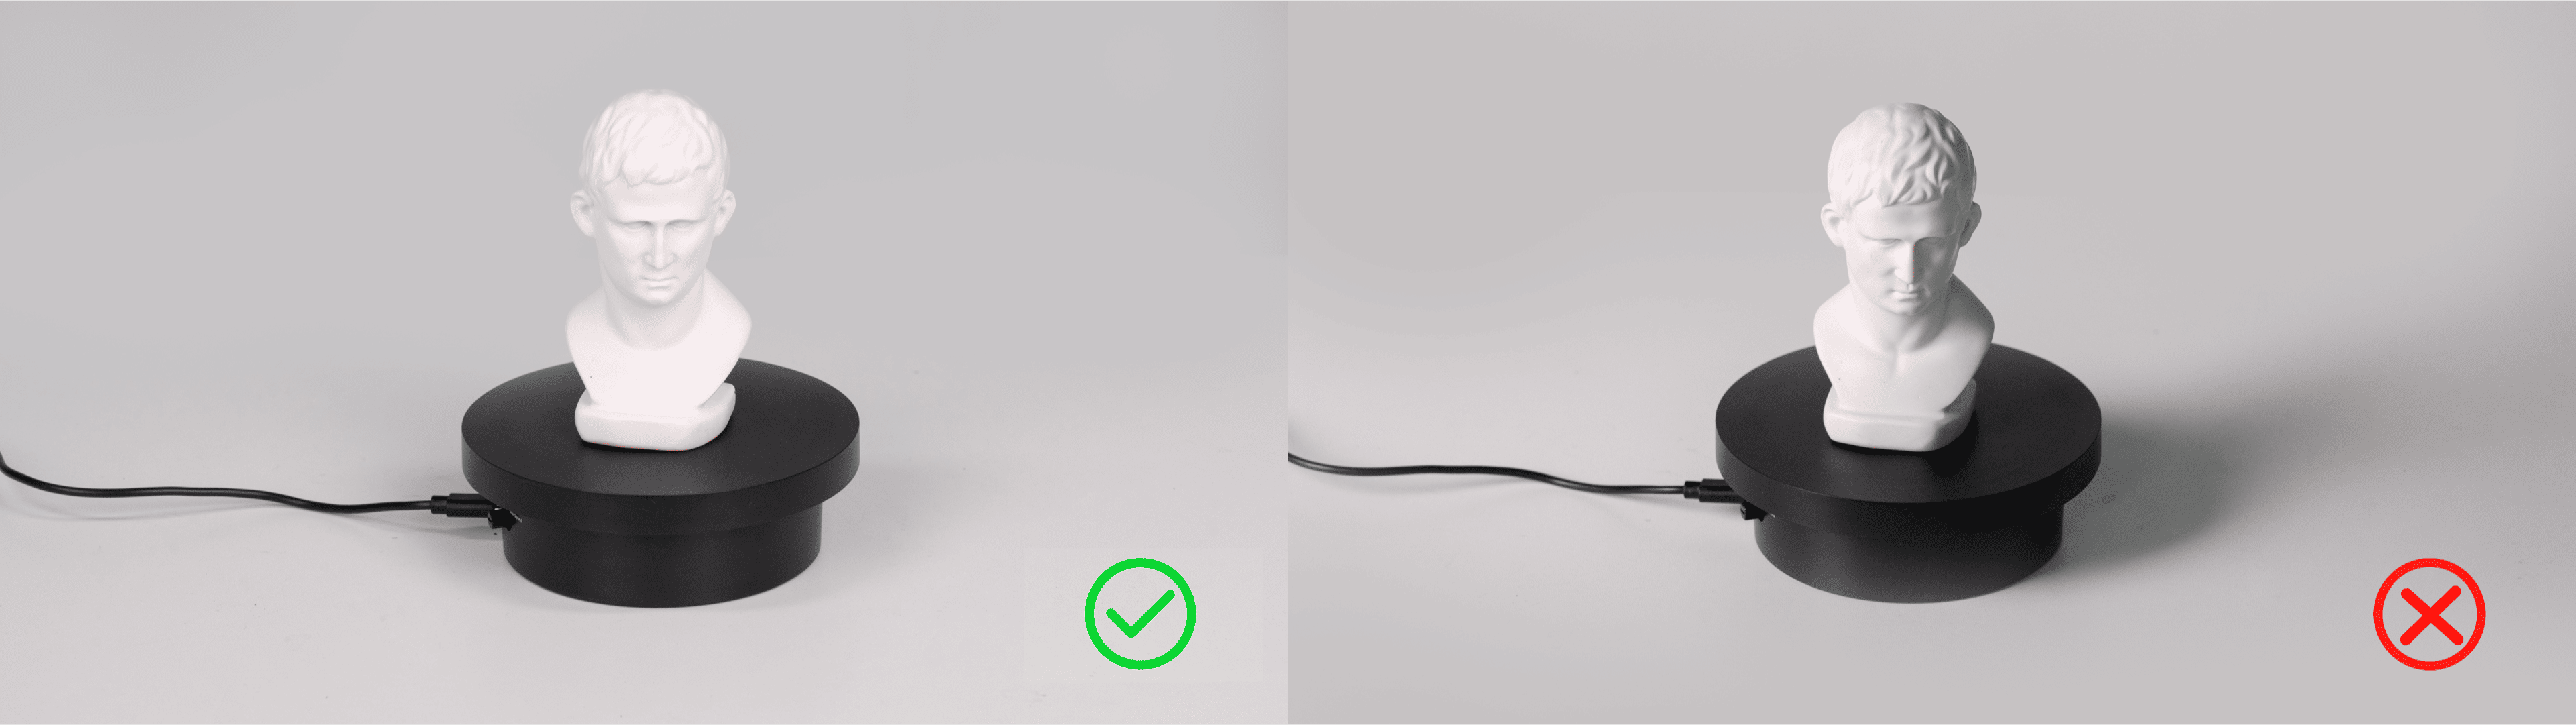
3) Adjust the scanner's height and angle to ensure the camera can fully capture the object.
If using the Auto Turntable mode, follow the steps below to set up the environment:
① Attach the scanner cradle to the tripod and place it on a stable surface. Put the scanner in the cradle.
② It is recommended that you affix the object to the turntable. Then, adjust the tripod to a suitable height. Use the power cable to power the turntable.
¶ 7.2 Scanner Calibration
Please refer to the Scanner Calibration section in this manual to perform scanner calibration.
¶ 7.3 Start Scan
① Make sure the scanner is powered on and successfully connected to the software.
② Click "New Project" on the software's home page, select the file storage location, and then enter the scanning interface.

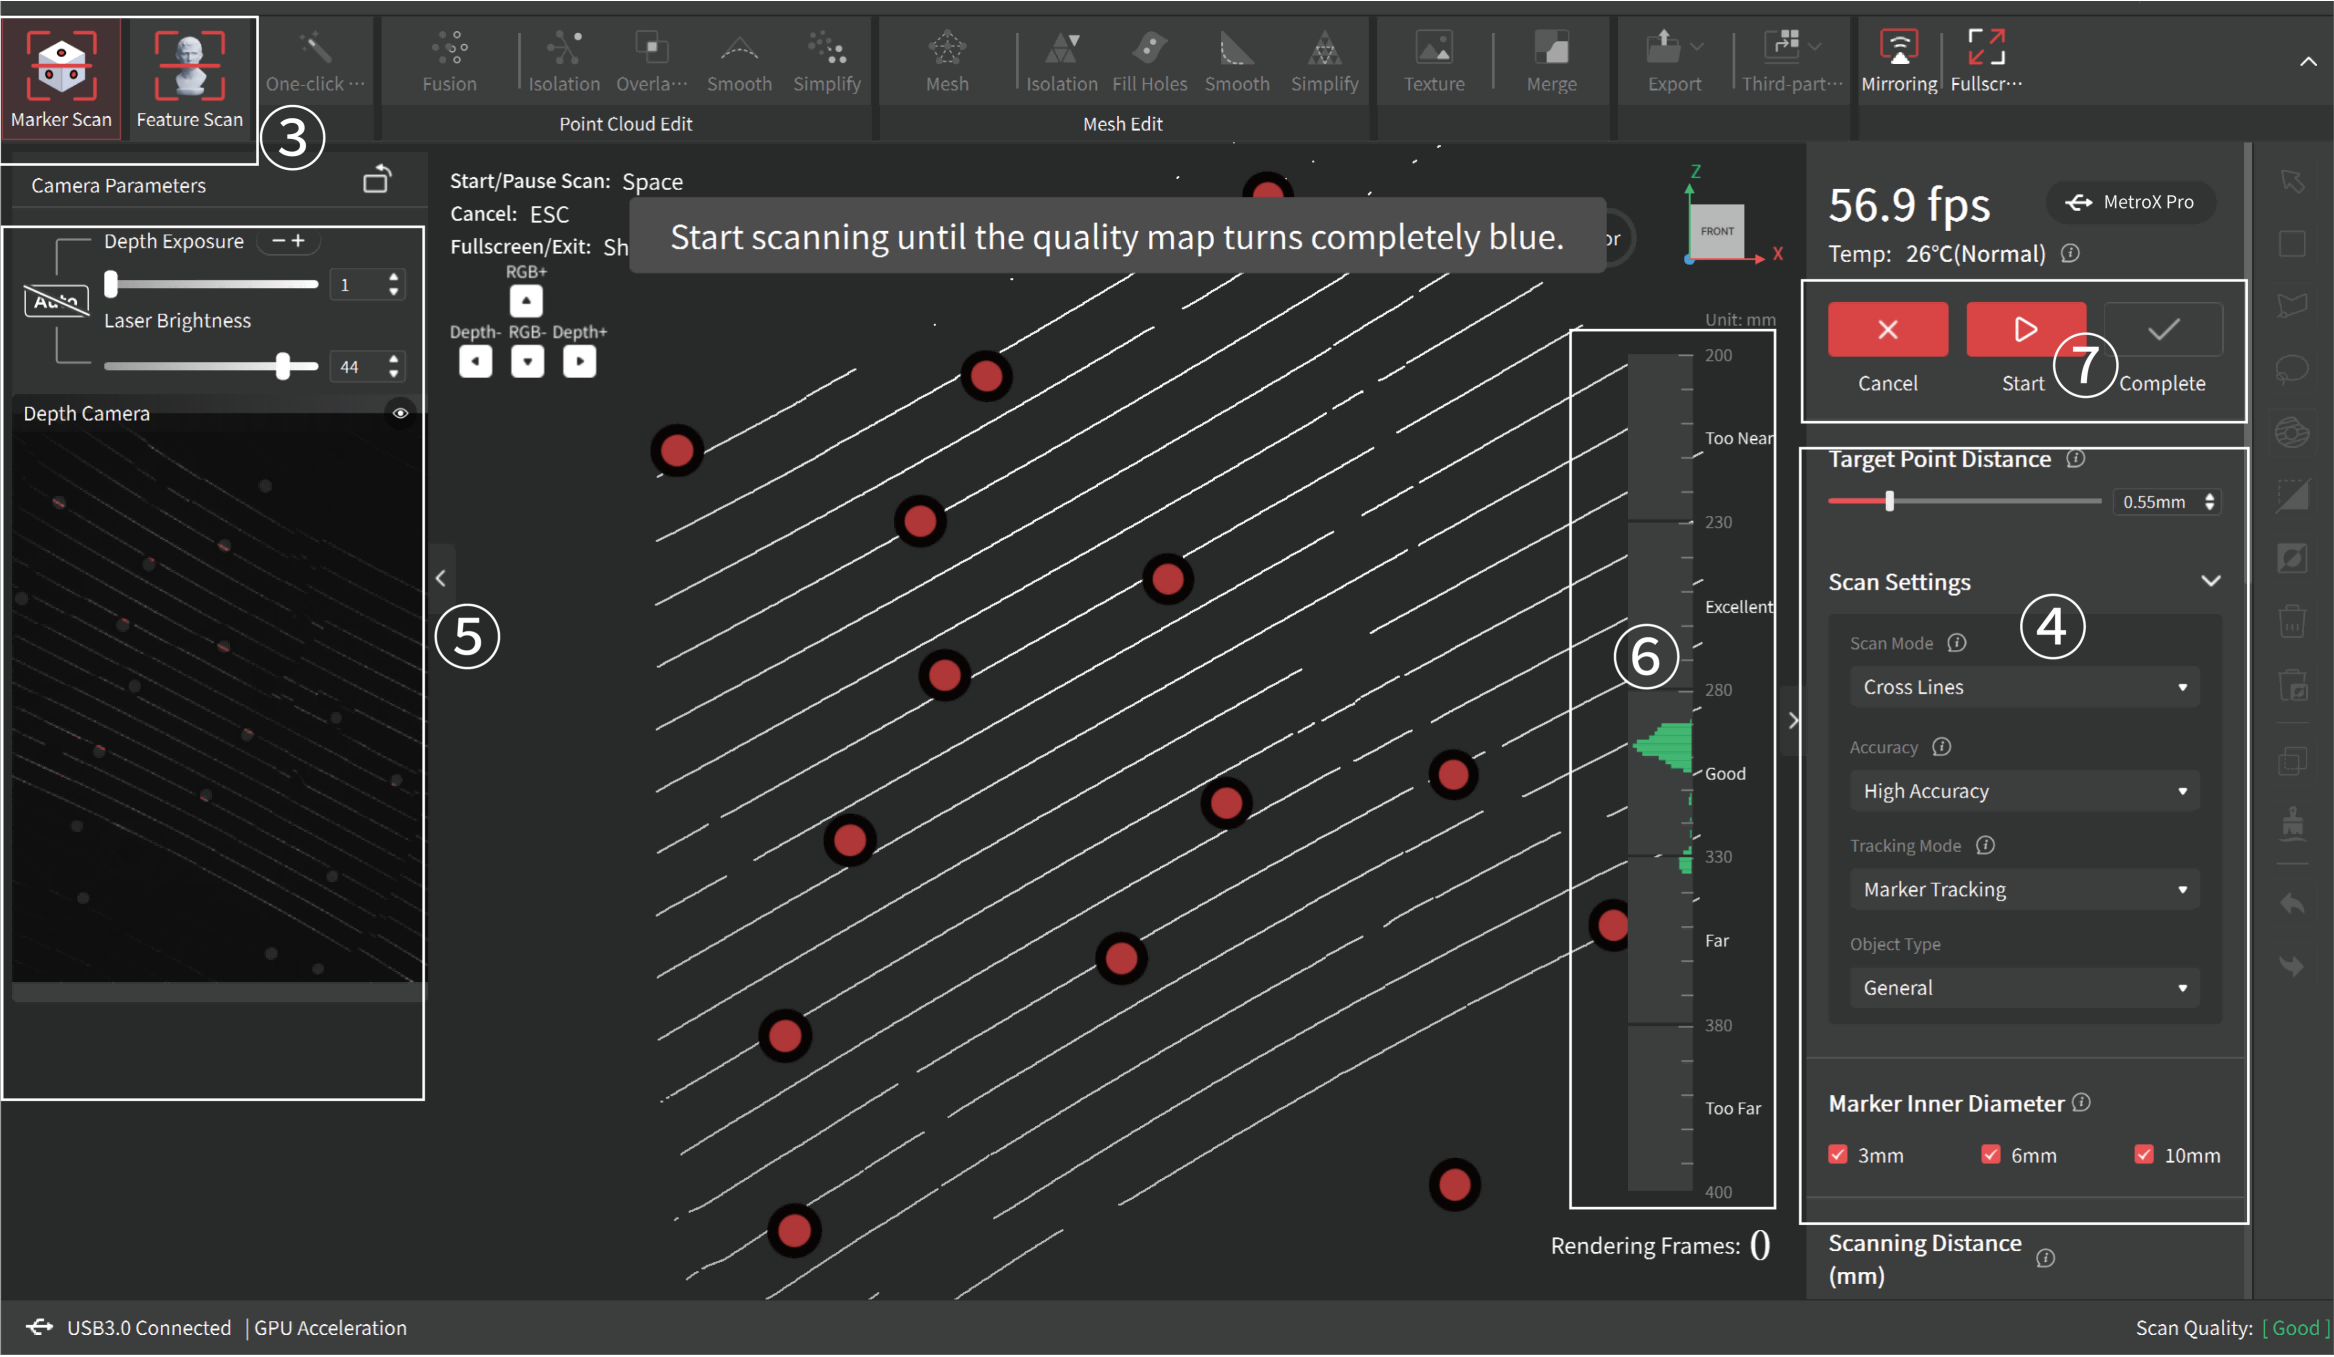
③ According to your actual needs, select the corresponding tracking mode in the upper-left corner of the scanning interface.
④ Set scanning parameters such as Scan mode, Scan accuracy, Object type, etc.
⑤ Adjust cameras exposure in the preview window on the left:
- In cross line or parallel line mode, adjust Depth camera exposure/laser brightness until the lase lines are clearly visible.
- In auto turntable or full field mode, ensure the blue or red areas are as less as possible in the preview window; adjust RGB camera exposure value (in auto turntable mode) until the object color in the preview window looks actual and real.
⑥ Move the scanner to a proper distance to ensure that the distance indicator bar remains green (Excellent/Good).
⑦ Click the "Start" button to begin scanning. During the process, you can pause to review the progress via the central preview window. If the model is incomplete, click "Start" again to continue until the entire model surface is covered.
For detailed scanning steps of each scan mode, please refer to the related sections:
- Laser Line Mode Scanning Steps(Cross Line/Parallel Line)
- Full Field Mode Scanning Steps
- Auto Turntable Scanning Mode Scanning Steps
¶ 7.4 Finish Scan
New users can use the following criteria to determine if scanning is complete:
1) Check if the model preview displays fully.
→ Ensure the real-time preview covers all surfaces of the target object, especially undersides, backsides, and crevices. Pause scanning to check for unfilled areas or structural omissions in point cloud or preview models. (Small holes can be manually filled during post-processing.)
-incomplete.png)
2) Check whether the model color/texture is uniform (if texture is enabled).
→ If texture is applied, check for obvious seams, missing color patches, or distortions.
-color scan.png)
Click "Finish" to complete the scan. If the model is incomplete, click the "Start" button to continue scanning.

¶ 7.5 Model Processing & Export
¶ 7.5.1 Model Editing
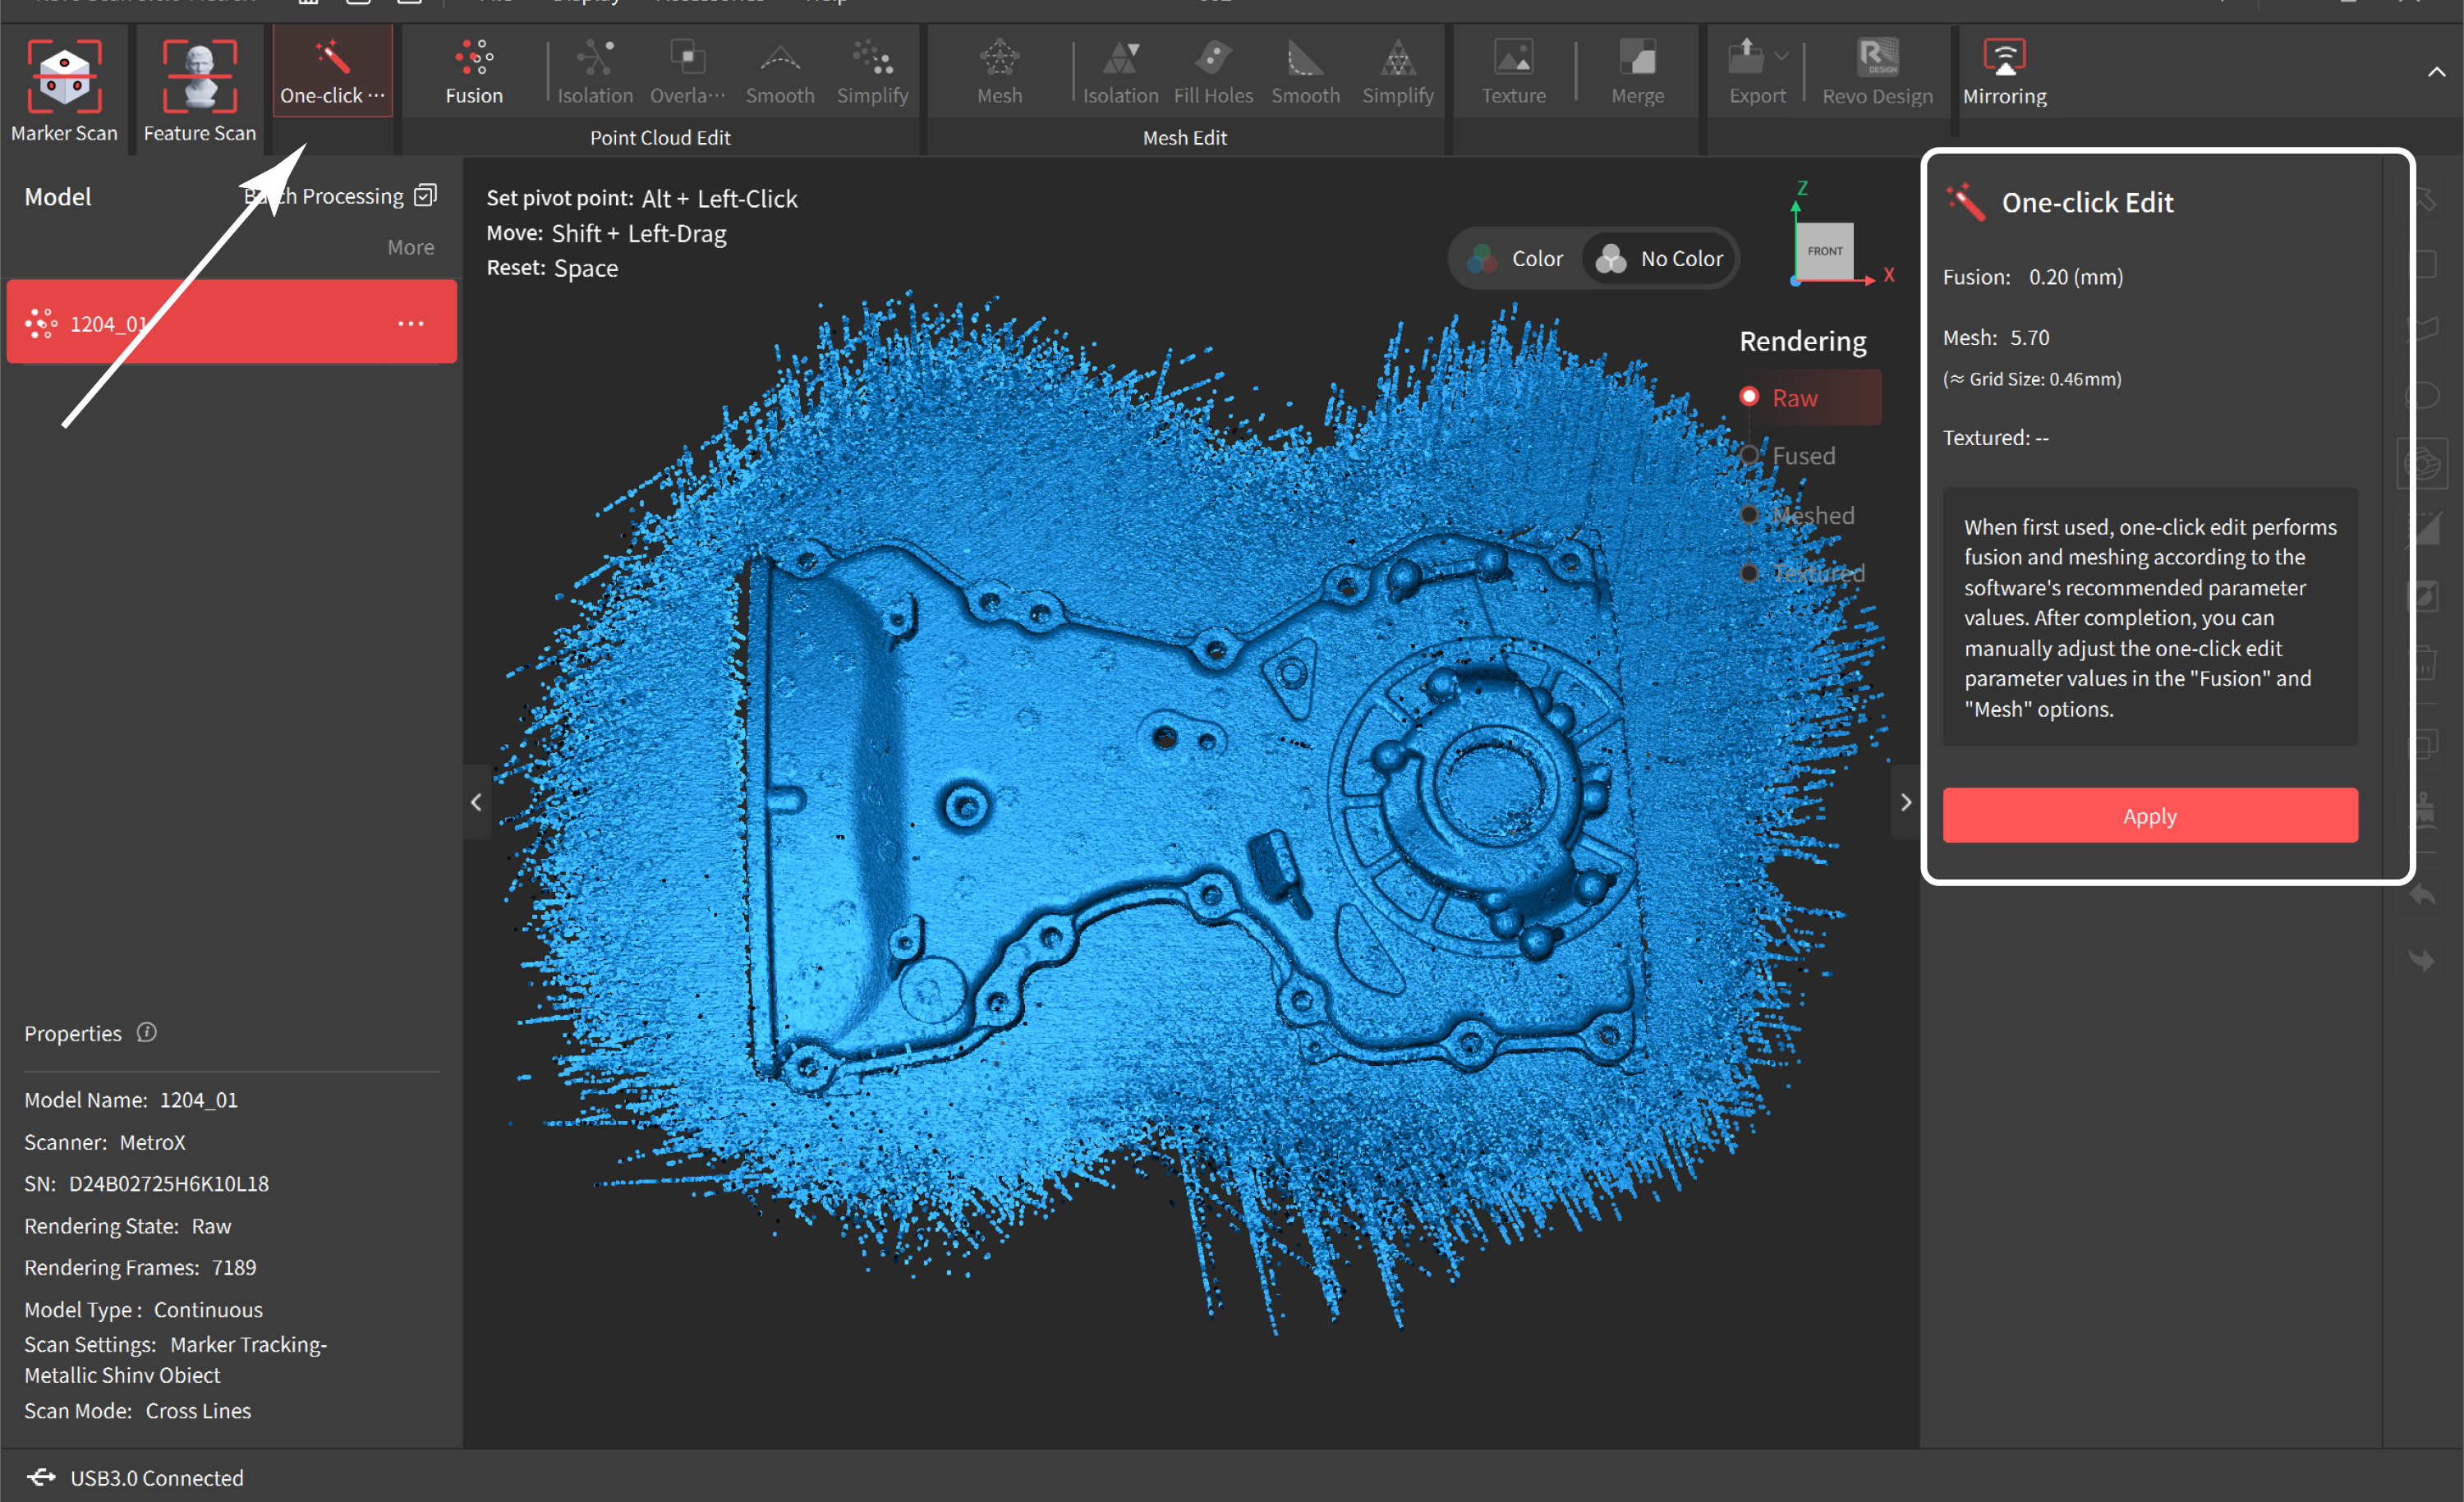
For beginners, it is recommended to use the "One-click Editing" function to perform point cloud fusion, meshing, and texture mapping (if color scanning is enabled) at once according to the system’s default optimal parameters, making it convenient and fast.
For more specific operations and detailed settings, you can refer to Point Cloud Editing, Mesh Editing, Texture sections in the user manual of the Revo Metro Software.
¶ 7.5.2 Model Export
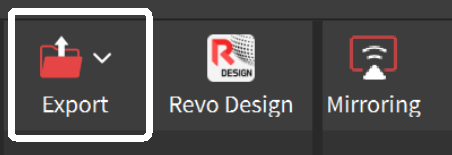
GO to the Tab Bar > Export to choose the desired model format for exporting.
¶ 7.6 More Tips
The preceding steps provide a foundational workflow. For enhanced results or efficiency, see the scanning tips below:
Scanning Tips:
2) Scanning Thin-Walled Objects
Parameter Settings:
Optimal results require proper parameter settings, which affect model integrity, clarity, and post-processing efficiency. Refer to Software Functions section in Revo Metro's user manual for guidance on detailed settings.